A fun, interactive project for makers new to Arduino. Control the brightness of an RGB LED with Potentiometers, with on/off switch built in.
ABOUT THIS PROJECT
Who is this for?: This RGB LED color mixer project is perfect for the beginner Arduino user who is keen to try an build an interactive gadget this is not only fun and easy to make, but could be useful for anyone who uses RBG colors, such as artists, web developers and interactive lighting controllers.
What is does: This simple circuit combines three potentiometers to set the brightness for each of the red, green and blue LED’s inside an RGB LED.
A pushbutton switch is added an an extra feature to turn the circuit on and off.
How do I build it tho? Wire the diagram as shown in the schematics. The RGB Led is wired to PMW pins 9, 10 and 11 on the Arduino. The pushbutton is connected to pin 7 and the 3 potentiometers to A0, A1 and A2. Remember to add a 10K ohm pull up resistor to the ground connection on the pushbutton. For an explanation as to how this works, check out here https://playground.arduino.cc/CommonTopics/PullUpDownResistor
Also make sure to connect 3 220 ohm resistor’s between the LED and the output pins, this will ensure your LED does not burn out.
The value of each Potentiometer is printed to the serial monitor, so if you are fiddling with the LED and find a color you like, you can record the RGB value to use later.
Once you have the circuit wired up and the sketch uploaded, try turning the knobs on the potentiometers. Nothing should happen at first until you hit the button. Now try turning the knobs again. The led should now light up. Time to play with light! Remember RGB light is not like mixing paint. when all the potentiometers are on full, the light should be white. Try leaving one of the potentiometers off or very low, and varying the other two.
An extension to this project would be to hard code some RBG values for particular colours you like, and add some more push buttons which, when pressed, would set the RGB LED to those colours. Feel free to share the code if you try an extension like this!
Enjoy!
int blue = 9; // Define Digital Pins for each colour of the LED
int green = 10;
int red = 11;

int redPot = A0;
int greenPot = A1; //Define Analog Pins for the 3 potentiometers
int bluePot = A2;


int greenVal = 0; //Create a variable to store the state of each Potentiometer
int blueVal = 0;
int redVal = 0;

const int BUTTON = 7; //Define the button Pin
int state = 0;    //Create a variable to store wether button is on or off
int val = 0;      //Create a variable to store the momentary state of the button
int old_val = 0;  //create a variable to store the previous state of the button

void setup() {
  // put your setup code here, to run once:

  pinMode(green, OUTPUT);  //Set LED's as output's, button as input
  pinMode(blue, OUTPUT);
  pinMode(red, OUTPUT);
  pinMode(BUTTON, INPUT);
  Serial.begin(9600);
}

void loop() {
  // put your main code here, to run repeatedly:
  Serial.begin(9600);                       //Open the serial monitor at 9600 baud

  val = digitalRead(BUTTON);                // Check state of button

  if ((val == HIGH) && (old_val == LOW)) {  //Check to see if state of button has changed
    state = 1 - state;                      //Set the button as either on (1) or off (0)
    delay(10);
  }

  old_val = val;                            // Save the previous button reading to compare next time through loop

  greenVal = analogRead(greenPot);          //Read the position of the potentiometers
  blueVal = analogRead(bluePot);
  redVal = analogRead(redPot);

  if (state == 1) {                         //If button is on, set the state of each LED according to position
    analogWrite(green, greenVal / 4);       //of its correspoding potentiometer. Anolog inputs range from 0-1023,
    analogWrite(blue, blueVal / 4);         // while anolog outputs as PMW can be from 0-255. Therefore we must
    analogWrite(red, redVal / 4);           // divide the potentiometer readings by 4 to set the state correctly

    Serial.print("RGB(");
    Serial.print(redVal/4);
    Serial.print(",");
    Serial.print(greenVal/4);
    Serial.print(",");
    Serial.print(blueVal/4);                 //Print the RGB Code, resuable in any RGB application
    Serial.println(")");

    delay(50);
  } else {                                   // If button is off, set all LED's to LOW/off
    analogWrite(green, 0);
    analogWrite(blue, 0);
    analogWrite(red, 0);
    delay(50);
  }
}
Want more? Click here to see the other projects on the Arduino Projects hub
At Fiverr, it’s our mission to grow and cultivate the world’s largest digital marketplace, a place where people can find and purchase any service they need, and build any business they dream. As an employee, your work is inspired by the success of our users and the celebration of your own personal growth. Join us.
How To Find The Right Freelancer
Use Fiverr to easily hire freelancers for your projects. Join over 11,000,000 happy businesses who found their freelance match in minutes.
4 Easy Steps To Find A Freelancer:
Use Fiverr’s search and side filters, to find the right freelancer for your project. Once you’ve found a service you’d like to order, click the gig. Choosing the right freelancer is easy:
1. Check out the freelancer’s work samples. 2. Check out the feedback from buyers like you. 3. Choose the package that best fits your needs. 4. Contact the freelancer with any questions to make sure they are aligned with your expectations.Browse Services
Pay-per-click (PPC) advertising – like Google Adwords and Facebook – are getting more expensive all the time. While we invest heavily in Google Adwords ourselves here at LeadDyno, I can tell you that our click costs are constantly creeping up. Which means that next month, I know we’ll have to pay a little bit more to get the same results. Our affiliate program, on the other hand, is always profitable… because we pay our affiliates a commission based on the sales they bring us. Until they sell something, we don’t have to pay them anything. Affiliate marketing is also more scalable than pay-per-click (PPC) marketing. While there are a fixed number of relevant keywords that we (and you) can bid on and make money, there’s basically an unlimited amount of product that you can sell with affiliate partners.
A Quick “Plug and Play” With Your E-Commerce Provider
As you probably know by now, most affiliate tracking software is pretty complex to get setup! You won’t have any setup issues with LeadDyno. We designed it to be really easy to integrate with your website. Many of our E-Commerce integrations are “one-click.” For example, if you’re a Shopify store owner, you simply enter the URL of your store, give LeadDyno permission to connect with it, and you’re done. You simply do this once, and you’re ready to start rolling out links and marketing materials to your affiliates! We also provide complimentary setup help. We’re available to assist five days per week via phone, six days per week via live chat, and seven days per week via email.
Easy Marketing For Your Affiliates, Too
New prospective users often ask me how easy it is for their affiliate to share their link. It’s “stupid simple.” Here’s how it works… When your affiliates sign up with you, they’ll automatically receive an email from you welcoming them to your affiliate program. This email will contain their unique referral link. It will also contain a “one-click” login link to their Affiliate Dashboard. The Affiliate Dashboard is where your affiliate can share their link via email and social media with a single click. For example, when they click the Facebook button, they’ll automatically be forwarded over to Facebook, with a new post pre-populated, and their affiliate link already embedded! They can add a personal note or recommendation if they’d like – or they can simply click “Post” to get the message up on their Wall immediately. This “convenience factor” is huge. Affiliates are able to share their link early and often with their friends and colleagues. It really couldn’t be any easier. The Affiliate Dashboard is also where they can grab marketing materials like banner ads for their website or blog. The banners will already have their affiliate link embedded. So, your affiliate can simply copy the HTML and paste it to their site – or they can have their web developer do this for them.
Use LeadDyno to Track Online Marketing Success
Pay-per-click advertising is becoming increasingly expensive. With LeadDyno, you can use our affiliate program and gain a profitable commission without worrying about creeping costs. As one of the best tracking systems in the market, offering a comprehensive set of features, our software tracking program allows you to manage and observe results of your marketing endeavors. Providing complete information through the affiliate dashboard, LeadDyno’s customizable link tracking platform is easy to understand, responsive and effective. With the one-click sharing option, affiliates can now share their products on various social media platforms and integrate the plug-in on numerous e-commerce stores as well.
Use LeadDyno for Google Adwords Conversion Tracking, Too
I never really knew how Google Adwords was working for me until I began tracking conversions with LeadDyno. While I always used the conversion tracking pixel that Google provides, I always found it to be imperfect. That’s because I want to measure specific $$$ amounts and sales… while Google is only able to tell me if someone made it to a certain page. Like a sign up, or “thank you” page. That’s a good start – but I need more! Specifically, I need to know what somebody bought and/or signed up for… how much they purchased… and how long they stayed with us afterwards. This is easy to do with LeadDyno. All you need to do is create a new marketing campaign tracking link – as use this link as the Target URL within Adwords. Or, if you’re advertising on Facebook, just make sure the link that you provide Facebook with is a campaign tracking link from LeadDyno. Don’t just give Facebook the link to your homepage – give them this link instead. It’s pretty much the same thing as using an affiliate link to track the effectiveness of a specific marketing campaign. Because LeadDyno is already plugged into your website – and most importantly, your E-Commerce provider – you’ll have visibility into the entire sales funnel that was generated as a result of each specific advertising campaign you are tracking. I’ve been doing online marketing for the past decade, and I can tell you this is huge. It allows me to test campaigns quickly and easily. I’m able to let our winners run, and cut our losers short.
You can easily upload, manage, and download files using phTagr. Discuss the media though comments and get updates of new media/comments via RSS or MediaRSS.
Images and videos are no more organized in folders, instead the data is accessed through their meta data e.g. view all screenshots though the category “screenshot“. phTagr reads (and writes) the meta data of EXIF and IPTC from images into a database backend to speed up the access to your images. In the same time in enables flexible filtering and searching of meta data like date, tags, categories and locations (also with exclusion of tags, categories, etc.!).
phTagr is ideal to publish and share your media in the Internet, too. Group based access control allows you to keep your personal files private and allows in the same time selected access for your friends including the original files.
To see phTagr in action visit the demo page! Fur further details read the blog or visit the wiki. Install instructions could be found here.
Core Features
OpenSource (GPLv2), written in MVC framework CakePHP
Media (images/video) web gallery for multiple users
Free web album softwareThe photo gallery is open source! Download, install and use it on your webserver. PHP >= 5.2.8 and mysql required.
Your web space – Your controllCreate your own stock sharing platform, a private web album, or your own multi media cloud storage with your photos, fotos, videos – your digital memory, your digital life
Tag your photosOrganize your photos, videos with keywords, categories, or geo location of your web gallery. Enrich your stock photos with meta data.
Browse your media galleryUse the flexible search in this php gallery with time range, calandar days, months, keywords, location. Exclusion filter are supported, too. Or use embedded slideshow (via piclense)
Share your private web albumShare your photo album with friends with other user accounts, guest accounts or simple authenticated user link. Download multiple files as ZIP archive. Comments, RSS, and email notifications are included!
Import picture, video file formats, and GPS loggerFormats like JPG, PNG, TIF, AVI, MOV, MPEG, GPX file and more
Automatic rotation and resizing of preview imagesPhotos are rotated automatically by EXIF orientation tag. Requires GD or ImageMagik
Automatic flash video conversionYour vaction videos of your digital camera are converted automatically to flash movies and can be viewed in the build-in flash video player. Requires ffmpeg
Upload via HTTP, WebDAV, local storageUse different ways to upload and import your pics with unlimted upload size. Simple ZIP archives and large file uploads are supported due chunked upload and drag and drop support. The web gallery phtagr can be used as desktop photo organizer, too. Just use WAMP or XAMPP
Geo Tagging – View your favourite photos on online world mapRequires google map key
Single or multiple edit of meta data like tags, keywords, categories, location or geo locationTagging of your photos will be done within seconds by selecting and tagging multiple images at once
Read and write support of EXIF, IPTC, and Geo DataRequires exiftool. Never loose your hard work of tagged photos and videos
Multiple user supportUse phTagr as social media hub for friends, company, or organization where each user has its own upload web space
Flexible and simple access right managementGroup based access (similar to friends list in Facebook or circles like in Google+) with different right levels for viewing or editing meta data. You decide who can add tags or download original files
The Holovect Mk II is a self-contained laser-based volumetric display system that fits on your lab bench or desktop. It is the perfect companion to a 3D printer and a stand-alone educational or promotional device. The Holovect Mk II is the first commercially available, laser-based desktop “holographic” display, capable of drawing 3D objects in air with light.
Holographic Starship! Beam on.
Holographic
Holovect images are NOT holograms but instead volumetric vector images projected onto modified air (i.e. projections in space). This distinction is due to the fact that a hologram is a recording of interference patterns on film or glass plates that contains three-dimensional information about an object (greek root “holo” means whole or complete, and “gram” means record). However, since Holovect images contain three dimensional information and are free-floating objects in air, they are most certainly holographic. They are real 3-D projections.
Mirage Technology
So how does it work? The principles are simple. When light travels between two different mediums in most cases you get three different effects to some degree: refraction (bending), reflection, and/or diffusion, depending on the different “refractive index” (RI) of the materials. An example of this are mirages, which occur when a portion of air has a different RI than its surroundings, causing light beams to bend and be reflected in unexpected ways. This can happen because of temperature or pressure differences from one region to the next.
With the holovect technology, we have invented how to control air within a box shaped section of space to precisely modify the RI within specific regions to refract and reflect a laser beam. This modification raises the “albedo” which is defined as the proportion of the incident light that is reflected by a surface, as well as the refractive properties at the boundary between the modified and unmodified air. Therefore by simultaneously controlling the aim of the laser and the position of a modified air column, a computer can place a volumetric pixel or voxel of light anywhere in 3D space. Then by keeping a laser beam on as it aims from point A to point B a line is drawn which is a 3D vector, and by joining many vectors in a sequence a holographic vector object can be generated. The Holovect Mk II is capable of drawing a complete image 50 times per second within
a 12cm by 12cm by 12cm cube we call the “drawbox”. Outside of this box things get messy, unpredictable and, in general, not useful.
from wikipedia commons
VECTS
“Vect” objects are the data-structure developed for the Holovect. Put simply it is a list of 3D coordinates that result in lines drawn in a head-to-tail sequence in space, which are compiled into vect class objects. The files are straightforward and easy to create using a variety of online tools, spreadsheets, or good old pencil and graph paper. Once loaded, vects can be rotated in three axes and moved around within the cubic canvas. These objects can be manipulated using the control knob, preset functions such as spin and move, or used within your own applications.
Create your own images on online tools. Vect creation on Plotly.
3-D printing pre-visualizer and Applications
Holovect Mk II can be used to visualize CAD models in STL format before 3D printing. This can be done in two ways: importing STL files and convert them to vect format, or visualized directly. Depending on the desired visualization, converting the STL will result in a volumetric wireframe projection, whereas direct STL visualization slices the model into layers which is ideal to inspect for potential manufacturing errors and revise inner structure in hollow parts before printing. This volumetric pre-visualization ability increases design and manufacturing efficiency by saving time and printing material before committing to a long printing process.
Other applications include the visualization of 3D data acquired through a 3D scanner, or a computed tomography scan. Commercial applications could also include advertising and branding.
Pre-visualization of a 3D printed model. Single Layer.
Beyond
As the community grows, our open source software philosophy will allow users to create applications that take advantage of Holovect’s glasses-free, touchable volumetric display. Games, tools and art applications are all in the works and should be available to users by shipping time. Moreover, the hardware will accommodate any advancements in 3D image capture and creation.
Risks and challenges
Our biggest challenge is producing enough units to keep costs low and maintain a large community of content creators. Your contributions will help our efforts and push this nascent technology further than even our imaginations can predict.
We have spent a year redesigning and streamlining the product and production line. We are ready to put considerable amount of units into the hands of developers, early adopters and enthusiasts. Help us make Holovect the standard of holographic volumetric displays.
Dwarf Fortress (officially called Slaves to Armok: God of Blood Chapter II: Dwarf Fortress) is a part construction and management simulation, part roguelike, indie video game created by Tarn and Zach Adams. Freeware and in development since 2002, its first alpha version was released in 2006 and it received attention for being a two-member project surviving solely on donations. The primary game mode is set in a procedurally generated fantasy world in which the player indirectly controls a group of dwarves, and attempts to construct a successful and wealthy underground fortress. Critics praised its complex, emergent gameplay but had mixed reactions to its difficulty. The game influenced Minecraftand was selected among other games to be featured in the Museum of Modern Art to show the history of video gaming in 2012.
The game has text-based graphics and is open-ended with no main objectives. Before playing, the player has to set in motion a process which generates worlds with continents, oceans and histories documenting civilizations. The main game mode, Dwarf Fortress, consists of selecting a suitable site from the generated-world, establishing a successful colony or fortress, combating threats like goblin invasions, generating wealth and taking care of the dwarves. Each dwarf is modeled down to its individual personality, has likes or dislikes and possesses specific trainable skills in various labors. The second main game mode, Adventurer, is a turn-based, open-ended roguelike mode where the player starts off as an adventurer in the world and is free to explore, complete quests, or even visit old abandoned fortresses. The combat system is anatomically detailed with combat logs describing events like organs getting pierced, fat getting bruised and limbs getting severed.
Prior to Dwarf Fortress, Tarn Adams was working on a project called Slaves to Armok: God of Blood which was a role-playing game. By 2004, Adams decided to shift from the original Armok to Dwarf Fortress after the former became difficult to maintain. Adams calls it his life’s work and said in 2011 that version 1.0 will not be ready for at least another 20 years, and even after that he would continue to work on it. The game has a cult following and an active online community. As there is no way to win, every fortress, no matter how successful, is usually destroyed somehow. This prompts the official community motto: “Losing is Fun!”
Pantone provides a universal language of color that enables color-critical decisions through every stage of the workflow for brands and manufacturers. More than 10 million designers and producers around the world rely on Pantone products and services to help define, communicate and control color from inspiration to realization – leveraging advanced X-Rite technology to achieve color consistency across various materials and finishes for graphics, fashion and product design. Pantone Standards feature digital and physical color specification and workflow tools. The Pantone Color Institute™ provides customized color standards, brand identity and product color consulting as well as trend forecasting inclusive of Pantone Color of the Year, Fashion Runway Color Trend Reports, color psychology and more. Pantone B2B Licensing incorporates the Pantone Color System into different products and services, enabling licensees to communicate and reproduce approved Pantone values and improve efficiencies for their users. Pantone Lifestyle brings color and design together across apparel, home, and accessories. Learn more and connect with Pantone on Instagram, Facebook, Pinterest, and LinkedIn.
About Pantone Standards
In 1963, Pantone revolutionized the printing industry with the colorful PANTONE MATCHING SYSTEM®, an innovative tool allowing for the faithful selection, articulation and reproduction of consistent, accurate color anywhere in the world. The tool organizes color standards through a proprietary numbering system and chip format, which have since become iconic to the Pantone brand.
Pantone’s color language supports all color conscious industries; textiles, apparel, beauty, interiors, architectural and industrial design, encompassing over 10,000 color standards across multiple materials including printing, textiles, plastics, pigments, and coatings.
Pantone Standards are available both digitally and physically. Integrated workflow tools such as PantoneLIVE and Pantone Studio, ensure market-relevancy and color achievability as technology continues to transform the design process.
About Pantone Lifestyle
An iconic name in the fashion, product, graphic design and lifestyle-oriented industries, Pantone is a symbol of the design-minded. Pantone Lifestyle, the consumer-licensing division of Pantone, offers consumer products inspired by the signature Pantone chip design, to infuse daily life with intentional color and patterns.
The Pantone Lifestyle division celebrates a modern design aesthetic and bold use of color, brought to life through collaborations with likeminded brands and licensing partnerships in categories including home furnishings, apparel, beauty, travel, and desktop accessories.SHOP PANTONE LIFESTYLE
About Pantone Color Institute
The Pantone Color Institute™ is a consulting service within Pantone that forecasts global color trends and advises companies on color in brand identity and product development, for the application and integration of color as a strategic asset. Recognized around the world as a leading source of color information through seasonal trend forecasts, custom color development, and palette recommendations for product and corporate identity, Pantone Color Institute partners with global brands to leverage the power, psychology and emotion of color in their design strategy.LEARN MORE
Our Parent X-Rite
Headquartered in Grand Rapids, Michigan, X-Rite is a global company with locations around the world. Experts in blending the art and science of color, they focus on providing complete end-to-end color management solutions for their clients in every industry where color matters.LEARN MORE
Hello! We’re the Nerdforge couple Martina & Hansi! Our channel is about making all kinds of things! If you’re wondering what to expect we really couldn’t tell you, as our inspiration is largely random, unplanned and chaotic. One day you get a soda dispenser, another day you get an epic castle! But, some common denominators are: leds, arduino, foam, leather and epicness! See you in the comments ! 🙂
The Differences in N-Ratings for Neodymium Magnets
Every type of rare earth magnet, whether neodymium, AlNiCo, or something else, has its own alphanumerical system for classifying strength. Each one is unique, and there’s no simple formula for translating a system from one magnet type into the system for another.
Because the classification systems are so different, it’s important to understand each magnet’s rating system so you can prevent magnet failures and potentially costly or dangerous situations.
Cracking Neodymium’s N-Ratings
Neodymium magnets are categorized by N-ratings, typically formed by an N, then a number, and then sometimes a couple more letters.
The N stands for neo, an industry simplification of neodymium. The numbers, however, are more complicated. In general, the number indicates the strength of the magnet, measured in Megagauss Oersted (MGOe). If a magnet has a grade of N-42, it has a maximum energy product of 42 MGOe. For every increase of 1, the magnet’s strength increases by about 1%. For example, an N-42 magnet is about 2% stronger than an N-40 magnet.
Once you’ve read the N and the following integers, you need to consider whether there are any letters after the numbers. These letters signal the maximum working temperature (the temperature at which the magnet will begin to lose strength) and the Curie temperature (the temperature at which the magnet will lose all magnetism).
Here’s what you can expect for each letter combination:
Letter
Max Working Temperature
Curie Temperature
No other letters
≤80°C
320°C-330°C
H
≤120°C
330°C-340°C
SH
≤150°C
340°C-350°C
UH
≤180°C
350°C-360°C
EH
≤200°C
360°C-370°C
When using a magnet with an N-rating that includes letters, proceed with caution. Neodymium magnets that can withstand higher temperatures aren’t pure neodymium. In order to withstand high temperatures, the neodymium needs to mix with other, weaker metals. In general, the more heat resistance a neodymium magnet has, the weaker it will be. If you need a magnet with high heat resistance and high strength, you’ll want a magnet with a high numerical rating as well.
You’ll also need to keep an eye on your budget as these magnets are generally more expensive than those that aren’t designed to withstand high temperatures.
Putting Your Knowledge to Use
Now that you understand N-Ratings, let’s practice. Say you have a magnet with the following spec: N-30SH. What do you know about it?
The N tells us the magnet is primarily made of neodymium. The 30 tells us its max energy production is 30 MGOe. Finally, the SH means the magnet’s max working temperature is about 150°C, and its Curie temperature is between 340°C and 350°C.
Get Your Hands on Neodymium Magnets
Since you know how neodymium magnets are rated, you should have a pretty good idea of what you need for your facility. Of course, our customer service team is standing by if you need help. When you are ready to buy, Apex Magnets offers a huge selection of neodymium magnets perfectly suited for a variety of applications. If you can’t find what you’re looking for, Apex Magnets offers custom magnets as well.
DIYElectronics is commited as a company to provide you with the widest range of electronics to suit your professional or hobby needs. We understand that good electronics is important to any project, we also understand that every new project brings a host of new challenges. That is why we have created this WIKI for you, to help you in your projects, whether you are buying your first 3d printer or building a rocket to the moon, our aim is to make every step of your creative journey just a little bit easier.
Dealzer has some interesting items for sale that focuses on hydroponics and indoor plant growing.
As I have the scenario set up from many years of reading castaway type stories I have been on the lookout for plant growing systems that would work underground or in space. Mars here I come…
VOLKANO·THURSDAY, 19 APRIL 2018· Create, play, listen, relax or work with the confidence that your Volkano Product will perform as you need it to when you need it to. Get ready to explore our range of top quality consumer electronics and experience raw power, through sheer simplicity.Volkano is the fastest growing personal electronics brand in the world with an ever increasing global footprint. We are committed to the ideal that price should never discount quality and with this in mind have introduced more than 100 different audio products, personal user electronics, computer peripherals and electronic accessories to the market. We firmly believe that for every electronic challenge you face, there is a Volkano Solution.
In a recent study by a team of researchers at MIT, self driving cars are being programmed to identify the social personalities of other drivers in an effort to predict their future actions and drive safer on roads.
It’s already been made evident that autonomous vehicles lack social awareness. Drivers around a car are regarded as obstacles rather than human beings, which can hinder the automata’s ability to identify motivations and intentions, potential signifiers to future actions. Because of this, self-driving cars often cause bottlenecks at four-way stops and other intersections, perhaps explaining why the majority of traffic accidents involve them getting rear-ended by impatient drivers.
The research taps into social value orientation, a concept from social psychology that classifies a person from selfish (“egoistic”) to altruistic and cooperative (“prosocial”). The system uses this classification to create real-time driving trajectories for other cars based on a small snippet of their motion. For instance, cars that merge more often are deemed as more competitive than other cars.
When testing the algorithms on tasks involving merging lanes and making unprotected left turns, the behavioral predictions were shown to improve by a factor of 25%. In a left-turn simulation, the automata was able to wait until the approaching car had a more prosocial driver.
Even outside of self-driving cars, the research could help human drivers predict the actions of other drivers around them.
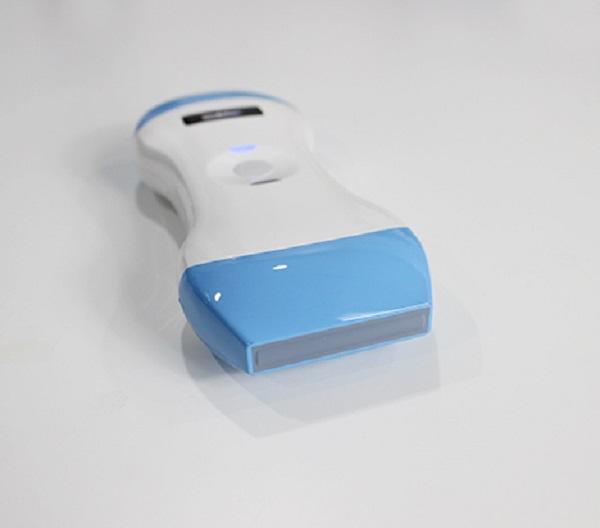
Wifiultras provides state-of-the-art wireless ultrasound equipment.We have partnered up with some of the biggest manufacturers and dealers accross the globe like Sonostar, Qsono & Sifsof.All of our products backed with 2 years of warranty and FDA, CE and ISO certificates.
Wifiultras is committed to offer the best possible service at the most competitive price to our valuable customers.Our final goal is Customer happiness and Health for the end customer that consumes our products. We’re always looking for long term healthy relationship.
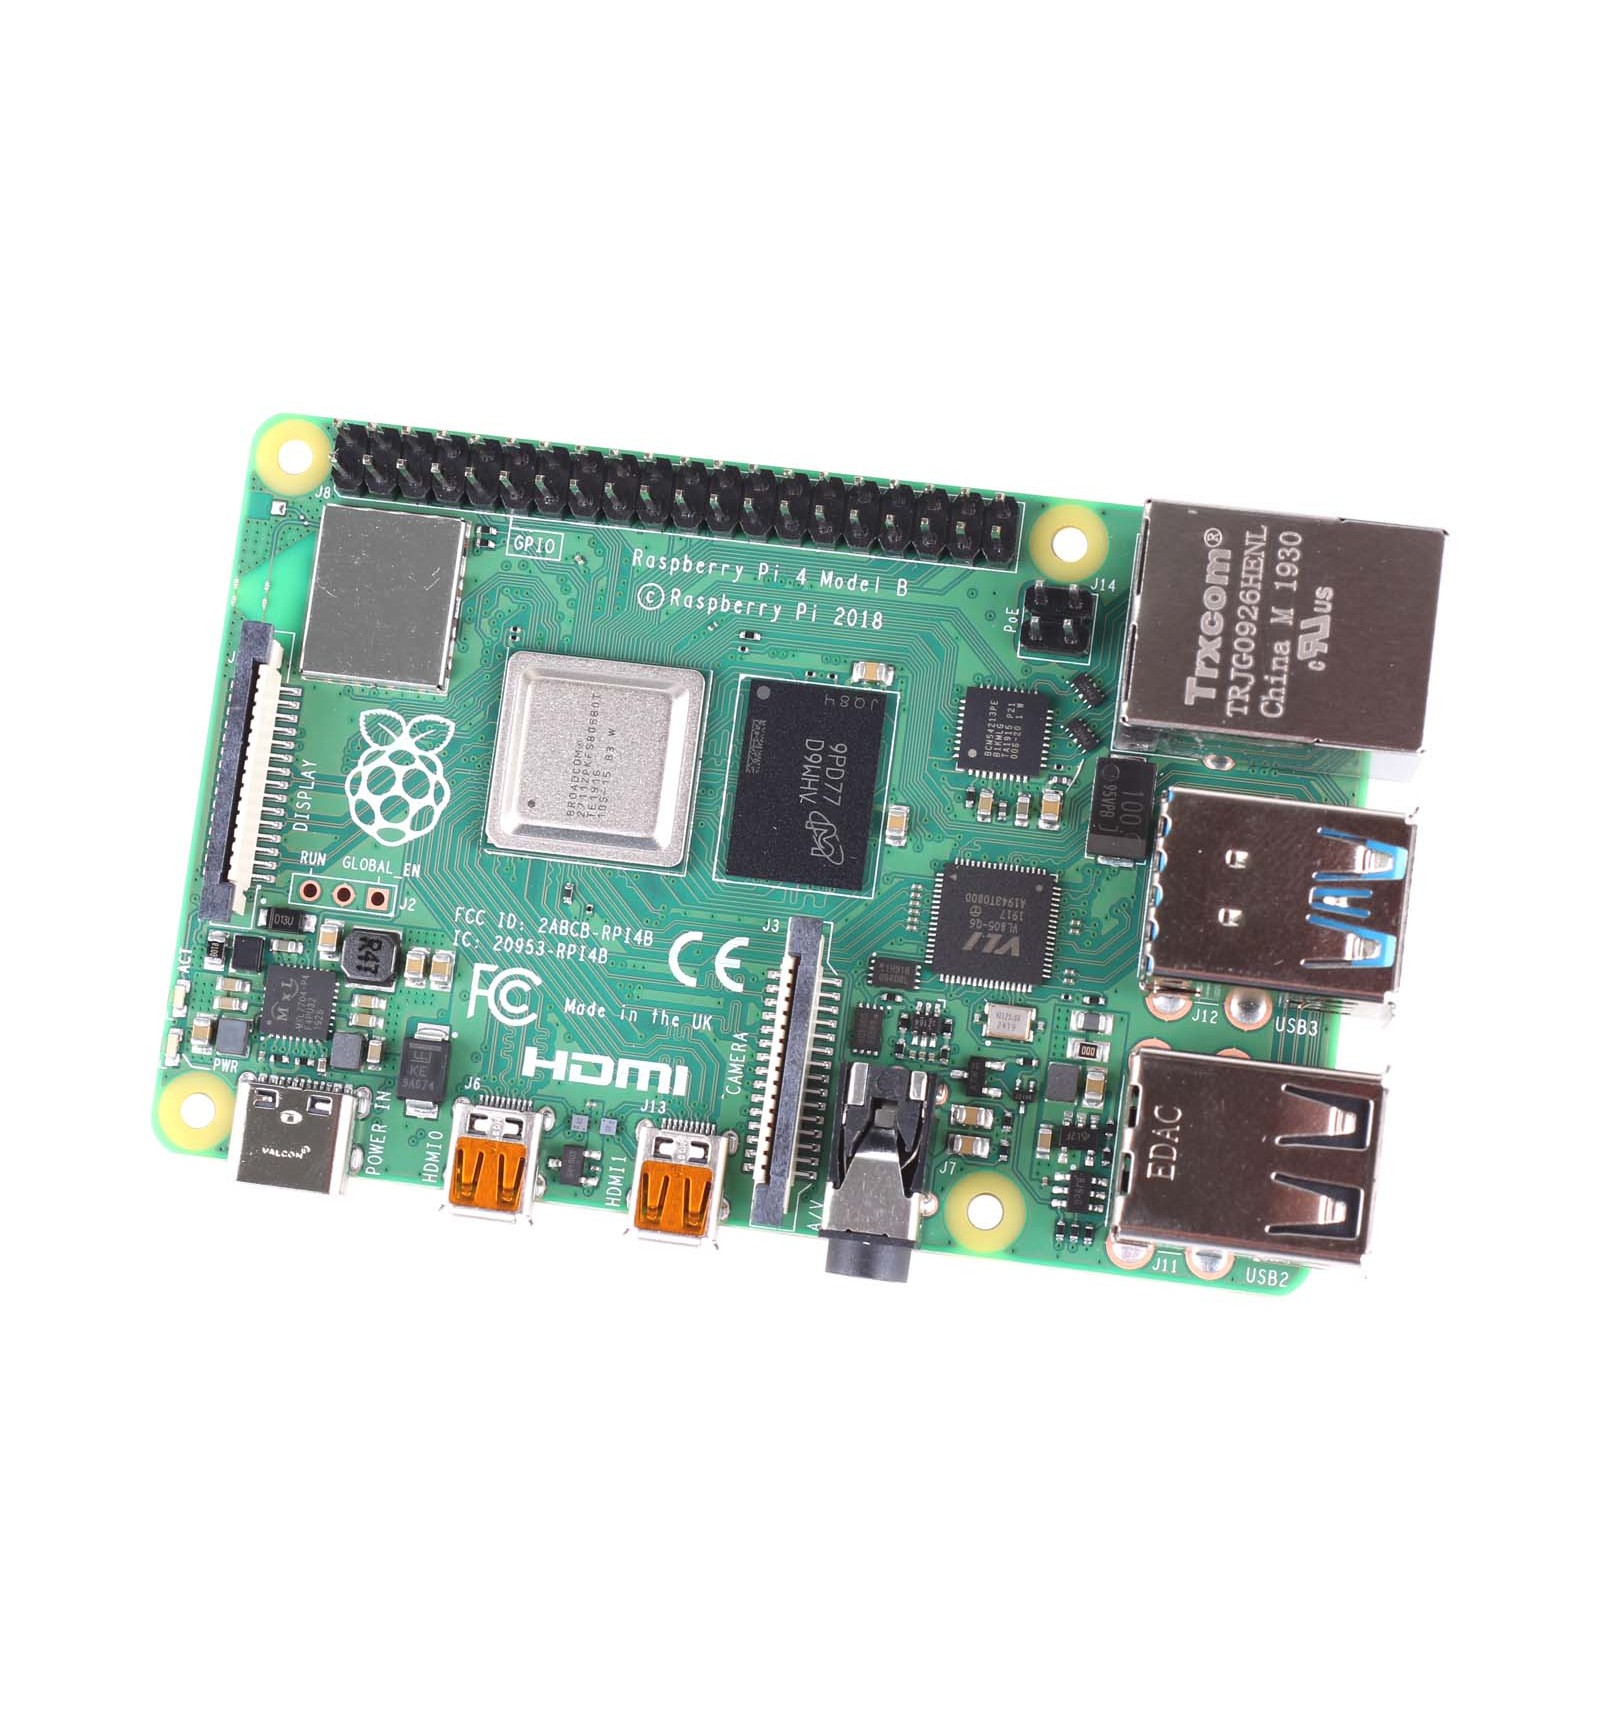
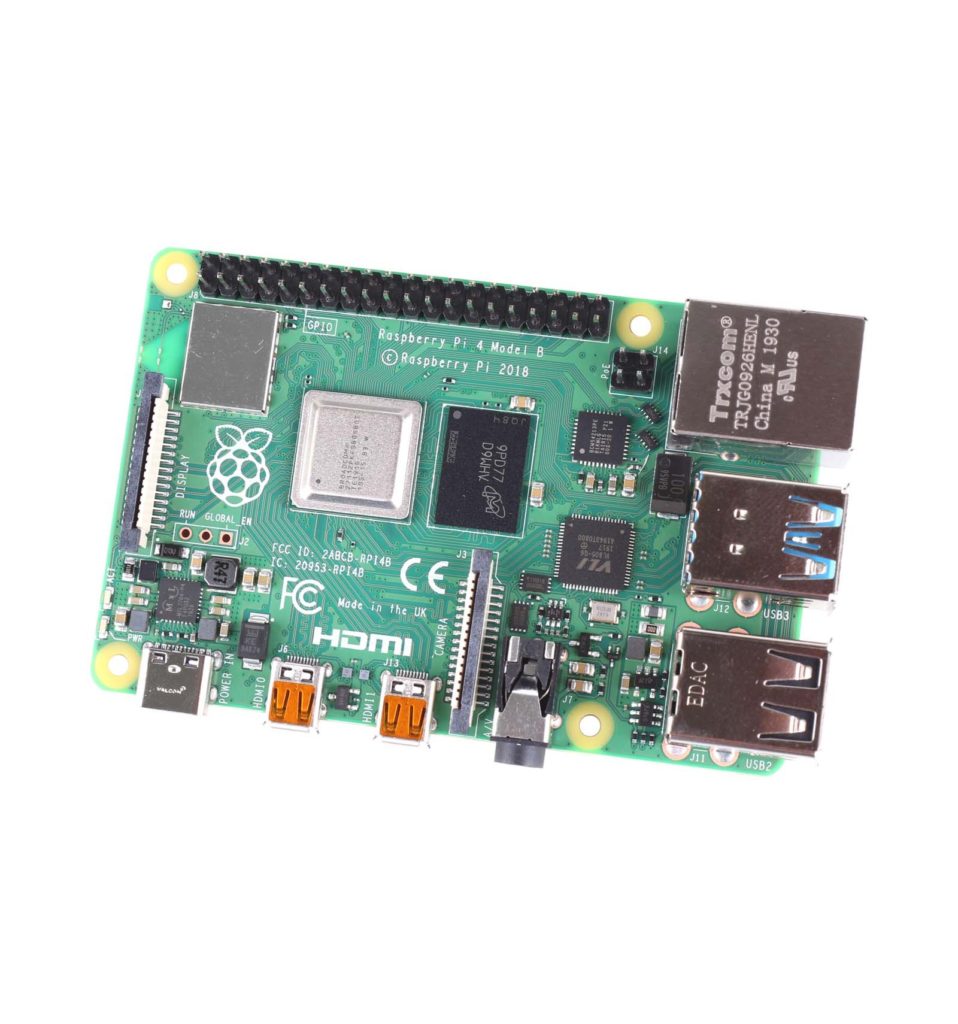
The moment we’ve all been waiting for has finally arrived, and TheRaspberry Pi 4 Model B 4Gisnow available from DIYElectronics!
The Raspberry Pi Foundation is a brand that just never seems to run out of steam, and after the release of the Raspberry Pi 3 Model B+, the brand dramatically grew in popularity due to the high level of functionality and incredibly low cost – two factors that are amazing for hobbyists like us. However, the recent release of the Raspberry Pi 4 has stepped up this offering even more, offering processing power and functionality that even rivals full-sized entry-level computers! This means that you, as a Pi Maker, have a lot more power to work with, opening up so many more opportunities for building awesome projects that blow the minds of your friends, family, colleagues, pets and even yourself!
SO HOW IS THE RASPBERRY PI 4 BETTER THAN THE RASPBERRY PI 3 B+?
This is the question in everyone’s minds right now, and we’re quite excited to tell you all about the many small and large improvements that the Pi 4 is ready to bring to the table. So, in terms of upgrades since the Pi 3 B+, the Raspberry Pi 4 Model B 4GB SBC has been improved in every single way, from a more powerful CPU, to more RAM, to more video outputs, and so much more. However, to just mention these upgrades without digging further into the juicy details would do the Pi 4 a great disservice, so let’s explore the fancy, functional and fantastic upgrades a little more – in a convenient and easy to read bullet point format:
Vastly More Powerful CPU – As the main brains behind these little single-board-computers, the Raspberry Pi 4 has been equipped with an extremely powerful Broadcom BCM2711B0 Cortex A-72processor. This is around 4 times more powerful than the Cortex-A53 on the Pi 3 B+, and achieves this power increase by catering to many of the small bottle-necking problems that were simply unavoidable with the previous chip architecture. This means that you can expect much more power from the Pi 4, without any drawbacks, allowing you to really step up your projects in terms of both processing speed, as well as complexity.
Higher Capacity AND Quality Memory – While a lot of people will initially look at the increased RAM and simply think that it’s a larger size, some may not realise that the new type of memory (LPDDR4 SDRAM) also makes a huge difference. Additionally, with a full 4GB of RAM on this model, you can expect not just 4 times the speed, but actually quite a lot more due to the more modern type of RAM that has been integrated. This makes the RAM both larger than previously, as well as faster with a higher frequency, which of course translates to reliable speed and a genuinely amazing benefit that anyone who worked with previous Pi Boards will appreciate.
More Serial Capabilities for Makers – As you will all know, Raspberry Pi Boards are designed for Makers and those interested in learning, and as such always featured convenient UART, I2C and SPI buses to communicate or interface with various low-level modules, sensors and other components. And as Makers, we can’t help but drool over the enhanced serial functionality of the Pi 4, with 4 UART Buses, 4 SPI Buses and 4 I2C Buses – allowing us to really take advantage of the processing power for our strange, wonderful and sometimes whacky Electronics projects.
A MAJOR Step Up for Audio/Video Output – Raspberry Pi has always been a great development platform to work with, offering an incredibly wide range of functionality from basic low-level peripheral projects all the way up to full computer capabilities. However, one area in which Pi boards have always left users wanting more is in the audio/video output. With the Raspberry Pi 4 and the integrated VideoCore VI (6), however, this is a thing of the past, and you can now enjoy Dual 4K30 HDMI Outputs or a Single 4K60 Output via the Micro HDMI ports. Additionally, the PWM functionality of the Pi 4 is no longer shared with the analogue audio output on the 3.5mm AV jack, as it was on previous models, allowing users to take full advantage of all of the different audio/video output options – without having to compromise or sacrifice functionality in other areas.
Now, don’t get us wrong, there are certainly many other awesome upgrades that have been made to the new Pi 4, but we felt that the above were the most exciting few that we as Makers can really take advantage of. As such, let’s take a look at a brief summary of all of the new features and specifications of the Pi 4, and then some of the awesome use cases that you can expect to enjoy when you finally get your hands on one of these beautiful boards.
Simply put, Buddy Tag is a child safety device that helps parents keep their precious children safe. It has an out-of-range alert to help prevent losing your child; a water safety alert to help prevent accidental drowning; a panic alarm for your child to alert you when in a threatening situation; and a personal ID to help reunite a lost child with their parents. Buddy Tag uses Bluetooth so it doesn’t have monthly fees.How does Buddy Tag work?
We’ve created a video demonstrating the proper setup and usage of Buddy Tag—click here to watch.How does the water safety alert feature work?
When Buddy Tag is submerged in water of about a foot deep or deeper, such as a pool, lake, or ocean, the signal from Buddy Tag becomes weakened. When the Buddy Tag phone app senses the weakened signal, it sounds the out of range alarm.Which phones does the Buddy Tag app work with?
Buddy Tag and its app are compatible with iPhones running iOS 9 and above and Android devices using Android version 4.3 (Jelly Bean) and above.How do I set up my Buddy Tag?
It’s simple! Press the button on Buddy Tag to turn it on. Launch the app on your phone. When your Buddy Tag should show up on the app, just touch it to connect it. There are many other features to make it even more useful for your daily life—watch our video to learn more about them.Can I connect to more than one Buddy Tag?
If you have a Brady Bunch, you can connect to as many Buddy Tags as you need. You can also customize the name of each Buddy Tag in our app, so you will know which tag is on which child.Can other Buddy Tag app users search for my child’s Buddy Tag device?
Once a Buddy Tag is connected to your phone, other Buddy Tag users can’t see your tag. If you want to let another caregiver track your child with the same Buddy Tag, you simply disconnect that tag from your app and let the caregiver connect to it.Can I share Buddy Tag with others?
Certainly. To lend your Buddy Tag to a friend, first disconnect that specific Buddy Tag from your phone app. Now your friend can put the Buddy Tag on their own child and connect to it with the Buddy Tag app on their own phone.What is the range of Buddy Tag?
The range varies depending on your environment. In an open field or a big open indoor space such as a shopping mall, Buddy Tag should work around 80 to 120 feet depending what phone you are using. But if you’re inside a house with many walls, the distance is reduced to about 40 feet.Is Buddy Tag waterproof?
Buddy Tag is now waterproof! Better yet, that allows us to provide a new water safety alert. See a question above for information about that alert.Will the panic button continue to alert me each time it’s activated?
Every time your kid presses the panic button, our app will sound the alarm on your phone and vibrate. (If your phone is muted, it will just vibrate.) At the same time, it will pop up a message on your phone telling you that your child needs you.How long will my Buddy Tag device last?
The battery inside Buddy Tag should last for over a year under normal usage. The battery isn’t replaceable because Buddy Tag is sealed to make it waterproof. When the tag’s battery is depleted, contact us to learn how to exchange it for a new tag ($10).How can I get in touch with you?
For more information about Buddy Tag, or for press inquiries, please use our contact form.
Do you offer international shipping?
We do offer international shipping at no cost. Free shipping is provided to all countries around the globe. Orders being shipped within the 48 contiguous states will be delivered within 3-4 business days. All other orders may take approximately one month to arrive, delivery times vary by country
Phonedeal.co.uk is part of Data2020 Ltd established on August 2014. Phonedeal.co.uk helps customers to save hundreds of pounds by offering pre owned iPhones in immaculate condition like new. Phonedeal.co.uk works with various partners in the mobile industry to make iPhones available much cheaper than usual high street and online retailers. We supply pre owned iPhones in immaculate condition that are as good as new and we work hard to keep our offers better than anyone else as well as consistency with our quality of products and services.Fayyaz Ahmed, Director of Phonedeal.co.uk explains: “My vision is to make latest gadgets available to everyone regardless of the high street price, I’ll bring it to consumers cheaper.”.
Our dedication and motivation continues to grow even everyday as we strive to maintain the level of service we have to our customers as well as our suppliers.
Our processes mean that we can offer our customers’ excellent prices as well as quick turnaround times. Our infrastructure is unique, allowing us to process an order and have it with a courier within 2 minutes of the order being completed. It is this level of service that has ensured we gain excellent customer feedback, as well as impressive customer retention.
We’re proud to be a one-stop shop for your iPhone, We work closely with a variety of suppliers to always ensure we have the latest iPhones available, continuously striving to be one step ahead to give our clients something new and exciting at affordable prices.
PhoneDeal is owned and operated by Data2020 Ltd, incorporated under England & Wales number 09190054
VAT
Our VAT Registration No is GB233 2391 33
We have displayed our VAT Number here for information purpose only. All products sold on “www.phonedeal.co.uk” are offered under 2nd hand VAT Margin Scheme.
I know, annoying ads, but this can’t be so bad. It counts as MLM so if that bothers you, don’t sign up.
Leaddyno has affiliate systems available where if any affiliate wants you to advertise for them, they have to prepare everything themselves and you just share the messages.
They offer a range of affiliates to choose from in categories you may appreciate.
Welcome to Code Bullet, a place to get all things Computer Science. If you want a mix between nerdy and awesome then look no further, because Code Bullet has plenty of both.
Avomance is a leading Minecraft Tutorial, Lets Play and Lets Build creator with an easy to follow style and really interactive channel. I especially enjoy creating a Minecraft tutorial for people with specific requirements A BIT ABOUT ME I am actually a London boy, born and bred and although I no longer live there, the accent can’t help slipping out. For all those people out there who comment I sound like Gordon Ramsey….. that’s why! The interaction I get with my ‘Avomaniacs’ is one of the best things about being on YouTube. Many ideas I have are because of people like you commenting in my videos and pushing me on. I really look forward to creating new and entertaining content for a long time to come and hope you continue to join me for the ride! Don’t forget to follow me on Social Media Twitter: @AvoMinecraft Insta: AvoMinecraft Focussing on Minecraft with Lets Play, Lets Build Tutorials, Redstone, SMP and more