When Only The Tiniest Of Violins Will Do

Playing the tiniest of violins may be a phrase to encapsulate the complete lack of sympathy as someone unpleasant receives their just deserts, but have any of you ever considered how such a feat might be achieved? Unless you’re an unusually talented virtuoso with the bow, it’s difficult to believe that such a small instrument could be played with ease, even if it were to be available in the first place.

Happily a solution is at hand to all those minuscule stringed instrument woes, courtesy of [Alexandra Covor], who has created a miniature PCB violin that is after a fashion playable. It may not be a conventional instrument with a horsehair bow and traditional sounding mechanism, but its electronic voice should still deliver enough to delight.

At the heart of the violin-shaped PCB is an ATtiny85 and a piezoelectric buzzer, and just where you might expect them are a set of strings made from wire attached to the PCB. The instrument can play stored tunes, but since the strings are hooked up to an analogue input on the microcontroller, it can be played as a touch instrument. Finally a pair of LEDs behind the translucent FR4-only F-holes complete the look. It’s fair to say that Itzhak Perlman and his ilk are safe from challengers bearing this instrument, but it’s still an eye-catching piece of PCB art.

This isn’t the first tiny violin that’s been featured here, some others are much smaller.

source https://hackaday.com/2020/10/25/when-only-the-tiniest-of-violins-will-do/

Flash is Dead, but Its Culture Should Live On

Flash is all but gone already, but as we approach the official Adobe end-of-life date on December 31st, it’s picking up traction one last time as people reminisce about the days of Internet past. Back in July, [Jonas Richner] created an impressive website that catalogs not only almost 20 years of Flash games, but also testimonials for the software from dozens of developers who began their careers with it.

Flash started in 1996 with the intention of being a standard for animations and vector graphics on the early Web. With the release of Flash Player 5 in August of 2000, Macromedia (later acquired by Adobe) presented the first version of ActionScript, an object-oriented scripting language meant to bring interactivity to animated Flash movies. Since then, thousands of games made with the platform were released online through websites like Newgrounds and shared all over the world, with the most popular games easily reaching tens of millions of plays.

These games became popular in part thanks to how quickly they could be created with the Flash authoring tools, but also because it was so easy for players to run them. With a single plugin for your web browser of choice, the barrier of entry was extremely low. Most home computers from the mid-2000s were able to run Flash software without needing dedicated graphics hardware. This prompted a “creative chaos” as [Richner] puts it, spawning millions of games and animations which started genres and careers lasting to this day.

Unfortunately, browsers have been dropping support for the plugin due to vulnerabilities in the most recent iterations of its scripting engine and Google no longer indexes Flash files. It would seem this particularly creative era of the Internet is coming to an end. However, you can still relive old games and animations made with plugins such as Flash and Shockwave with [BlueMaxima]’s Flashpoint, and like [Richner], we also hope that the people building today’s platforms and technologies keep the lessons from Flash in mind.

source https://hackaday.com/2020/10/24/flash-is-dead-but-its-culture-should-live-on/

A Transistor-less Sound Synthesizer

A synthesizer without transistors could almost be the basis of a trick question, surely without transistors it must be using a vacuum tube or similar. Not [Dr. Cockroach]’s synth though, instead of transistors it uses coupled pairs of LEDs and light-dependent resistors as its active components. Its oscillator circuit comes courtesy of [Patrick Flett], and uses a pair of LED/LDR combinations to alternately charge and discharge a capacitor. This feeds another LDR/LED pair that appears to act as a buffer to drive a bridge rectifier, with a final amplifier following it.

The result oscillates, though at frequencies in the low audio range with a cluster of harmonics thrown in. Its sound is best described as something akin to a small single-cylinder motorcycle engine at the lower frequencies, and is something we see could have all sorts of interesting possibilities.

This approach of using LDR-based active devices may be something of a dead end that could have had its day back in the 1930s, but it’s nevertheless an entertaining field to explore. It’s not the first time we’ve followed [Dr. Cockroach] at it, in the past we’ve seen the same technique applied to logic gates.

Have a listen to the synth in the video below the break.

source https://hackaday.com/2020/10/24/a-transistor-less-sound-synthesizer/

Let The Solar Free

Anyone tackling solar power for the first time will quickly find there’s a truly dizzying amount of information to understand and digest. You might think you just need to buy some solar panels, wire them together, and just sort of plug them in. But there are a hundred and one different questions about how they’ll be connected, the voltage of the panels, and the hardware for driving a load. [Michel], [case06], and [Martin Jäger] have set out to create a simpler and easier to understand charge controller named LibreSolar.

a diagram showing how the libre solar is wired up

A charge controller is fundamentally a simple idea. The goal is to charge a battery with solar panels, which means it’s essentially just a heavy-duty DC/DC buck converter. What makes this project different is that it is an open platform built for extensibility.

There are UEXT connectors included for adding extra peripherals, and with some tweaks to the STM32 firmware, it would be easy to handle small wind turbines (with some rectification to convert to DC, of course). LibreSolar seems to be designed with an eye towards creating a nano-scale localized networked grid. For example, they’ve developed a Raspberry Pi Zero module that uses WiFi to create a CAN bus allowing the boxes to communicate their maximum voltage to each other. This makes the system as plug-and-play as possible, as the bus doesn’t require a master controller to communicate.

With features such as MPPT (Maximum Power Point Tracking), 20 amp peak charging, a USB interface for updating, and several built-in protection mechanisms, it’s clearly a well thought through project. We look forward to seeing it deployed in the real world!

source https://hackaday.com/2020/10/24/let-the-solar-free/

Let The Solar Free

Anyone tackling solar power for the first time will quickly find there’s a truly dizzying amount of information to understand and digest. You might think you just need to buy some solar panels, wire them together, and just sort of plug them in. But there are a hundred and one different questions about how they’ll be connected, the voltage of the panels, and the hardware for driving a load. [Michel], [case06], and [Martin Jäger] have set out to create a simpler and easier to understand charge controller named LibreSolar.

a diagram showing how the libre solar is wired up

A charge controller is fundamentally a simple idea. The goal is to charge a battery with solar panels, which means it’s essentially just a heavy-duty DC/DC buck converter. What makes this project different is that it is an open platform built for extensibility.

There are UEXT connectors included for adding extra peripherals, and with some tweaks to the STM32 firmware, it would be easy to handle small wind turbines (with some rectification to convert to DC, of course). LibreSolar seems to be designed with an eye towards creating a nano-scale localized networked grid. For example, they’ve developed a Raspberry Pi Zero module that uses WiFi to create a CAN bus allowing the boxes to communicate their maximum voltage to each other. This makes the system as plug-and-play as possible, as the bus doesn’t require a master controller to communicate.

With features such as MPPT (Maximum Power Point Tracking), 20 amp peak charging, a USB interface for updating, and several built-in protection mechanisms, it’s clearly a well thought through project. We look forward to seeing it deployed in the real world!

source https://hackaday.com/2020/10/24/let-the-solar-free/

Optical Centrepunch Is An Easy Build If You Need One

Tired of getting his centerpunches thereabouts but not quite there, [Uri] decided something had to be done. A common tool to solve this problem is the optical centerpunch, but models on sale were just a little too pricy for something so basic. Instead, [Uri] elected to build his own.

An optical centerpunch is a simple tool that helps machinists hit a centerpunch dead on target, time after time. A guide is used that holds a clear plastic rod with a dot in the center. This dot is lined up over the spot to be centerpunched. The plastic rod is then removed and replaced with the actual punch that does the work. Not content to build something utilitarian, [Uri] instead sculpted the tool into a likeness of Sgt Pepper (of Yellow Submarine fame). Seeing the hunk of bare brass quickly become a recognisable figure on camera is a testament to [Uri’s] skill as a sculptor.

It’s a tool that can be readily built by anyone with a lathe, or, at the very least, a decent drill press. We imagine it would be particularly useful for those without perfect vision, making it easier to get punches on the mark on a regular basis. [Uri] has graced these pages before, too — he previously built an ornate tool to make all the other hammers jealous. Video after the break.

source https://hackaday.com/2020/10/24/optical-centrepunch-is-an-easy-build-if-you-need-one/

Get Over Your Fears

Some projects are just too complex, that’s for sure. But I’d be willing to bet that some things you think are too difficult actually aren’t, and it may be that all you need to get over your personal hurdle is a good demonstration. Here come three cases in point.

I was looking at the new Raspberry Pi Compute Module last weekend. They have a whole bunch of high-speed traces: things like Gigabit Ethernet, HDMI, and those crazy-fast SDI serial camera interfaces. I have no experience in high-speed design and layout at all, and frankly it gives me the willies. But the Raspberries also shipped me an IO demo board, and concomitant KiCAD design files, with the review board. Looking at it, they were just wires — maybe pairwise length-matched and impedance controlled — but also just wires. Opening up the KiCAD board file and clicking on the traces just like I do with my own designs, I’m a lot less scared. That was a revelation for me.

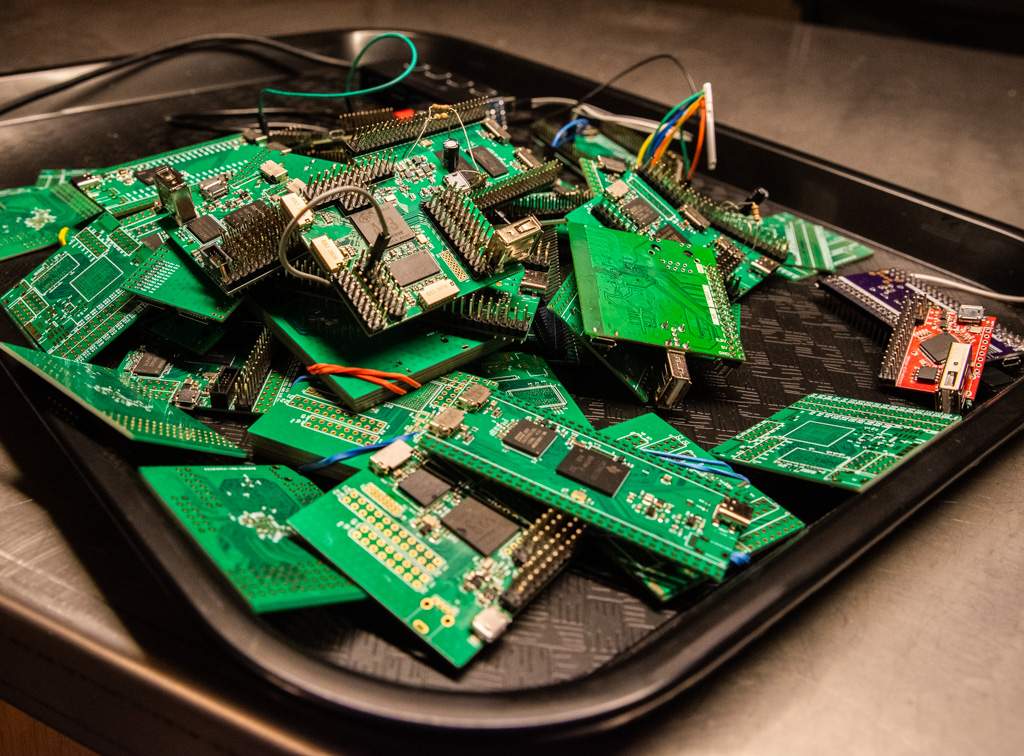
In a great writeup of his experience building ten different Linux single-board-computers from scratch, Jay Carlson had a similar effect on me. I would never have considered breaking out the hotplate for some CPU-and-DRAM action, and I’ve never had to lay out a PCB with a high density BGA chip before either. I’m not quite into Dunning-Kruger territory yet; I still have a healthy respect for the layout intricacies in fanning out a tight BGA CPU into a DRAM. But Jay’s frank assessments of what is easy and what is hard make it all seem within the realm of the doable.

As Mike and I were talking on the podcast about Jay’s work, Mike came clean about his fear of BGAs. I’ve done enough reflow-plate soldering, with parts that have a lead pitch that’s a factor of two finer than the 0.8 mm pitch BGAs in question, so it doesn’t seem implausible to me. And I’m 100% sure Mike could pull it off too, but he is in need of a BGA guru. Any good hobbyist videos out there?

Being a nerdy type, I’m much more focused on the knowledge and the inspiration, but maybe the courage is equally important — at least I think I undervalue it. I don’t need to lay out HDMI lines, or build a from-scratch Linux box, but I am no longer afraid that I couldn’t, and that’s because I’ve seen detailed examples of fellow hackers who’ve done the same. I might not get it right on the first shot, but I’m not afraid to try, and I wouldn’t have said the same before looking over other folks’ shoulders. Forza e corragio!

source https://hackaday.com/2020/10/24/get-over-your-fears/

Get Over Your Fears

Some projects are just too complex, that’s for sure. But I’d be willing to bet that some things you think are too difficult actually aren’t, and it may be that all you need to get over your personal hurdle is a good demonstration. Here come three cases in point.

I was looking at the new Raspberry Pi Compute Module last weekend. They have a whole bunch of high-speed traces: things like Gigabit Ethernet, HDMI, and those crazy-fast SDI serial camera interfaces. I have no experience in high-speed design and layout at all, and frankly it gives me the willies. But the Raspberries also shipped me an IO demo board, and concomitant KiCAD design files, with the review board. Looking at it, they were just wires — maybe pairwise length-matched and impedance controlled — but also just wires. Opening up the KiCAD board file and clicking on the traces just like I do with my own designs, I’m a lot less scared. That was a revelation for me.

In a great writeup of his experience building ten different Linux single-board-computers from scratch, Jay Carlson had a similar effect on me. I would never have considered breaking out the hotplate for some CPU-and-DRAM action, and I’ve never had to lay out a PCB with a high density BGA chip before either. I’m not quite into Dunning-Kruger territory yet; I still have a healthy respect for the layout intricacies in fanning out a tight BGA CPU into a DRAM. But Jay’s frank assessments of what is easy and what is hard make it all seem within the realm of the doable.

As Mike and I were talking on the podcast about Jay’s work, Mike came clean about his fear of BGAs. I’ve done enough reflow-plate soldering, with parts that have a lead pitch that’s a factor of two finer than the 0.8 mm pitch BGAs in question, so it doesn’t seem implausible to me. And I’m 100% sure Mike could pull it off too, but he is in need of a BGA guru. Any good hobbyist videos out there?

Being a nerdy type, I’m much more focused on the knowledge and the inspiration, but maybe the courage is equally important — at least I think I undervalue it. I don’t need to lay out HDMI lines, or build a from-scratch Linux box, but I am no longer afraid that I couldn’t, and that’s because I’ve seen detailed examples of fellow hackers who’ve done the same. I might not get it right on the first shot, but I’m not afraid to try, and I wouldn’t have said the same before looking over other folks’ shoulders. Forza e corragio!

source https://hackaday.com/2020/10/24/get-over-your-fears/

Super-Simple VGA Adapter Sports Low-Res Output with Only Four TTL Chips

Here at Hackaday we cast a wary eye at tips that come in with superlative claims. Generally, if we post something that claims to be the fastest or the smallest of all time, we immediately get slapped down in the comments by someone who has done it faster or smaller. So we present the simplest TTL video card ever knowing the same thing will happen, but eager to see how anyone might scale things down.

To be fair, [George Foot] does qualify his claim to the simplest usable VGA adapter, and he does note that it descends from [Ben Eater]’s “world’s worst video card”, which he uses for his 6502 breadboard computer. But where [Ben]’s VGA adapter uses about 20 TTL chips and an EEPROM, [George] has managed to decrease the BOM to just four TTL chips along with the memory and a crystal oscillator. This required a fair number of compromises, of course; the color depth is fairly low, as is the resolution. Each pixel appears as a thin horizontal bar rather than a small square, leading the images to be smeared out across the screen. They’re still surprisingly viewable, though, which probably says more about the quality of the pattern-recognition wetware between our ears than anything about the quality of the adapter. [George] gives a tour of the circuit in the brief video below.

It looks like [George] has posted a few improvements to the project since we first spotted it, so we’re looking forward to seeing how much the parts count went up. We’re also keen to see if anyone can outdo the simplicity of this effort — be sure to let us know if you give it a shot.

source https://hackaday.com/2020/10/24/super-simple-vga-adapter-sports-low-res-output-with-only-four-ttl-chips/

Proprietary Lenses Are No Problem With This USB Adaptor

There was a time when a camera lens was simply a set of shaped pieces of glass in a tube, with a mount and an aperture. But as cameras have embraced electronics ever more, technology has found its way past the lens mount to the extent that all features of a modern lens are electronically controllable. Can they be used outside the confines of the camera they were designed for? If the user is [Jan Henrik] then certainly, because he’s created a nifty USB adapter and mount for Canon lenses for use with his custom streaming camera.

The hardware is a 3D printed lens mount with a PCB that mates with the pins on the lens. An STM32 does the hard work and talks to the outside world through a USB interface, however it’s in the software that the real effort lies. The Canon lens protocol has been extended since the 1980s, and the commands for different generations of lenses can be convoluted. All the information is in a GitHub repository, so the curious hacker can roll their own.

There are a wealth of camera projects to be found for those that don’t mind tearing apart some of their more valuable possessions, and this isn’t the first we’ve seen involving the hacking of the Canon protocol.

source https://hackaday.com/2020/10/24/proprietary-lenses-are-no-problem-with-this-usb-adaptor/

Relay Computer Consumes Six Years and 4.5 Suitcases

If you thought your home-brew project was taking a long time, [Jeroen Brinkman]’s MERCIA Relay Computer project probably has you beat. He began working on this impressive computer back in 2014, and has been at it ever since.  In fact, the ongoing nature of the project is embedded into the name itself — the English translation of the acronym MERCIA is “My Simple Relay Computer Under Construction”.  Being interested in old analog and relay computers from an early age, [Jeroen] took on this project to educate students about how computers work.  The entire computer is build only using relays, diodes, and capacitors, not to mention color-coded wire based on signal functions. Using relays as the primary switching elements is at the core of his educational goal — anyone can understand how a relay works.

Understandably, this thing is big.  But he has cleverly packaged it to visually show the major building blocks of a computer.  While the exact size isn’t stated, we can estimate based on the photo of [Jeroen] standing next to the modules that these panels are about 1.5 m tall and perhaps 60 cm wide.  The whole computer is nine panels wide, making it about 5 meters long.  Except for the ROM assembly, pairs of panels are hinged together and they fold like a book and carried like a suitcases when being moved.  If you enjoy the clickety-clack sound of relays, be sure to watch the relay longevity test in the video below and check out our article on the 1958 FACOM from last year.

This is a fascinating project, but unless you have a couple thousand relays laying around and a decade of free time, it’s probably better to just enjoy [Jeroen]’s work rather than build your own.  We hope he releases schematics and other documentation once the project is finished.  You can follow his Facebook build log if you want to keep track of the progress. Thanks to [David Gustafik] for the tip.

source https://hackaday.com/2020/10/23/relay-computer-consumes-six-years-and-4-5-suitcases/

Short Video Recaps A Long Tradition of Space Hacks

Human spaceflight has always been, and still remains, a risky endeavor. We mitigate risk by being as prepared as we can. Every activity is planned, reviewed, and practiced long before any rocket engines are ignited. But space has a history of not cooperating with plans, and thus there is a corresponding history of hacks to get missions back on track. YouTube space fan [Scott Manley] recaps some of his favorites in How a $2 Toothbrush Saved the ISS and Other Unbelievable Space Hacks.

The introduction explained this compilation was motivated by the latest International Space Station drama, where an elusive air leak has finally been tracked down. Air leaks are obviously much more worrying in a space station than in, say, a bicycle tire. Thus there exists a wide array of tools to track down leaks but they couldn’t find this one. Reportedly the breakthrough came from an improvised airflow visualization tool: leaves from a cut-open tea bag. Normally small floating particles are forbidden in space because they might end up in troublesome places. (Eyes, noses, onboard equipment…) Apparently the necessity of the hack outweighed the rules here.

Tea leaves are but the latest in a long line of hacks devised in the course of space missions, because things don’t always go according to the original plan. Or even any of the large volume of contingency plans. Solutions have to be cobbled together from resources on hand, because when we’re in space, what we brought is all we have. From directly editing production code during Apollo 14, to a field-built replacement fender for the Apollo 17 Lunar Rover Vehicle (top picture), to the $2 toothbrush pressed into service as metal debris cleaner. The mission must go on!

source https://hackaday.com/2020/10/23/short-video-recaps-a-long-tradition-of-space-hacks/

Don’t Guess, Listen to Your Plants’ Pleas for Water

Plants are great to have around, but they all have different watering needs. If only they could cry out when they’re thirsty, right? Well, now they can. All you need to hear them suffer is your very own Klausner Machine. [RoniBandini] based the Klausner machine on one of Roald Dahl’s short stories, which features an inventor who builds a machine that can make audible the sound of plants shrieking whenever they’re cut.

In [RoniBandini]’s version of the Klausner Machine, the point is to judge the plant’s feelings based on its soil moisture content. An Arduino Nano reads in from the soil moisture sensor, and if the soil is dry, the plant screams. If the soil is moist, the plant emits happy sounds from DF Player Mini and SD card.  We think the analog meters are a great touch, and the jumping needles really anthropomorphize the plant.

Go forth and gain a better appreciation for your plants’ feelings, because this project is wide open. Maybe it will help you water them more often. Some plants need to be cut back, so we think it would be cool if you could make it scream when you take a cutting. Check out the demo after the break.

This is isn’t the first time we’ve seen an analog meter used in conjunction with soil moisture. What is a VU meter, anyway? Our own [Dan Maloney] really moved the needle on the subject a while back.

source https://hackaday.com/2020/10/23/dont-guess-listen-to-your-plants-pleas-for-water/

The Adorable Robot Spot, Now In Affordable Form

If you’ve been following the Boston Dynamics project Spot, you’ve seen its capabilities and how we’re starting to see it being used in public more since its official release last year. But in a true display of how hobbyist electronics have been evolving and catching up with the big companies over the past few years, [Miguel Ayuso Parrilla] shows us his own take on the walking robot with CHOP, one of the finalists in this year’s Hackaday Prize.

CHOP is a DIY quadruped robot that works much in the same way as Spot, although in a smaller form-factor and, perhaps most impressive of all, a bill of materials that can be all acquired for under $500. The entire project is open source, meaning that anyone can built their own version of it with off-the-shelf parts and some 3D printing. If you can’t get the hardware however, you can still play with the PyBullet simulation of the mechanics that were used during the debugging process.

Running the show are two main components, a Raspberry Pi 4B and an Arduino Mega. While the Mega interfaces with the servo controllers and provides filtering for sensors like the inertial measurement unit, the Pi takes all that data in and uses a series of Python scripts in order to determine the gait of the robot and which way the servos should move through an inverse kinematics model. To control the direction in which the body of the robot should accelerate, a Bluetooth remote controller sends commands to the Raspberry Pi.

We’re excited to see home-grown projects rise to this level of complexity, which would be mostly unheard of a few years ago in the maker scene, and only presented by large tech companies with tons of money to spend on research and development. There are other quadruped robots to inspire yourself on than Spot though, like this one with a spherical design and fold-out legs. Check this one in action after the break.

source https://hackaday.com/2020/10/23/the-adorable-robot-spot-now-in-affordable-form/

Complex Wood Joints, Thanks To New Software’s Interactive Features

Artfully-crafted wooden joints that fit together like puzzle pieces and need neither glue nor nails is fascinating stuff, but to call the process of designing and manufacturing them by hand “time-consuming” would be an understatement. To change that, a research team from the University of Tokyo presented Tsugite, a software system for interactively designing and fabricating complex wooden joints. It’s named after the Japanese word for joinery, and aims to make the design and manufacture of glue and fastener-free joints much easier than it otherwise would be.

Three-way joint that requires no glue or fasteners.

It looks like the software is so far only a research project and not something that can be downloaded, but the approach it takes is interesting. This downloadable PDF explains how the software approaches the problem of how to make such a task interactive and practical.

The clever bit is that the software not only provides design assistance for the joints themselves in a WYSIWYG (what you see is what you get) interface, but also generates real-time feedback based on using a three-axis CNC tool as the manufacturing method. This means that the system understands the constraints that come from the fabrication method, and incorporates that into design feedback.

The two main limitations of using a three-axis CNC are that the cutting tool can only approach the material from above, and that standard milling bits cannot create sharp inner corners; they will have a rounded fillet the same radius as the cutting bit. Design can be done manually, or by selecting joints from a pre-defined gallery. Once the design is complete, the system generates the toolpaths for manufacture.

Currently, Tsugite is limited to single joints meant for frame structures, but there’s no reason it couldn’t expand beyond that scope. A video to accompany the paper is embedded below, it’s short and concise and shows the software in action, so be sure to give it a look.

We love the idea, and it reminds of the Matchsticks project, which also used CNC specifically to ease the fabrication of joints.

[via SciTechDaily]

source https://hackaday.com/2020/10/23/complex-wood-joints-thanks-to-new-softwares-interactive-features/

Complex Wood Joints, Thanks To New Software’s Interactive Features

Artfully-crafted wooden joints that fit together like puzzle pieces and need neither glue nor nails is fascinating stuff, but to call the process of designing and manufacturing them by hand “time-consuming” would be an understatement. To change that, a research team from the University of Tokyo presented Tsugite, a software system for interactively designing and fabricating complex wooden joints. It’s named after the Japanese word for joinery, and aims to make the design and manufacture of glue and fastener-free joints much easier than it otherwise would be.

Three-way joint that requires no glue or fasteners.

It looks like the software is so far only a research project and not something that can be downloaded, but the approach it takes is interesting. This downloadable PDF explains how the software approaches the problem of how to make such a task interactive and practical.

The clever bit is that the software not only provides design assistance for the joints themselves in a WYSIWYG (what you see is what you get) interface, but also generates real-time feedback based on using a three-axis CNC tool as the manufacturing method. This means that the system understands the constraints that come from the fabrication method, and incorporates that into design feedback.

The two main limitations of using a three-axis CNC are that the cutting tool can only approach the material from above, and that standard milling bits cannot create sharp inner corners; they will have a rounded fillet the same radius as the cutting bit. Design can be done manually, or by selecting joints from a pre-defined gallery. Once the design is complete, the system generates the toolpaths for manufacture.

Currently, Tsugite is limited to single joints meant for frame structures, but there’s no reason it couldn’t expand beyond that scope. A video to accompany the paper is embedded below, it’s short and concise and shows the software in action, so be sure to give it a look.

We love the idea, and it reminds of the Matchsticks project, which also used CNC specifically to ease the fabrication of joints.

[via SciTechDaily]

source https://hackaday.com/2020/10/23/complex-wood-joints-thanks-to-new-softwares-interactive-features/

Complex Wood Joints, Thanks To New Software’s Interactive Features

Artfully-crafted wooden joints that fit together like puzzle pieces and need neither glue nor nails is fascinating stuff, but to call the process of designing and manufacturing them by hand “time-consuming” would be an understatement. To change that, a research team from the University of Tokyo presented Tsugite, a software system for interactively designing and fabricating complex wooden joints. It’s named after the Japanese word for joinery, and aims to make the design and manufacture of glue and fastener-free joints much easier than it otherwise would be.

Three-way joint that requires no glue or fasteners.

It looks like the software is so far only a research project and not something that can be downloaded, but the approach it takes is interesting. This downloadable PDF explains how the software approaches the problem of how to make such a task interactive and practical.

The clever bit is that the software not only provides design assistance for the joints themselves in a WYSIWYG (what you see is what you get) interface, but also generates real-time feedback based on using a three-axis CNC tool as the manufacturing method. This means that the system understands the constraints that come from the fabrication method, and incorporates that into design feedback.

The two main limitations of using a three-axis CNC are that the cutting tool can only approach the material from above, and that standard milling bits cannot create sharp inner corners; they will have a rounded fillet the same radius as the cutting bit. Design can be done manually, or by selecting joints from a pre-defined gallery. Once the design is complete, the system generates the toolpaths for manufacture.

Currently, Tsugite is limited to single joints meant for frame structures, but there’s no reason it couldn’t expand beyond that scope. A video to accompany the paper is embedded below, it’s short and concise and shows the software in action, so be sure to give it a look.

We love the idea, and it reminds of the Matchsticks project, which also used CNC specifically to ease the fabrication of joints.

[via SciTechDaily]

source https://hackaday.com/2020/10/23/complex-wood-joints-thanks-to-new-softwares-interactive-features/

This Week in Security: Too Little Too Late, and Other Stories

Microsoft has just announced a way to disable JScript in Internet Explorer. This would have been very useful a few years ago, to proactively prevent problems found in the now-ancient JScript engine, which ran their own slightly different version of standard JavaScript. Even though IE is no longer under active development, it still receives security updates. JScript, on the other hand, is basically done. If you’re one of the 1.06% that still use IE, then go flip the switch to protect yourself from additional JScript vulnerabilities.

Zerologon and Samba?

Samba is an open source re-implemenation of Microsoft’s SMB protocol. There’s a clever term that describes the reality of this situation: “Bug for bug compatibility”. Remember Zerologon, the flaw where a security token’s generation could be manipulated to vastly reduce the key space? Samba follows the specification, and therefore suffers from the same issue, though it seems to be unusual to actually run Samba in a vulnerable configuration.

Other implementations cannot say the same. QNAP in particular has been bitten by Zerologon when configured as a domain controller. What’s not clear is whether QNAP is running Samba on the NAS products, or if this is yet another vulnerable implementation. Either way, go update your devices.

CVE-2020-17023

Some times, a bug has a story to tell, and CVE-2020-17023 is one of those bugs. With a score of 7.8, it’s not the most critical vulnerability of all time, but it could be of specific interest to the HaD audience, as it was in Visual Studio Code. This open source editor is widely considered to be quite good, and is gaining a following. Microsoft has a habit of being less than forthcoming with their security bulletins, but perhaps the open source nature of this project will be helpful. Running to their GitHub and searching for the CVE leads to this issue.

Let’s break down what we have here. First, [Justin Steven] is explaining details about a previous flaw, CVE-2020-16881. That flaw was a result of using a .exec() function, which has all the same problems as a system() call. It acts like it’s executing something on the command line, so all sorts of command injection trickery is possible. The worst part is that hovering over a malicious package is enough to trigger the exploit. Microsoft fixed this earlier problem, and all was well, right? Well, no. Their fix was to add a filter to catch invalid package names, rather than remove the unsafe system call. As you can guess, there is a loophole — not all failures are treated equally. The filter function can fall through, and return True, even when the name is invalid. MS eventually implemented the right fix, using a safer exec function, and even credited [Justin] with a CVE of his own.

What Harm is an Open Redirect?

There’s a class of website vulnerability that seems very innocuous at first glance — open redirects, and similar problems like subdomain hijacking. What harm could these possibly cause? Both of these can lead to subtle vulnerabilities in web applications, and today we have a good example of how an open redirect can be used as part of an account takeover attack.

First, what exactly is an open redirect? It’s a page on someone’s website that will automatically redirect the visitor to a different page. Redirection is only half the definition, though. An open redirect takes the redirect target as one of its parameters, and can send the user anywhere that parameter points. Not every example is straightforward. Requesting a URL like http://local.dev?source=message&script_name=ggg might redirect you to http://local.devggg/welcome/index. If instead of “ggg”, we inject “mybaddomain.com”, we can suddenly redirect a user to a domain we control. This is the exact pattern that William Bowling, AKA [vakzz], discovered in GitHub Enterprise.

The attack goes like this, then. Send someone a GitHub Gist link, but add a “script_name” parameter, that points to a domain that you own. They click on the link, go through GitHub’s authentication process, but get redirected to your domain. Since their session information is in the URL, configure your server to log that information, and then redirect them to the proper next URL in GitHub’s authentication flow. It happens quickly enough that no-one knows the difference. However, take the logged information, and you can recreate the session and act as that user.

You may notice that we’re a little short on stories this week. I’m sure our collective hair will be on fire next week to make up for it. If you see something you think we should cover, drop it in the tips line, or tag me directly on Twitter.

source https://hackaday.com/2020/10/23/this-week-in-security-too-little-too-late-and-other-stories/


Battery Swap Gives Nissan LEAF New Lease on Life

It’s often said that one of the advantages of owning an electric vehicle is reduced maintenance costs, and for the most part, that’s true. That is, until the vehicle’s battery pack starts to show its age. Then you might be on the hook for a repair bill comparable to swapping out the engine on your old gas-burner. Depending on the age of the vehicle at that point, you might find yourself in the market for a new ride.

But in his latest video, [Daniel Öster] demonstrates that you can replace the battery in a modern electric vehicle without breaking the bank. While it’s not exactly an easy job, he manages to swap the pack in his 2012 Nissan LEAF from the comfort of his own garage using common tools and with the vehicle up on jack stands. The old battery wasn’t completely shot, so he was even able to recoup some of his costs by selling it; bringing the total price of the operation to approximately €2,122 ($2,500 USD).

Splicing on a new diagnostic connector.

While that wouldn’t be a bad deal even for a simple swap, the operation was actually an upgrade. The car was originally sold with a 24 kWh battery, but [Daniel] has replaced it with a 30 kWh pack intended for the 2017 LEAF. His car now has a greater range than it did the day it rolled off the assembly line, though as you might expect, the installation was more complex than it would have been with a contemporary battery.

[Daniel] has produced a kit that has all the adapters required to perform your own battery upgrade, including a module that translates the diagnostic signals from the newer battery into something the older vehicle can understand. With all the electrical bits simplified, all you’ve got to worry about is drilling the new battery mounting holes in the frame.

The battery pack is truly the heart and soul of an electric car, so its no surprise that mechanics and hackers alike are eager to learn as much about them as possible. They’ll have their work cut out for them, as the technology is only going to get more advanced with time.

source https://hackaday.com/2020/10/23/battery-swap-gives-nissan-leaf-new-lease-on-life/

Cardboard Models Trace Design Process of Vintage Tektronix Miniscopes

There aren’t many brands that inspire the kind of passion and fervency among its customers as Tektronix does. The venerable Oregon-based manufacturer of top-end test equipment has produced more collectible gear over the last 75 years than just about anyone else.

Over that time they have had plenty of innovations, and in the 1970s they started looking into miniaturizing their flagship oscilloscopes. The vintageTEK museum, run by current and former employees, has a review of the design process of the 200 series of portable oscilloscopes that’s really interesting. At a time when scopes were portable in the way a packed suitcase is portable, making a useful instrument in a pocketable form factor was quite a challenge — even for big pockets.

The article goes into great detail on the back-and-forth between the industrial designers, with their endless stream of models, and the engineers who would actually have to stuff a working scope into whatever case they came up with. The models from the museum’s collection are wonderful bits of history and show where the industrial designers really pushed for some innovative designs.

Some of the models are clearly derived from the design of the big bench scopes, but some have innovative flip-down covers and other interesting elements that never made it to production. Most of the models are cardboard, but some were made of aluminum in the machine shop and sport the familiar “Tek blue” livery. But the pièce de résistance of the collection is a working engineering model of what would become the 200-series of miniscopes, a handmade prototype with a tiny round CRT and crudely labeled controls.

The vintageTEK museum sounds like another bucket-list stop for computer and technology history buffs. Tek has been doing things their own way for a long time, and stopping by the museum is sure to be a treat.

Thanks to [Tanner Bass] for the tip.

source https://hackaday.com/2020/10/22/cardboard-models-trace-design-process-of-vintage-tektronix-miniscopes/

Cardboard Models Trace Design Process of Vintage Tektronix Miniscopes

There aren’t many brands that inspire the kind of passion and fervency among its customers as Tektronix does. The venerable Oregon-based manufacturer of top-end test equipment has produced more collectible gear over the last 75 years than just about anyone else.

Over that time they have had plenty of innovations, and in the 1970s they started looking into miniaturizing their flagship oscilloscopes. The vintageTEK museum, run by current and former employees, has a review of the design process of the 200 series of portable oscilloscopes that’s really interesting. At a time when scopes were portable in the way a packed suitcase is portable, making a useful instrument in a pocketable form factor was quite a challenge — even for big pockets.

The article goes into great detail on the back-and-forth between the industrial designers, with their endless stream of models, and the engineers who would actually have to stuff a working scope into whatever case they came up with. The models from the museum’s collection are wonderful bits of history and show where the industrial designers really pushed for some innovative designs.

Some of the models are clearly derived from the design of the big bench scopes, but some have innovative flip-down covers and other interesting elements that never made it to production. Most of the models are cardboard, but some were made of aluminum in the machine shop and sport the familiar “Tek blue” livery. But the pièce de résistance of the collection is a working engineering model of what would become the 200-series of miniscopes, a handmade prototype with a tiny round CRT and crudely labeled controls.

The vintageTEK museum sounds like another bucket-list stop for computer and technology history buffs. Tek has been doing things their own way for a long time, and stopping by the museum is sure to be a treat.

Thanks to [Tanner Bass] for the tip.

source https://hackaday.com/2020/10/22/cardboard-models-trace-design-process-of-vintage-tektronix-miniscopes/

Tracking Boats and Ships in Real Time at the Same Time

Software-defined radio came on the hacker scene in a big way less than a decade ago thanks to the discovery that a small USB-based TV tuner dongle could be used for receiving all kinds of radio transmissions. Two popular projects from that era are tracking nearby airplanes and boats in real time. Of course, these projects rely on different frequencies and protocols, but if you live in a major port city like [Ian] then his project that combines both into a single user interface might be of interest.

This project uses an RTL-SDR dongle for the marine traffic portion of the project, but steps up to a FlightAware Pro dongle for receiving telemetry from airplanes. Two separate antennas are needed for this, and all of the information is gathered and handled by a pair of Raspberry Pis. The Pis communicate with various marine and air traffic databases as well as handles the custom user interface that knits both sets of information together. This interface was custom-built from a previous project of his and was repurposed slightly to fit the needs of this one.

This is a great project that goes into a lot of interesting detail about how the web traffic moves and how the UI works, so even if you’re not into software-defined radio it might be worth a look. However, it’s also worth noting that it hasn’t been easier to set up a system like this thanks to the abundance and low price of RTL-SDR dongles and the software tools that make setting them up a breeze.

source https://hackaday.com/2020/10/22/tracking-boats-and-ships-in-real-time-at-the-same-time/

Digital Preservation for Old Batteries

The times they are a-changin’. It used to be that no household was complete without a drawer filled with an assortment of different sizes and types of batteries, but today more and more of our gadgets are using integrated rechargeable cells. Whether or not that’s necessarily an improvement is probably up for debate, but the fact of the matter is that some of these old batteries are becoming harder to find as time goes on.

Which is why [Stephen Arsenault] wants to preserve as many of them as possible. Not in some kind of physical battery museum (though that does sound like the sort of place we’d like to visit), but digitally in the form of 3D models and spec sheets. The idea being that if you find yourself in need of an oddball, say the PRAM battery for a Macintosh SE/30, you could devise your own stand-in with a printed shell.

The rather brilliantly named Battery Backups project currently takes the form of a Thingiverse Group, which allows other alkaline aficionados to submit their own digitized cells. The cells that [Stephen] has modeled so far include not only the STL files for 3D printing, but the CAD source files in several different flavors so you can import them into your tool of choice.

Like the efforts to digitally preserve vintage input devices, it’s not immediately clear how many others out there are willing to spend their afternoons modeling up antiquated batteries. But then again, we’ve long since learned not to underestimate the obscure interests of the hacker community.

source https://hackaday.com/2020/10/22/digital-preservation-for-old-batteries/

Digital Preservation for Old Batteries

The times they are a-changin’. It used to be that no household was complete without a drawer filled with an assortment of different sizes and types of batteries, but today more and more of our gadgets are using integrated rechargeable cells. Whether or not that’s necessarily an improvement is probably up for debate, but the fact of the matter is that some of these old batteries are becoming harder to find as time goes on.

Which is why [Stephen Arsenault] wants to preserve as many of them as possible. Not in some kind of physical battery museum (though that does sound like the sort of place we’d like to visit), but digitally in the form of 3D models and spec sheets. The idea being that if you find yourself in need of an oddball, say the PRAM battery for a Macintosh SE/30, you could devise your own stand-in with a printed shell.

The rather brilliantly named Battery Backups project currently takes the form of a Thingiverse Group, which allows other alkaline aficionados to submit their own digitized cells. The cells that [Stephen] has modeled so far include not only the STL files for 3D printing, but the CAD source files in several different flavors so you can import them into your tool of choice.

Like the efforts to digitally preserve vintage input devices, it’s not immediately clear how many others out there are willing to spend their afternoons modeling up antiquated batteries. But then again, we’ve long since learned not to underestimate the obscure interests of the hacker community.

source https://hackaday.com/2020/10/22/digital-preservation-for-old-batteries/

A Linear Stencil Clock Built for Quiet Operation

We around the Hackaday shop never get tired of seeing new ways to mark the passage of time. Hackers come up with all manner of interesting timekeeping modalities using every imaginable material and method of moving the mechanism once per whatever minimum time unit the hacker chooses to mark.

But honestly, there are only so many ways to make a clock, and while we’re bound to see some repeats, it’s still nice to go over old ground with a fresh approach. Take this linear sliding stencil clock for instance. [Luuk Esselbrugge] has included some cool design elements that bear a closer look. The video below shows that the display is made up of four separate stepper motors, each driving a vertical stencil via a rack-and-pinion mechanism. There a simple microswitch for homing the display, and a Neopixel for lighting things up.

The video below shows that the stencils move very, very slowly; [Luuk] says that this is to keep the steppers as quiet as possible. Still, this means that some time changes take more than a minute to accomplish, which is a minor problem. The Neopixel also doesn’t quite light up just one digit, which should be a pretty easy fix for version 2. Still, even with these issues, we like the stately movements of this clock, and appreciate [Luuk]’s attempts to make it easier to live with.

Don’t let the number of clocks you see on these pages dissuade you from trying something new, or from putting your twist on an old design. Start with fridge magnets, an old oscilloscope, or even a bevy of steel balls, and let your imagination run wild. Just make sure to tell us all about it when you’re done.

[via r/Arduino]

source https://hackaday.com/2020/10/22/a-linear-stencil-clock-built-for-quiet-operation/