Hands-On: The RISC-V ESP32-C3 Will Be Your New ESP8266

We just got our hands on some engineering pre-samples of the ESP32-C3 chip and modules, and there’s a lot to like about this chip. The question is what should you compare this to; is it more an ESP32 or an ESP8266? The new “C3” variant has a single 160 MHz RISC-V core that out-performs the ESP8266, and at the same time includes most of the peripheral set of an ESP32. While RAM often ends up scarce on an ESP8266 with around 40 kB or so, the ESP32-C3 sports 400 kB of RAM, and manages to keep it all running while burning less power. Like the ESP32, it has Bluetooth LE 5.0 in addition to WiFi.

Espressif’s website says multiple times that it’s going to be “cost-effective”, which is secret code for cheap. Rumors are that there will be eight-pin ESP-O1 modules hitting the streets priced as low as $1. We usually require more pins, but if medium-sized ESP32-C3 modules are priced near the ESP8266-12-style modules, we can’t see any reason to buy the latter; for us it will literally be an ESP8266 killer.

On the other hand, it lacks the dual cores of the ESP32, and simply doesn’t have as many GPIO pins. If you’re a die-hard ESP32 abuser, you’ll doubtless find some features missing, like the ultra-low-power coprocessor or the DACs. But it does share a lot of the ESP32 standouts: the LEDC (PWM) peripheral and the unique parallel I2S come to mind. Moreover, it shares the ESP-IDF framework with the ESP32, so despite running on an entirely different CPU architecture, a lot of code will run without change on both chips just by tweaking the build environment with a one-liner.

One of these things is not like the other

If you were confused by the chip’s name, like we were, a week or so playing with the new chip will make it all clear. The ESP32-C3 is a lot more like a reduced version of the ESP32 than it is like an improvement over the ESP8266, even though it’s probably destined to play the latter role in our projects. If you count in the new ESP32-S3 that brings in USB, the ESP32 family is bigger than just one chip. Although it does seem odd to lump the RISC-V and Tensilica CPUs together, at the end of the day it’s the peripherals more than the CPUs that differentiate microcontrollers, and on that front the C3 is firmly in the ESP32 family.

Our takeaway: the ESP32-C3 is going to replace the ESP8266 in our projects, but it won’t replace the ESP32 which simply has more of everything when we need it. The shared codebase and peripheral architecture makes it easier to switch between the two when we don’t need the full-blown ESP32. In that spirit, we welcome the newcomer to the family.

But naturally, we’ve got a lot more to say about it. Specifically, we were interested in exactly what the RISC-V core brought to the table, and ran the module through power and speed comparisons with the ESP32 and ESP8266 — and it beats them both by a small margin in our benchmarks. We’ve also become a lot closer friends with the ESP-IDF SDK that all of the ESP32 family chips use, and love how far it has come in the last year or so. It’s not as newbie-friendly as ESP-Arduino, for sure, but it’s a ton more powerful, and we’re totally happy to leave the ESP8266 SDK behind us.

RISC-V: Power and Speed

The ESP32-C3 shares the coding framework with the ESP32, some of the peripherals, and has about the same amount of memory. What’s different? The RISC-V CPU of the C3 vs. the Tensilica cores in the ESP32 and the ESP8266. So we thought we’d put them through their paces and see how they stack up in terms of processing speed and overall power use.

In terms of standard benchmarks for microcontrollers and other embedded devices, CoreMark is probably the go-to. And we found that it had been already ported to the ESP8266 and ESP32 by [Ochrin]. (Thanks!) CoreMark includes three tests: finding and sorting with linked lists to tax the memory units, running a state machine to test switch/case branching speed, and a matrix multiplication task to tax the CPU and compiler.

In practice, and mimicking our general experience with the ESP8266 and ESP32 frameworks, the code compiled without any hassle for the ESP32 and ESP32-C3. In contrast, getting it running on the ESP8266 was a hair-pulling few hours spent degrading versions of the RTOS framework, installing modules in Python 2 inside virtualenvs, and getting the set of PATHs and other environment variables just right. But we weren’t going to leave you without a proper comparo, so we burned the midnight oil.

The takeaway is that a single RISC-V core on the ESP32-C3 is marginally faster per MHz than a single core on either of the Tensilica-based devices. Of course, if you’re crunching numbers hard and using both cores of the ESP32, it’s in another league, and you know who you are. But if you’re running Arduino on the ESP32 and you’re not explicitly running the RTOS tasks yourself, or running MicroPython and not using threads, you’re probably running a single core on the ESP32 anyway. Modulo some small difference in having a free core to exclusively handle WiFi, you might not be much worse off with the C3.

While running this test, we also hooked up our super-sophisticated power measuring unit to the devices under test, a USB cable with three 3 Ω resistors and an oscilloscope. Of course, if you simply wanted the chip’s power specs, you could hit up the datasheet.

Instead, here we’re looking at the real-life performance of three different modules: the WeMos D1 mini for the ESP8266, the Lolin 32 for the ESP32, and our demo ESP32-C3-DevKitC-1, straight from Espressif. All were running with LEDs off, or clipped summarily with side-cutters in the case of the ESP32-C3 unit. (It didn’t make all that much difference, but you don’t know until you try.)

With power consumption data, we could also check out the modules’ power efficiency, measured in CoreMark score per milliwatt. Here, the ESP32-C3 does a bit better than the ESP8266, and somewhere between the ESP32 running one core and two cores respectively. This confirms what we’ve suspected for a while — if you want to save power, your best bet is to keep the chip sleeping as much as possible, and then run it full-out when it needs to run. If you’re doing that with an ESP32, use both cores.

And while our results are definitely significant and repeatable in terms of power and speed, they’re not game-changing. If we really needed to crush floats, we’d go for a chip that’s better suited for the task like an STM32F4xx or STM32F7xx, or those brutal NXP/Freescale 600 MHz i.MX ARM7 chips in the Teensy 4.0. If you’re buying an ESP-anything, it’s because you want the wireless connectivity, and it’s good to know that you’re not giving anything away with the ESP32-C3 on the CPU speed.

We hinted at it in the introduction, but the RISC-V nature of this chip, at least in terms of user experience, is no big deal. You code, compile, and flash just the same as you would with any other toolchain. The ESP-IDF makes using the new chip as easy as typing idf.py set-target esp32c3 and maybe idf.py fullclean for good measure. Then you go about your business. I must have swapped architectures 30 times in the course of this testing, and it’s literally that simple.

Of Peripherals and Pins

The first limitation you run into with an ESP8266 is that it doesn’t have enough GPIOs, or ADCs, for your particular project. While the ESP32 is a serious improvement in sheer GPIO quantity, once you’ve taken account of the pins with dedicated functions, or that are only input, you can end up pushing the limits of the chip easily. So you design in an external ADC chip and connect it via I2C, or you tack on a shift register and drive it with the blindingly fast I2S peripheral — something you can’t do with the ESP8266.

Sharing the peripheral set with the ESP32 will help alleviates some of these woes on the ESP32-C3, even though it has the same number of pins as the ESP8266. Heck, if you’re willing to allocate them, the C3 even has JTAG capabilities. And while the JTAG isn’t, a lot of the hardware peripherals are assignable to whichever pins you wish.

But we have to conclude that designing with the ESP32-C3 is still going to be a lot like designing for the ESP8266. I/O is limited. You’ll have to work with that.

Situating the ESP-C3

The ESP8266 started life as a simple AT-command-set WiFi modem, and a bunch of hackers proved that it had a lot more to offer. It’s sometimes hard to remember how difficult and expensive WiFi connectivity was before the ESP8266, but at the time, WiFi for $5 was revolutionary compared to WiFi for $50 – $100. Flash forward a few years, and the ESP32 is a competent microcontroller in its own right, with some cool quirky features. Oh yeah, and WiFi and BLE. We’ve come a long way in a very short time.
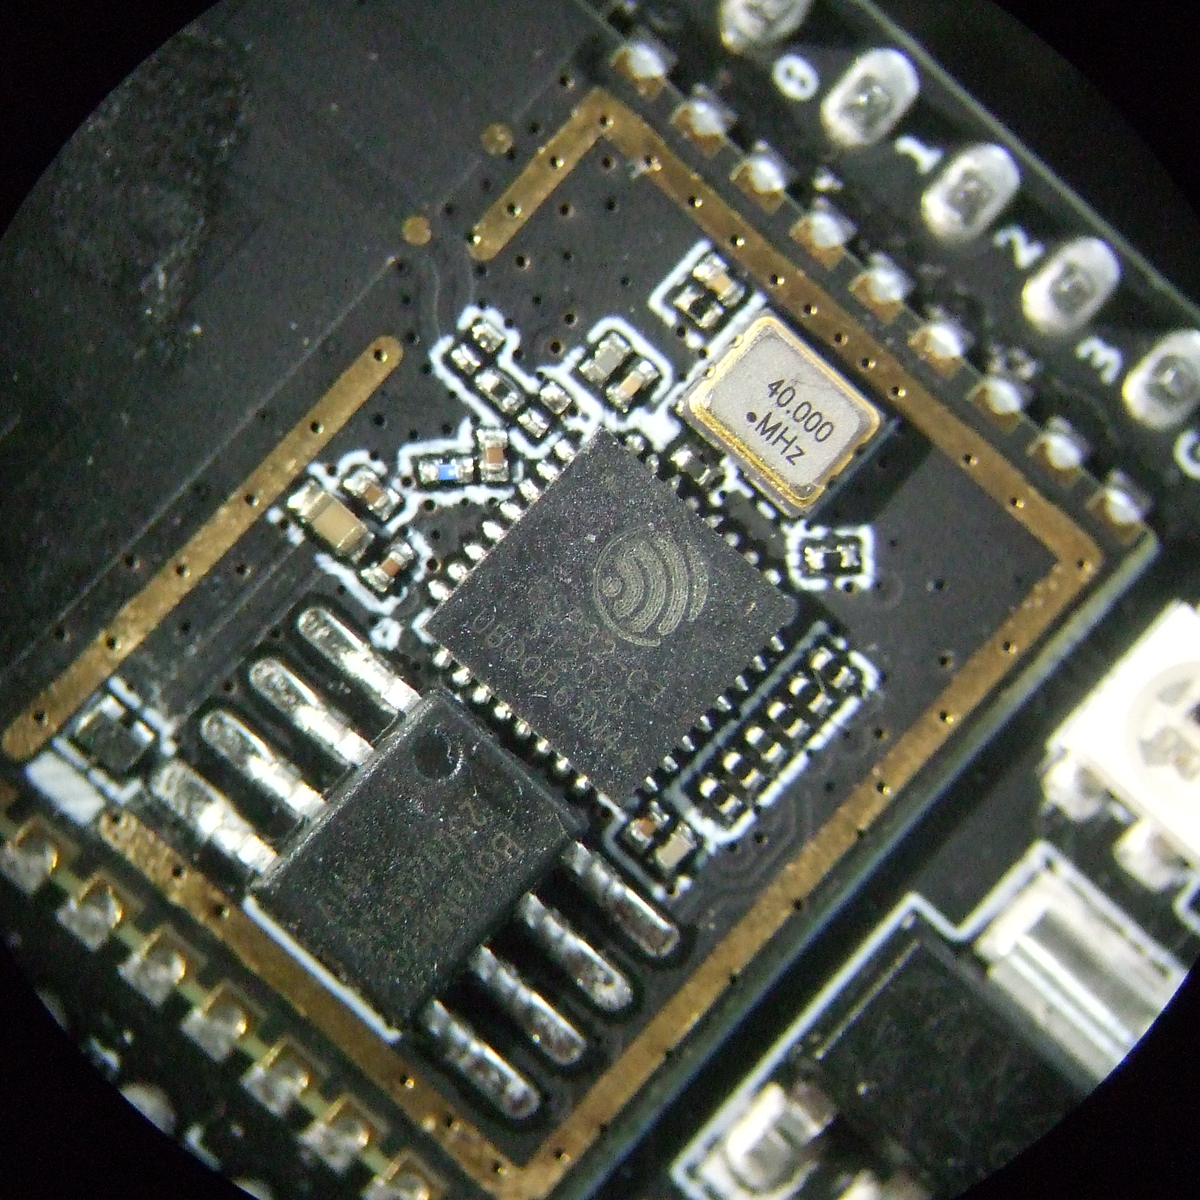
The C3 is really a blend of the two: a limited number of GPIO pins like the ESP8266, but with nice peripherals like the ESP32. If it’s priced to compete with the ESP8266, it will push that chip into retirement. But maybe it’s time.

The ESP-IDF has grown on us, but it’s still nothing compared to the overabundance of examples for ESP-Arduino or the incredible ease of use of MicroPython. When the latter gets ported over to the ESP32-C3, with its significantly expanded memory over the ESP8266, that’ll be a tremendously inexpensive platform that will make many forsake ever compiling again. But when you need the speed of the native SDK, it’s nice to be able to lean on the extant ESP32 codebase, so an ESP8266 in ESP32’s clothing is a winner.

We’ve got pre-production samples, and Espressif is still working on supporting all the features of the ESP32-C3 in the IDF. Heck, you can’t buy an ESP32-C3 module yet anyway, so we’re stuck looking into our crystal ball a little bit. But the murmurs about pricing similarly to the ESP8266 make us take notice, and it’s certainly a worthy upgrade even at a small price premium, if that’s what the market will bear. At the same time, the ESP32-C3 is fundamentally less capable than the ESP32, so it’s got to come in cheaper than that. With ESP8266 dev boards selling for $2 and ESP32 dev boards selling for $4, that doesn’t leave much wiggle room, and we suspect some folks will just pony up for the ESP32s. So it’s hard to say how much the price really matters anyway.

But it’s nice to see RISC-V cores in more devices, not least because the standardized instruction set architecture — which essentially amounts to a standard set of machine-language commands — makes writing optimizing compilers easier and faster. For the end user, it doesn’t matter all that much, but if saving money on IP licensing fees is what allows Espressif to include a more modern peripheral set for the ESP8266 price, then we’re all for it.

source https://hackaday.com/2021/02/08/hands-on-the-risc-v-esp32-c3-will-be-your-new-esp8266/
This Classy but Chaotic Gear Clock Keeps You Guessing

There are a lot of ways to tell time, but pretty much all of them involve some sort of sequential scale — the hands sweeping across the face of an analog clock comes to mind, as does the incremental changes of a digital clock. Clocks are predictable by their very nature, and therefore somewhat boring.

This nonsequential gear clock aims to break that predictability and make for a timepiece that’s just a little bit different. It’s the work of [Tony Goacher], who clearly put a lot of work into it and pulled out nearly every tool in the shop while doing it. He started with a laser-cut plywood prototype to get the basics worked out — a pair of nested rings with internal gear teeth, each hanging on a stepper-driven pinion. The inner ring represents hours and the outer minutes, with the numbers on each randomly distributed — more or less, since no two sequential numbers are positioned more than five seconds of rotation apart.

The finished version of the clock is rendered in brass, acrylic, hardwood, and a smattering of aluminum, with a case reminiscent of the cathedral radios of yore. There are some really nice touches, like custom-made brass screws, a CNC-engraved brass faceplate with traditional clock art, and a Latin inscription on the drive cog for the hours ring that translates roughly to “Time rules all.” When we looked that up we found that “tempus rerum imperator” is the motto of the Worshipful Company of Clockmakers, the very existence of which we find pleasing in the extreme.

The clock runs through its initialization routine in the brief video below. We’re not sure we’d want this on our nightstand, but it’s certainly a unique and enjoyable way to show the passage of time. It sort of reminds us of this three-ringed perpetual calendar, but just a bit more stochastic.

source https://hackaday.com/2021/02/08/this-classy-but-chaotic-gear-clock-keeps-you-guessing/

When Is Apple Beige Not Apple Beige?

If we cast our minds back a few decades, almost all computers were a beige colour. “Beige box” even became a phrase for a generic PC, such was their ubiquity. Long before PCs though there were other beige computers, and probably one of the first to land on the desks of enthusiasts rather than professionals was the Apple ][. But exactly what beige colour was it? It’s a question that interested [Ben Zotto], and his quest led him through a fascinating exploration of a colour most of us consider to be boring.

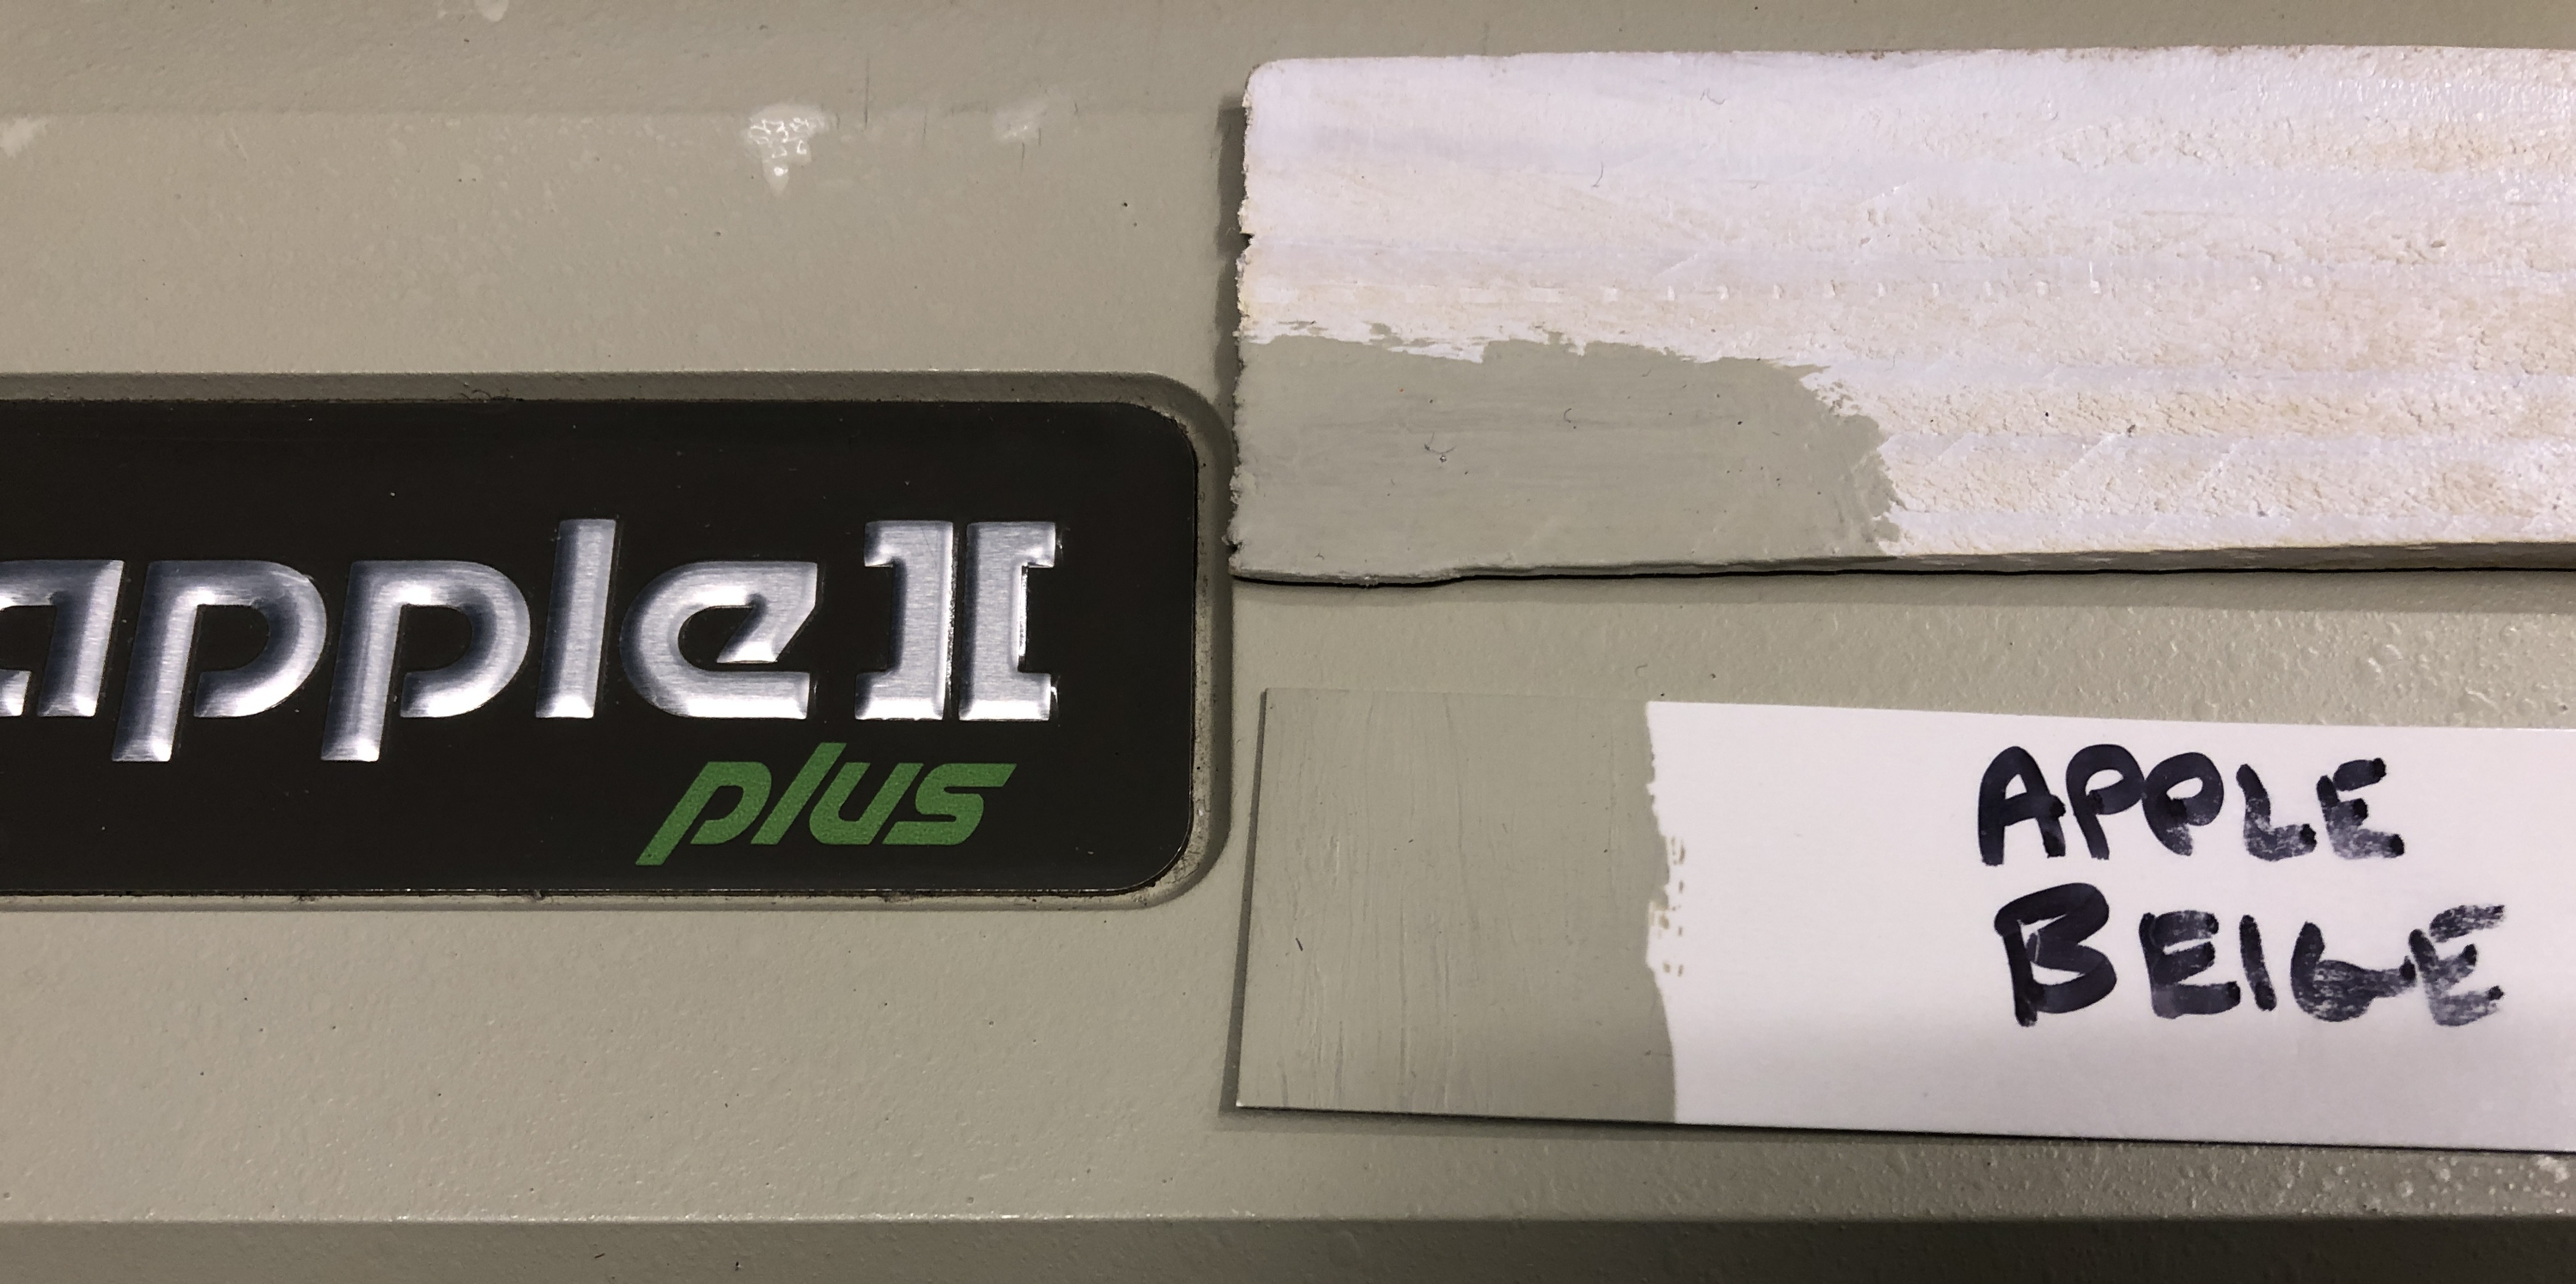
We’re used to older beige computers becoming yellow with time, as the effect of light and age causes the fire retardants in their plastic to release bromine. But the earlier Apple products haven’t done this, because their beige came not from the plastic but from a paint. [Ben] was lucky enough to find a small pot of touch-up paint from Apple that was made available to dealers, so notwithstanding any slight pigment changes from its age, he set off in pursuit of its origin.

Along the way to identifying a modern Pantone shade (Pantone 14–0105 TPG, for the curious) he treats us to a cross-section of Apple’s early colour history with reference to the memories of early Apple luminaries. He even suggests readily available shades that could suffice, pointing to Gloss Almond Rust-Oleum spray paint.

So should you wish to colour-match to an early Apple, now you can. If you have a Commodore or an Atari though, maybe your task is a little easier.

source https://hackaday.com/2021/02/07/when-is-apple-beige-not-apple-beige/

When Is Apple Beige Not Apple Beige?

If we cast our minds back a few decades, almost all computers were a beige colour. “Beige box” even became a phrase for a generic PC, such was their ubiquity. Long before PCs though there were other beige computers, and probably one of the first to land on the desks of enthusiasts rather than professionals was the Apple ][. But exactly what beige colour was it? It’s a question that interested [Ben Zotto], and his quest led him through a fascinating exploration of a colour most of us consider to be boring.

We’re used to older beige computers becoming yellow with time, as the effect of light and age causes the fire retardants in their plastic to release bromine. But the earlier Apple products haven’t done this, because their beige came not from the plastic but from a paint. [Ben] was lucky enough to find a small pot of touch-up paint from Apple that was made available to dealers, so notwithstanding any slight pigment changes from its age, he set off in pursuit of its origin.

Along the way to identifying a modern Pantone shade (Pantone 14–0105 TPG, for the curious) he treats us to a cross-section of Apple’s early colour history with reference to the memories of early Apple luminaries. He even suggests readily available shades that could suffice, pointing to Gloss Almond Rust-Oleum spray paint.

So should you wish to colour-match to an early Apple, now you can. If you have a Commodore or an Atari though, maybe your task is a little easier.

source https://hackaday.com/2021/02/07/when-is-apple-beige-not-apple-beige/

When Is Apple Beige Not Apple Beige?

If we cast our minds back a few decades, almost all computers were a beige colour. “Beige box” even became a phrase for a generic PC, such was their ubiquity. Long before PCs though there were other beige computers, and probably one of the first to land on the desks of enthusiasts rather than professionals was the Apple ][. But exactly what beige colour was it? It’s a question that interested [Ben Zotto], and his quest led him through a fascinating exploration of a colour most of us consider to be boring.

We’re used to older beige computers becoming yellow with time, as the effect of light and age causes the fire retardants in their plastic to release bromine. But the earlier Apple products haven’t done this, because their beige came not from the plastic but from a paint. [Ben] was lucky enough to find a small pot of touch-up paint from Apple that was made available to dealers, so notwithstanding any slight pigment changes from its age, he set off in pursuit of its origin.

Along the way to identifying a modern Pantone shade (Pantone 14–0105 TPG, for the curious) he treats us to a cross-section of Apple’s early colour history with reference to the memories of early Apple luminaries. He even suggests readily available shades that could suffice, pointing to Gloss Almond Rust-Oleum spray paint.

So should you wish to colour-match to an early Apple, now you can. If you have a Commodore or an Atari though, maybe your task is a little easier.

source https://hackaday.com/2021/02/07/when-is-apple-beige-not-apple-beige/

These Plastic Pavers Are Earth Savers

Plastic waste is everywhere you look, and there’s seemingly no end in sight for both the demand and production of plastic goods. So isn’t it time to try putting all that waste from the plastic industry to good use? [Nzambi Matee], a materials engineer in Kenya, thinks so. She was tired of seeing plastic littering the streets of Nairobi, and saw an opportunity to solve two problems at once — cleaning up the streets and paving them with plastic.

Three years ago, [Nzambi] quit her job as an oil industry data analyst and used all her savings to pursue a solution for the pesky plastic problem. She built a lab in her mother’s backyard and begin experimenting with plastics and sand, melding them together to make blocks.

After about a year of trial and error, she had discovered which plastics worked and which didn’t. Then she developed machinery to churn out the sand-plastic paste and stamp it into sturdy paving bricks. Her company Gjenge Makers gets most of their plastic free from factories that would otherwise have to pay to dispose of it. The bricks are strong, lightweight, and nearly indestructible compared to concrete pavers. In the video after the break, there’s a shot of [Nzambi] spiking one on the ground to demonstrate its toughness.

Now, her company produces about 1,500 of these pavers each day. [Nzambi] and her team are planning to start making building blocks as well. With a melting point somewhere above 350° C, the material seems pretty well-suited for that purpose.

Want to do more than just recycle your plastic, but don’t know how? You could start by turning plastic bottles into rope, and then use the rope to make things like brooms and brushes.

Thanks for the tip, [foamyguy]!

source https://hackaday.com/2021/02/07/these-plastic-pavers-are-earth-savers/

Hackaday Links: February 7, 2021

What’s that they say about death and taxes? Apparently that maxim doesn’t apply to Flash, at least when it comes to the taxman. As we noted last week, the end of the Adobe Flash era took with it a scheduling and routing app for the railway system in a Chinese city. This time around, it’s the unfortunately acronymed SARS, for South African Revenue Services, having Flash woes. They still have several online tax forms that haven’t been migrated to HTML5, so to keep the revenue flowing they built their own Flash-enabled browser. Taxpayers are free to download and use the browser while SARS works on getting the rest of their forms migrated. It sort of reminds us of those plans the Internal Revenue Service has to ensure tax collection continues after a nuclear apocalypse — death and taxes indeed.

Trouble for Nintendo in the EU? It looks that way, as consumer groups have made the case to EU regulators that Nintendo’s wildly popular Switch consoles are showing unacceptably premature obsolescence with the notorious “Joy-Con drift” issue. The problem, which manifests as players being unable to control a game due to constant movement despite no inputs on the joystick-like controller, requires a repair, one that Nintendo initially only did for free as warranty service for consoles less than a year old. For consoles out of the warranty period, Nintendo was charging €45, which is approximately the same as what a new controller would cost. This didn’t sit well with regulators, and now they’re breathing down Nintendo’s neck. They now offer free repairs for up to two years, but they’re still under the EU microscope. The interesting bit in the linked document is the technical reason for the problem, which is attributed to premature PCB wear — possibly meaning the traces wear away — and inadequate sealing of the Joy-Con mechanism against dust intrusion.

Last year looked as though it was going to be an exciting one with respect to some of our nearest solar and galactic neighbors. For a while there, it looked like the red giant Betelgeuse was going to go supernova, which would have been interesting to watch. And closer to home, there were some signs of life, in the form of phosphine gas, detected in the roiling atmosphere of our sister planet, Venus. Alas, both stories appear not to have panned out. The much-hoped-for (by me) Betelgeuse explosion, which was potentially heralded by a strange off-cycle dimming of the variable star, seems now to be due to its upper atmosphere cooling by several hundred degrees. As for Venus, the phosphine gas that was detected appears actually to have been a false positive triggered by sulfur dioxide. Disappointing results perhaps, but that’s how science is supposed to work.

Amateur radio often gets a bad rap, derided as a hobby for rich old dudes who just like to talk about their medical problems. Some of that is deserved, no doubt, but there’s still a lot of room in the hobby for those interested in advancing the state of the art in radio communications. In this vein, we were pleased to learn about HamSCI, which is short for Ham Radio Science Citizen Investigation. The group takes to heart one of the stated primary missions of amateur radio as the “ontinuation and extension of the amateur’s proven ability to contribute to the advancement of the radio art.” To that end, they’ll be holding HamSCI Workshop 2021, a virtual conference that will be focused on midlatitude ionospheric science. This appears to be a real science conference where both credentialed scientists and amateurs can share ideas. They’ve got a Call for Proposals now, with abstracts due by February 15. The conference itself will be on March 19 and 20, with free admission. The list of invited speakers looks pretty impressive, so if you have any interest in the field, check it out.

And finally, we got a tip this week about a collection of goofy US patents. Everything listed, from the extreme combover to baby bum-print art, is supposedly covered by a patent. We didn’t bother checking Google Patents, but some of these are pretty good for a laugh. We did look at a few, though, and were surprised to learn that the Gerbil Shirt is not a garment for rodents, but a rodent-filled garment for humans.

source https://hackaday.com/2021/02/07/hackaday-links-february-7-2021/

Holding A Mirror Up In Front Of GNU/Linux

We’re guessing that we have something in common with a substantial number of our readers in that this post is being written on an open-source operating system. A well-known GNU/Linux distribution provides everything you might expect from a PC, but of course it’s not the only open-source game in town. A year-old piece from [Unixsheikh] caught the eye with the title “Why you should migrate everything from Linux to BSD“, and being naturally curious, it was worth a read.  It’s interesting enough to talk about here not because of its BSD advocacy, but because of its examination of some of GNU/Linux’s shortcomings. Using and appreciating an operating system shouldn’t mean slavish fandom, it’s worth every Linux user taking a moment to consider its points.

There are two main thrusts to the argument, firstly that GNU/Linux has become a bloated kernel with a fragmented operating system, and secondly that the interests of the various big businesses that derive income from Linux-based products have led to the resulting ecosystem being shaped by those businesses and in their interests. The piece points to the huge disconnect between kernel developers and operating system users, and the seeming lack of concern over some of the problems this can create. It’s a jarring read for an open-source software enthusiast because while there is much good in the world of free software even the most devoted of fans should admit that it’s not without problems. We think it’s worth a read not necessarily to agree with but in order to stir discussion and debate. Every community needs to look in the mirror sometimes.

As for BSD, it’s worth admitting there lies a shameful gap in a Hackaday scribe’s knowledge. One that deserves to be plugged, in the interests of better understanding.

Header: Tux, Larry Ewing, CC0.

source https://hackaday.com/2021/02/07/holding-a-mirror-up-in-front-of-gnu-linux/

Simple Sensor Makes Filament Measurements a Snap

Just how tight are the manufacturing tolerances of modern FDM printer filament. Inquiring minds want to know, and when such minds are attached to handy fellows like [Thomas Sanladerer], you end up with something like this home-brew filament measurement rig to gather the data you seek.

The heart of this build is not, as one might assume, some exotic laser device to measure the diameter of filament optically. Those exist, but they are expensive bits of kit that are best left to the manufacturers, who use them on their production lines to make sure filament meets their specs. Rather, [Thomas] used a very clever homemade device, which relies on a Hall effect sensor and a magnet on a lever to do the job. The lever is attached to a roller bearing that rides on the filament as it spools through the sensor; variations in diameter are amplified by the lever arm, which wiggles a magnet over the Hall sensor, resulting in a signal proportional to filament diameter.

The full test rig has a motor-driven feed and takeup spools, and three sensors measuring across the filament in three different spots around the radius; the measurements are averaged together to account for any small-scale irregularities. [Thomas] ran several different spools representing different manufacturers and materials through the machine; we won’t spoil the results in the video below, but suffice it to say you probably have little to worry about if you buy from a reputable vendor.

When we see a filament sensor, it’s generally more of the “there/not there” variety to prevent a printer from blindly carrying on once the reel is spent. We’ve seen a few of those before, but this is a neat twist on that concept.

Thanks to [Baldpower] for the tip.

source https://hackaday.com/2021/02/07/simple-sensor-makes-filament-measurements-a-snap/

An ESP Will Read Your Meter For You

As home automation starts to live up to its glossy sci-fi promise there remains a deficiency when it comes to interfacing between the newer computerised components and legacy items from a previous age. A frequent example that appears in projects on Hackaday is the reading of utility meters, and in that arena [Sascha Kloß] has a very neat solution involving an ESP32 camera module and a software neural network to identify meter readings directly.

The ESP and camera sit at the top of a 3D-printed housing that fits over the meter. The clever trick comes as each photo’s orientation is determined, and not only is OCR used to read digits but also figures are derived from small dial meters and other indicators on the meter face. It’s a very well-thought-out system, with a web-based configuration tool that allows full customisation of the readable zones and how they should be treated.

This project makes full use of the ESP32’s capabilities, and the attention to detail that has gone into making it usable is particularly impressive. It certainly raises the bar against previous OCR meter reading projects.

source https://hackaday.com/2021/02/07/an-esp-will-read-your-meter-for-you/

Ice40 Runs DOOM

Spec sheets are an important tool in determining the performance of a given part or system, but they’re not the be all and end all when it comes to engineering. However, specs alone don’t prove whether a given system can complete a given task. Sometimes, you need to actually do the work to prove it instead – as [Sylvain] has done, running DOOM on the iCE40 FPGA.

DOOM’s minimum specifications demand a 386 with 4MB RAM minimum, but it’s commonly agreed that a 486 DX2 running at 66MHz with 8MB of RAM is required to play the game smoothly. With an iCEBreaker v1.0b running a RISC V softcore at 25MHz, it may seem like a difficult task, but the RISC V core has the benefit that many instructions run in a single clock cycle that take many on the 486. While the iCEBreaker doesn’t have much RAM onboard, it’s a simple job to piggyback an 8MB SPI device on top of the existing flash storage. Control of the game is via keystrokes sent to the iCEBreaker over serial, while video is handled over a PMOD video interface with an HDMI connector.

[Sylvain] does a great job of explaining all the minute details of the work that was required to get things working, and has provided files on Github for those keen to replicate the feat or expand upon the code. Music is notably absent but MIDI output could likely be achieved without much hassle. “Does it run DOOM?” is still a question asked of many platforms, even the new Nintendo Game & Watch. Video after the break.

source https://hackaday.com/2021/02/07/ice40-runs-doom/

Sensing Danger with Spinach

Do you need more proof that we’re living in the future? A group of MIT engineers have found a way for spinach, aka Popeye’s favorite short-term strength booster, to send potentially lifesaving emails regarding explosives in the area.

As the team outlined in a paper published in 2016, the field of plant nanobionics uses nanotechnology to enhance the natural abilities of plants and make them do new tricks. Here’s how this one works: the roots of the spinach plants absorb nitroaromatic compounds such as picric acid from the groundwater, and these transpire up through the stem and into the leaves along with water and other nutrients. When the compounds reach the leaves, they accumulate in the plants’ mesophyll — the inner tissue of the leaves.

A pair of sensors made of single-walled carbon nanotubes are built into the leaves. One sensor is engineered to detect nitroaromatic compounds using near-infrared fluorescent emission, and the other is used as a reference signal. As the the compounds build up in the mesophyll, the IR signal gets stronger. This change is detected by a camera, which triggers an email alert to the researchers within a matter of minutes. After running the experiments with a fancy-pants indium-gallium-arsenide camera, the researchers were able to duplicate the results using a Raspberry Pi and a CCD camera module with the infrared filter removed.

Plants have an ear to the groundwater like none other and absorb a lot of information about the environment around them, so the researchers believe that detecting explosive materials is only the beginning — they could also be harbingers of pollution and other environmental concerns.

Even if there is no threat of landmines in the vicinity, weeds are a problem everywhere. There’s a Raspberry Pi-based solution for those, too.

source https://hackaday.com/2021/02/07/sensing-danger-with-spinach/

GBA Gets Homebrew USB-C Charging Upgrade

Sure there are pre-made kits to add a rechargeable battery and USB-C compatibility to Nintendo’s venerable Game Boy Advance, but [HorstBaerbel] thought he could throw together something similar for a fraction of the price. Plus, he wouldn’t have to wait on shipping. The end result might not be quite as polished, but it’s certainly impressive for what’s essentially a junk bin build.

The star of the show is a USB-C variant of the popular TP4056 lithium-ion charger module, which fits nicely inside the original battery compartment while still leaving room for a 1,000 mAh pouch cell. The 4.2 V output of the fully charged battery is a bit too high for the Game Boy’s liking, so [HorstBaerbel] used the forward voltage drop of a diode to bring it down to a more acceptable 3.5 V.

Naturally this does waste a good deal of energy, especially compared to the DC-DC converters used in commercial offerings like the CleanJuice, but it still delivers a respectable seven hours of runtime. The only issue with this modification seems to be that you’ve got just five minutes to save your progress and shut down when the GBA’s low-battery light goes on; but what’s life without a little excitement?

While not nearly extreme as some of the other GBA modifications we’ve seen over the years, this project is yet another example of the seemingly unlimited hacking potential of Nintendo’s iconic Game Boy line.

source https://hackaday.com/2021/02/06/gba-gets-homebrew-usb-c-charging-upgrade/

GBA Gets Homebrew USB-C Charging Upgrade

Sure there are pre-made kits to add a rechargeable battery and USB-C compatibility to Nintendo’s venerable Game Boy Advance, but [HorstBaerbel] thought he could throw together something similar for a fraction of the price. Plus, he wouldn’t have to wait on shipping. The end result might not be quite as polished, but it’s certainly impressive for what’s essentially a junk bin build.

The star of the show is a USB-C variant of the popular TP4056 lithium-ion charger module, which fits nicely inside the original battery compartment while still leaving room for a 1,000 mAh pouch cell. The 4.2 V output of the fully charged battery is a bit too high for the Game Boy’s liking, so [HorstBaerbel] used the forward voltage drop of a diode to bring it down to a more acceptable 3.5 V.

Naturally this does waste a good deal of energy, especially compared to the DC-DC converters used in commercial offerings like the CleanJuice, but it still delivers a respectable seven hours of runtime. The only issue with this modification seems to be that you’ve got just five minutes to save your progress and shut down when the GBA’s low-battery light goes on; but what’s life without a little excitement?

While not nearly extreme as some of the other GBA modifications we’ve seen over the years, this project is yet another example of the seemingly unlimited hacking potential of Nintendo’s iconic Game Boy line.

source https://hackaday.com/2021/02/06/gba-gets-homebrew-usb-c-charging-upgrade/

The Future of Hydrogen Power… is Paste?

We’ve been promised hydrogen-powered engines for some time now. One downside though is the need for hydrogen vehicles to have heavy high-pressure tanks. While a 700 bar tank and the accompanying fuel cell is acceptable for a city bus or a truck, it becomes problematic with smaller vehicles, especially ones such as scooters or even full-sized motorcycles. The Fraunhofer Institute wants to run smaller vehicles on magnesium hydride in a paste form that they call POWERPASTE.

The idea is that the paste effectively stores hydrogen at normal temperature and pressure. At 250C, the paste decomposes and releases its hydrogen. While your motorcycle may seem hot when parked in the sun, it isn’t getting quite to 250C.

Interestingly, the paste only provides half the available hydrogen. The rest is from water added start a reaction to release the hydrogen. Fraunhofer claims the energy density available is greater than that of a 700 bar tank in a conventional hydrogen system and ten times more than current battery technology.

One thing that’s attractive is that the paste is easy to store and pump. A gas station, for example, could invest $20-30,000 and dispense the paste from a metal drum to meet low demand and then scale up as needed. A hydrogen pumping setup starts at about $1.2 million. Fraunhofer is building a pilot production plant that will produce about four tons of the material a year.

This isn’t a totally new idea, of course. Using metal hydrides to store hydrogen chemically has other proponents, including French company McPhy energy. There have also been schemes to use other hydrides in powder form as well as chemical hydrogen carriers like formic acid and ammonia.

Will your next drone power itself on paste and water? Probably not for a while although it has been done. If you want to dig into the hydrogen energy economy, [Lewin Day] can fill you in.

source https://hackaday.com/2021/02/06/the-future-of-hydrogen-power-is-paste/

PCB Bath Comes from Russia with Love

[Ruvin Kub] likes magnets, a lot. Most of his projects feature some sort of magnet and his PC board agitation bath is no exception. You can see a video about the device, below. We’ll admit our Russian is pretty rusty, but if you ask YouTube nicely it will translate the Russian subtitles into whatever language you like.

One of the things we liked about the video was that he uses hydrogen peroxide, citric acid, and salt as an etchant. We’ve seen the same mix with vinegar or muriatic acid instead of citric acid. We aren’t sure what the actual  translation is about why he doesn’t like ferric chloride, but YouTube says, “she’s too gloomy for my light souls.”

There are a few translation glitches, but overall the design is straightforward. A motor moves a little see saw in the base with magnets that repel similar magnets in the tank. In that way, the electronics are isolated from the liquid. The whole affair runs on a rechargeable battery.

As a bonus, in the end, there’s a brief tutorial on making a board with toner transfer along with comparing the time to etch the board with agitation and without. Like a Tootsie Roll Pop, he finally got tired of waiting for the non-agitated board and finished it with agitation. The test board that started in the bath had been done for a long time.

If you want to try different etching solutions, we’ve asked people to share their favorites. Or, just break out that CNC machine.

source https://hackaday.com/2021/02/06/pcb-bath-comes-from-russia-with-love/

Cap-Gun Lighter Built From Scratch

For most of us, a lighter is a cheap $2 plastic tool that serves a purpose, and little more. Some of us may go so far as to have a nice Zippo, or perhaps a windproof lighter for better outdoor performance. But if you’re a machinist, you could consider whipping yourself up something special, like this build by [W&M Levsha].

There’s plenty to love here for those who love making chips. The body is crafted out of brass and copper, soldered together by blowtorch. The lighter works by an unusual mechanism. The fluid tank is stuffed with cotton wool and filled with lighter fluid, which feeds a wick, which by itself, is fairly ordinary. However, ignition is via a spring-loaded aluminium hammer, which fires off a paper cap, igniting the wick. The flame can then be extinguished by blowing it out.

It’s a lighter that’s sure to be a conversation piece, though we wonder how welcome it’s cracking report will be at a quiet, reserved cigar bar. The mechanism may have more consumables than a typical lighter, but that’s the price paid to be truly unique. There are other creative designs out there too, like this lighter which uses a platinum catalyst for ignition. Video after the break.

source https://hackaday.com/2021/02/06/cap-gun-lighter-built-from-scratch/

Super Mario Original Sound Tracks Get High Quality Remaster Thanks To Gigaleak

2020 saw many gigabytes of internal Nintendo data leaked on the broader internet. Known as the “Gigaleak”, it contained source codes and assets from many games. Using data from this leak, a group of enthusiasts has put together high-quality renditions of the SNES Super Mario World Original Sound Tracks (OST).

The work was made possible when source code from the Gameboy Advance remake of Super Mario World was found in the leaked data. The source code included the names of the samples, which were the same as were used in the original SNES game. This allowed the team to find the original samples amongst the gigabytes of leaked files.

We wondered what would be done with all that code, speculating that it would be a poison pill for the emulator scene. This type of hack wasn’t even on our radar and we’re delighted to see the project come to light. The reproduced songs have an altogether different quality than the original SNES soundtrack. This is largely due to the samples not having to be compressed or cut down to fit on a cartridge and work with the console’s sound chip. Other variances in the sound also come from the fact that unlike in the game, the samples in these renditions don’t match the play lengths in the original game.

Regardless of the changes, it’s interesting to hear a more full, rounded sound of these classic video game tunes. It reminds us somewhat of the later CD console era, when sound designers were able to break free of the limitations of earlier hardware. Of course, we still bow at the alter of chiptune, though — and this MIDI Gameboy mod is a great place to start if you’re curious. Video after the break.

source https://hackaday.com/2021/02/06/super-mario-original-sound-tracks-get-high-quality-remaster-thanks-to-gigaleak/

The Right Tools for the Job

We’re knee-deep in new microcontrollers over here, from the new Raspberry Pi Pico to an engineering sample from Espressif that’s right now on our desk. (Spoiler alert, review coming out Monday.) And microcontroller peripherals are a little bit like Pokemon — you’ve just got to catch them all. If a microcontroller doesn’t have 23 UARTS, WiFi, Bluetooth, IR/DA, and a 16-channel 48 MHz ADC, it’s hardly worth considering. More is always better, right?

No, it’s not. Chip design is always a compromise, and who says you’re limited to one microcontroller per project anyway? [Francesco] built a gas-meter reader that reminded to think outside of the single-microcontroller design paradigm. It uses an ATtiny13 for its low power sleep mode, ease of wakeup, and decent ADCs. Pairing this with an ESP8266 that’s turned off except when the ATtiny wants to send data to the network results in a lower power budget than would be achievable with the ESP alone, but still gets his data up into his home-grown cloud.

Of course, there’s more complexity here than a single-micro solution, but the I2C lines between the two chips actually form a natural division of work — each unit can be tested separately. And it’s using each chip for what it’s best at: simple, low-power tasks for the Tiny and wrangling WiFi on the ESP.

Once you’ve moved past the “more is better” mindset, you’ll start to make a mental map of which chips are best for what. The obvious next step is combination designs like this one.

source https://hackaday.com/2021/02/06/the-right-tools-for-the-job/

Proto-TV Tech Lies Behind This POV Clock

If it weren’t for persistence of vision, that quirk of biochemically mediated vision, life would be pretty boring. No movies, no TV — nothing but reality, the beauty of nature, and live performances to keep us entertained. Sounds dreadful.

We jest, of course, but POV is behind many cool hacks, one of which is [Joe]’s neat Nipkow disk clock. If you think you’ve never heard of such a thing, you’re probably wrong; Nipkow disks, named after their 19th-century inventor Paul Gottlieb Nipkow, were the central idea behind the earliest attempts at mechanically scanned television. Nipkow disks have a series of evenly spaced, spirally arranged holes that appear to scan across a fixed area when rotated. When placed between a lens and a photosensor, a rudimentary TV camera can be made.

For his Nipkow clock, though, [Joe] turned the idea around and placed a light source behind the rotating disk. Controlling when and what color the LEDs in the array are illuminated relative to the position of the disk determines which pixels are illuminated. [Joe]’s clock uses two LED arrays to double the size of the display area, and a disk with rectangular apertures. The resulting pixels are somewhat keystone-shaped, but it doesn’t really distract from the look of the display. The video below shows the build process and the finished clock in action.

The key to getting the look right in a display like this is the code, and [Joe] put in a considerable effort for his software. If only the early mechanical TV tinkerers had had such help. [Jenny List] did a nice write-up on the early TV pioneers and their Nipkow disk cameras; we’ve also seen other Nipkow displays before, but [Joe]’s clock takes the concept to another level.

source https://hackaday.com/2021/02/06/proto-tv-tech-lies-behind-this-pov-clock/

Open-Source Thermostat Won’t Anger Your Landlord

[Nathan Petersen] built a Hackable Open-Source Thermostat to smooth out temperature fluctuations caused by the large hysteresis of the bimetallic strip thermostat in his apartment. While it may be tempting to adjust the “anticipator” to take care of the problem or even replace the bimetallic thermostat with an electronic version, building your own thermostat from scratch is a good way to add to your project portfolio while making your way through college. Plus, he got to hone his hardware and software design chops.

The hardware is designed around the STM32, using a cheap, minimal variant since the device just needs to sense temperature and control the furnace in on-off mode. The TMP117 high-accuracy, low-power, temperature sensor was selected for temperature measurement since accuracy was an essential feature of the project. Dry-contact output for the furnace is via a normally-open solid state relay (opto-isolator). For the user interface, instead of going the easy-route and using an I2C/SPI OLED or LCD display, [Nathan] used three 7-segment LED displays, each driven by an 8-channel constant current driver. The advantage is that the display can be viewed from across the room, and it’s brightness adjusted via PWM. Temperature set-point adjustment is via a simple slide potentiometer, whose analog voltage is read by the micro-controller ADC. To remind about battery replacement, a second ADC channel on the micro-controller monitors the battery voltage via a voltage divider. The PCB components are mostly surface mount, but the packages selected are easy enough to hand solder.

[Nathan]’s Github repo provides the hardware and firmware source files. The board is designed in Altium, but folks using KiCad can use either the awesome Altium2KiCad converter or the online service for conversion. (The results, with some minor errors that can be easily fixed, are quite usable.) Serendipitously, his PCB layout worked like a charm the first time around, without requiring any rework or bodge wires.

The firmware is a few hundred lines of custom bare-metal C code, consisting of drivers to interface with the hardware peripherals, a UI section to handle the user interface, and the control section with the algorithm for running the furnace. [Nathan] walks us through his code, digging into some control theory and filtering basics. After making a few code tweaks and running the thermostat for some time, [Nathan] concludes that it is able to achieve +0.1°F / -0.5°F temperature regulation with furnace cycles lasting about 10-15 minutes (i.e. 4-6 cycles per hour). Obviously, his well insulated apartment and a decent furnace are also major contributing factors. Moving on, for the next version, [Nathan] wants to add data collection capabilities by adding some memory and SD card storage, and use an RTC to allow seasonal adjustments or time-based set-points.

This is his first attempt at a “functional’ useful project, but he does love to build the occasional toy, such as this POV Top.

source https://hackaday.com/2021/02/06/open-source-thermostat-wont-anger-your-landlord/

Building A Continuously Variable Transmission With Lego

The first continuously variable transmission fitted to an automobile actually has its roots in the late 19th century, though the technology has only become popular in the last two decades or so. While a relatively complex technology in its modern automotive form, it’s still possible to illustrate the basic principles with everyone’s favourite mechanical learning toy – Lego.

The transmission as built isn’t great at high torque delivery, as the belt tends to slip on the smooth plastic of the cones. Increasing friction would help.

The build consists of a Lego motor driving the transmission’s input shaft, upon which a cone is mounted. A similar cone is mounted on the output shaft, and a rubber belt stretched between the two. With the cones mounted in opposing directions, the gear ratio can be continually varied by changing where upon the cones the belt rides. By riding on the small diameter section of the input cone, the belt correspondingly rides on the large diameter section of the output cone, leading to a slower, high torque output. By sliding the belt to the other end of the cone, the ratios are reversed, leading to high output speed with less torque.

The demonstration works somewhat differently than modern automotive models, but the basic concept is the same. It’s also limited in its torque transfer ability by the coefficient of friction of the plastic Lego parts. Despite this, it’s a quick way to illustrate the mechanisms at play, and where some of the common losses are in such a system. If you prefer your gearboxes of a more classic sequential design, we’ve seen those too, of course. Video after the break.

source https://hackaday.com/2021/02/05/building-a-continuously-variable-transmission-with-lego/

Building A Continuously Variable Transmission With Lego

The first continuously variable transmission fitted to an automobile actually has its roots in the late 19th century, though the technology has only become popular in the last two decades or so. While a relatively complex technology in its modern automotive form, it’s still possible to illustrate the basic principles with everyone’s favourite mechanical learning toy – Lego.

The transmission as built isn’t great at high torque delivery, as the belt tends to slip on the smooth plastic of the cones. Increasing friction would help.

The build consists of a Lego motor driving the transmission’s input shaft, upon which a cone is mounted. A similar cone is mounted on the output shaft, and a rubber belt stretched between the two. With the cones mounted in opposing directions, the gear ratio can be continually varied by changing where upon the cones the belt rides. By riding on the small diameter section of the input cone, the belt correspondingly rides on the large diameter section of the output cone, leading to a slower, high torque output. By sliding the belt to the other end of the cone, the ratios are reversed, leading to high output speed with less torque.

The demonstration works somewhat differently than modern automotive models, but the basic concept is the same. It’s also limited in its torque transfer ability by the coefficient of friction of the plastic Lego parts. Despite this, it’s a quick way to illustrate the mechanisms at play, and where some of the common losses are in such a system. If you prefer your gearboxes of a more classic sequential design, we’ve seen those too, of course. Video after the break.

source https://hackaday.com/2021/02/05/building-a-continuously-variable-transmission-with-lego/

Building A Continuously Variable Transmission With Lego

The first continuously variable transmission fitted to an automobile actually has its roots in the late 19th century, though the technology has only become popular in the last two decades or so. While a relatively complex technology in its modern automotive form, it’s still possible to illustrate the basic principles with everyone’s favourite mechanical learning toy – Lego.

The transmission as built isn’t great at high torque delivery, as the belt tends to slip on the smooth plastic of the cones. Increasing friction would help.

The build consists of a Lego motor driving the transmission’s input shaft, upon which a cone is mounted. A similar cone is mounted on the output shaft, and a rubber belt stretched between the two. With the cones mounted in opposing directions, the gear ratio can be continually varied by changing where upon the cones the belt rides. By riding on the small diameter section of the input cone, the belt correspondingly rides on the large diameter section of the output cone, leading to a slower, high torque output. By sliding the belt to the other end of the cone, the ratios are reversed, leading to high output speed with less torque.

The demonstration works somewhat differently than modern automotive models, but the basic concept is the same. It’s also limited in its torque transfer ability by the coefficient of friction of the plastic Lego parts. Despite this, it’s a quick way to illustrate the mechanisms at play, and where some of the common losses are in such a system. If you prefer your gearboxes of a more classic sequential design, we’ve seen those too, of course. Video after the break.

source https://hackaday.com/2021/02/05/building-a-continuously-variable-transmission-with-lego/

Sequencing DNA for Metagenomics

If someone brought you an odd piece of electronic hardware and you wanted to identify it, you’d probably look for markings on the outside first. If that didn’t work out, you might look under the cover and read some markings on the board or key components. However, in a tough case, you might dump the firmware and try to guess what the device is or what it does by examining the code that makes it run. That’s kind of what [Ciro] did. Wanting to determine the bacteria in a water sample led to using relatively inexpensive DNA sequencing hardware to look at the DNA present in the samples. This would have been a huge undertaking for a well-funded lab just a few short years ago. Now it just takes a USB device and some software.

Of course, inexpensive is in the eye of the beholder. The micropore sequencer costs about $500 and has a one-time use consumable cost of about $500, although that’s enough to process about 10 human genomes. The technology depends on using a small pore only large enough to pass one strand of DNA at a time. Blocks of nucelotides cause different amounts of electrical current to flow through the pore.

A lot of blood cell counters work in a similar fashion, but have an easier mechanism as they look for the tiny aperture’s partial blockage. Determining which DNA components are passing through the pore requires very precise measurements.

Of course, such a thing is hardly plug and play. First, the water samples needed reduction using several filtration and separation techniques. Then a polymerase chain reaction clipped the part of the DNA that would allow for the identification of unique bacteria types. Truly, the work in concentrating the DNA samples seemed to dwarf the actual sequencing.

Honestly, we aren’t as knowledgeable about DNA science as we’d like to be, but we were impressed at the results you could get for less than you’d spend on a big PC. Polymerase chain reaction technology has become cheap and simple, maybe this is the next frontier on biohacking. We’ve looked at how you can get started with PCR several times.

source https://hackaday.com/2021/02/05/sequencing-dna-for-metagenomics/