TinySA is a $49 Spectrum Analyzer

The NanoVNA made network analyzers cheap enough for almost everyone. Now you can get a $49 spectrum analyzer to go with it. Is it worth it? Watch [IMSAI Guy]’s video after the break for his opinion. From the tinySA.org website:

  • Spectrum Analyzer with two inputs, high-quality MF/HF/VHF input for 0.1MHZ-350MHz, lesser quality UHF input for 240MHz-960MHz.
  • Switchable resolution bandpass filters for both ranges between 2.6kHz and 640kHz
  • Color display showing 290 scan points covering up to the full low or high-frequency range.
  • Input Step attenuator from 0dB to 31dB for the MF/HF/VHF input.
  • When not used as Spectrum Analyzer it can be used as Signal Generator, MF/HF/VHF sinus output between 0.1MHZ-350MHz, UHF square wave output between 240MHz-960MHz.
  • A built-in calibration signal generator that is used for automatic self-test and low input calibration.
  • Connected to a PC via USB it becomes a PC controlled Spectrum Analyzer
  • Rechargeable battery allowing a minimum of at least 2 hours portable use

A lot of cheap scopes and PC-based scopes can do spectrum analysis, too, of course, so this isn’t as exotic as a VNA. But at this price, having a dedicated instrument might be worth it to you, especially if you don’t care about frequency below 100 MHz.

There are some limitations, of course, but the price is right. [IMSAI Guy] shows a few oddities that he didn’t like, but overall, it seemed like a good value. If you have a modern scope it may already do this function, or you might be able to do a software solution. If you only need audio frequencies and you want novelty, try some ping pong balls

source https://hackaday.com/2020/09/01/tinysa-is-a-49-spectrum-analyzer/

Antique Oscilloscope Gets New Home and Purpose

As the pace of technology charges blindly forward, a lot of older tools or products get left in the dust, forgotten to most but those left with them. This doesn’t mean they’re useless, though. In fact, old technology that continues to survive in the present tends to be more robust and sturdy than most modern, cheap replacements. While this might be survivorship bias, this is certainly true in particular of oscilloscopes. Rugged CRTs in large metal housings with discrete through-hole components in simple layouts made them reliable, but they’re heavy, bulky, and lack features of modern instruments. With some modifications, though, you can give them a new home and keep their vintage aesthetic.

[BuildComics] had just such an oscilloscope on hand and set out to make it into something useful but aesthetically pleasing as well. With a small circuit board, formerly available as a kit from Sparkfun/Dutchtronix but now only available if you can build them yourself, the cathode ray tube can be modified to output not waveforms but rather a working clock face. The donor oscilloscope was a Heathkit IO-102 which was fine for its time but is now lacking, so the CRT was removed from its housing and placed in a custom-built enclosure with a 40s radio style that suits its new purpose well.

Seeing old hardware that is past its prime being put to work in a new way is great, both from a technical standpoint and also because that’s usable hardware that’s being kept out of the landfill. Oscilloscopes are popular for projects like these too since they are relatively easy to understand and modify. Besides being used as clocks, we’ve also seen them modified to play video games such as Pac-Man.

source https://hackaday.com/2020/09/01/antique-oscilloscope-gets-new-home-and-purpose/

This 3D Printed “Bladeless” Fan Gets it Done Cheap

Not long after Dyson unveiled their “bladeless” fan, a fairly steady stream of ever cheaper clones have been hitting the market. But this 3D printed version created by [Elite Worm] must surely be one of the most budget-friendly takes on the concept. If you’ve got a 3D printer, we’d wager you’ve already got most of the parts required to build your own.

See, there’s a blade.

To be clear, of course there’s a blade. They aren’t magic, obviously. The fan is just small, and hidden inside the base. Air is pulled from the sides and bottom, and into the ring mounted to the top of the unit. When the air eventually exits the thin slit in the ring, it “sticks” to the sides due to the Coandă effect and produces a low pressure zone in the center. That’s all a fancy way of saying that the air flow you get from one of these gadgets is several times greater than what the little dinky fan would be capable of under normal circumstances. That’s the theory, anyway.

We can’t promise that all the physics are working as they should in this 3D printed version, but in the video after the break it certainly appears to be moving a considerable amount of air. It’s also quite loud, but that’s to be expected given it’s using a brushless hobby motor. To get it spinning, [Elite Worm] is using a Digispark ATtiny85 connected to a standard RC electronic speed control (ESC). The MCU reads a potentiometer mounted to the side of the fan and converts that to a PWM signal required by the ESC.

Beyond the electronics, essentially every piece of this project has been printed on a standard desktop 3D printer. An impressive accomplishment, though we probably would have gone with a commercially available propeller for safety’s sake. On the other hand, the base of the fan should nicely contain the shrapnel created should it explode at several thousand RPM. Probably.

source https://hackaday.com/2020/09/01/this-3d-printed-bladeless-fan-gets-it-done-cheap/

“A Guy in a Jet Pack” Reported Flying Next to Aircraft Near LAX

In case you needed more confirmation that we’re living in the future, a flight on approach to Los Angeles International Airport on Sunday night reported “a guy in a jet pack” flying within about 300 yards of them. A second pilot confirmed the sighting. It’s worth watching the video after the break just to hear the recordings of the conversation between air traffic control and the pilots.

The sighting was reported at about 3,000 feet which is an incredible height for any of the jet packs powerful enough to carry humans we’ve seen. The current state of the art limits jet pack tech to very short flight times and it’s hard to image doing anything more than getting to that altitude and back to the ground safely. Without further evidence it’s impossible to say, which has been an ongoing problem with sightings of unidentified flying objects near airports.

While superheros (or idiots pretending to be superheros) flying at altitude over the skies of LA sounds far fetched, the RC super hero hack we saw nine years ago now comes to mind. At 300 yards, that human-shaped drone might pass for an actual person rather than a dummy. This is of course pure speculation and we don’t want to give the responsible members for the RC aircraft community a bad name. It could have just as easily been trash, balloons, aliens, or Mothra. Or perhaps the pilot was correct and it was “some guy” flying past at 3,000 feet. That’s not impossible.

We anxiously await the results of the FAA’s investigation on this one.

[via HN and TheDrive]

source https://hackaday.com/2020/09/01/a-guy-in-a-jet-pack-reported-flying-next-to-aircraft-near-lax/

A Cyclopic LCD Case For Your Raspberry Pi Server

If you’ve got a personal website that needs hosting or a few hundred gigabytes of files that could use a centralized storage location, the Raspberry Pi’s small size and extreme energy efficiency make it a compelling server choice compared to that curbside Pentium 4 box you’ve been trying to find a home for. All you need is something to put in.

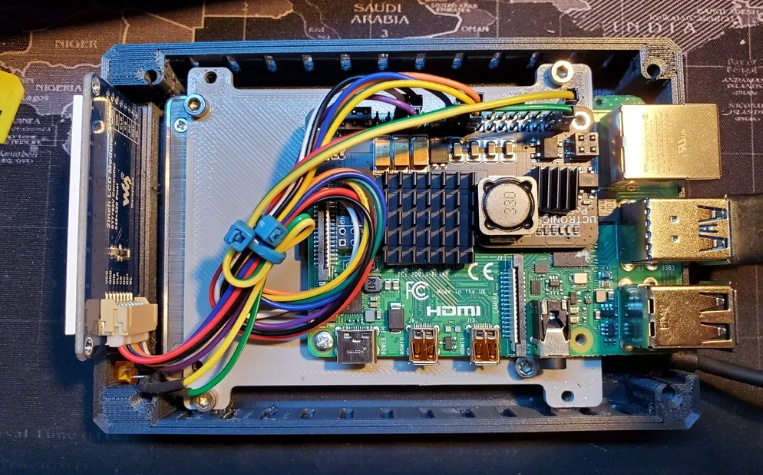
Of course there’s no shortage of Pi case designs ready to be extruded from your 3D printer, but we recently found ourselves particularly taken with this unique one designed by [Ken Segler]. It’s not only small and sleek with a dash of futuristic flair, but it includes a front-mounted two inch 240 x 320 IPS display that connects to the Pi over SPI. At the minimum that gives you a way to see all those beautiful boot messages on startup, but with a little code, it could provide you with various system statics and status messages at a glance.

While the LCD is clearly the star of the show here, the case also has a few other nice features that make it worthy of your consideration. The magnetically attached fan filter on the the top, for one. The stacked layout that puts the Pi directly above the SSD also makes for a relatively compact final product.

One thing to note though is that [Ken] is using Power-over-Ethernet, meaning there’s no spot for a dedicated power jack on the case. It’s an easy enough feature to add into your own build, but naturally not everyone’s network is suitably equipped. In that case, beyond the normal annoyances of editing STL files, it shouldn’t be too much trouble to add one in without having to literally hack your way through the printed plastic.

source https://hackaday.com/2020/09/01/a-cyclopic-lcd-case-for-your-raspberry-pi-server/

A Cyclopic LCD Case For Your Raspberry Pi Server

If you’ve got a personal website that needs hosting or a few hundred gigabytes of files that could use a centralized storage location, the Raspberry Pi’s small size and extreme energy efficiency make it a compelling server choice compared to that curbside Pentium 4 box you’ve been trying to find a home for. All you need is something to put in.

Of course there’s no shortage of Pi case designs ready to be extruded from your 3D printer, but we recently found ourselves particularly taken with this unique one designed by [Ken Segler]. It’s not only small and sleek with a dash of futuristic flair, but it includes a front-mounted two inch 240 x 320 IPS display that connects to the Pi over SPI. At the minimum that gives you a way to see all those beautiful boot messages on startup, but with a little code, it could provide you with various system statics and status messages at a glance.

While the LCD is clearly the star of the show here, the case also has a few other nice features that make it worthy of your consideration. The magnetically attached fan filter on the the top, for one. The stacked layout that puts the Pi directly above the SSD also makes for a relatively compact final product.

One thing to note though is that [Ken] is using Power-over-Ethernet, meaning there’s no spot for a dedicated power jack on the case. It’s an easy enough feature to add into your own build, but naturally not everyone’s network is suitably equipped. In that case, beyond the normal annoyances of editing STL files, it shouldn’t be too much trouble to add one in without having to literally hack your way through the printed plastic.

source https://hackaday.com/2020/09/01/a-cyclopic-lcd-case-for-your-raspberry-pi-server/

A Cyclopic LCD Case For Your Raspberry Pi Server

If you’ve got a personal website that needs hosting or a few hundred gigabytes of files that could use a centralized storage location, the Raspberry Pi’s small size and extreme energy efficiency make it a compelling server choice compared to that curbside Pentium 4 box you’ve been trying to find a home for. All you need is something to put in.

Of course there’s no shortage of Pi case designs ready to be extruded from your 3D printer, but we recently found ourselves particularly taken with this unique one designed by [Ken Segler]. It’s not only small and sleek with a dash of futuristic flair, but it includes a front-mounted two inch 240 x 320 IPS display that connects to the Pi over SPI. At the minimum that gives you a way to see all those beautiful boot messages on startup, but with a little code, it could provide you with various system statics and status messages at a glance.

While the LCD is clearly the star of the show here, the case also has a few other nice features that make it worthy of your consideration. The magnetically attached fan filter on the the top, for one. The stacked layout that puts the Pi directly above the SSD also makes for a relatively compact final product.

One thing to note though is that [Ken] is using Power-over-Ethernet, meaning there’s no spot for a dedicated power jack on the case. It’s an easy enough feature to add into your own build, but naturally not everyone’s network is suitably equipped. In that case, beyond the normal annoyances of editing STL files, it shouldn’t be too much trouble to add one in without having to literally hack your way through the printed plastic.

source https://hackaday.com/2020/09/01/a-cyclopic-lcd-case-for-your-raspberry-pi-server/

Perfect Photographs For PCB Reverse Engineering

There’s an unexpected part of hacking that is very difficult to get right, namely photographing printed circuit boards. Everything seems to catch the light, making for a complex dance of manipulating light sources and camera angles. We were thus captured by [Roman Walls]’ budget rig for taking PCB photos that makes ingenious use of roadside trash to achieve a result.

It was inspired by a video featuring a much more accomplished rig, which he set out to emulate for much less outlay. Instead of an expensive lens, he’s using a Nikon camera with its kit lens. And instead of a tripod there’a a scrap drawer salvaged from the roadside and modified to become a camera holder. Lighting is diffused by baking paper, and the result is a rig that can photograph PCBs with neutral lighting and without annoying highlights.

We especially like work that takes junk and makes something useful from it, and though our purpose isn’t in reverse engineering it’s impressive to see how well the technique reveals the traces. We’ll definitely be experimenting with some of the techniques herein, and those lighting tips might also work with the Hackaday ear camera microscope.

source https://hackaday.com/2020/09/01/perfect-photographs-for-pcb-reverse-engineering/

The Hurricanes are Coming

It’s hurricane season in the northern hemisphere right now, and plenty of news and weather organizations remain dedicated to alerting people if a storm is about to impact their area. There’s no shortage of ways to receive this information, either. We all have our favorite weather app or forecasting site, and there are emergency alerts to cell phones, TV, and radio stations as well. If none of that suits you, though, you can also roll out your own weather alert readerboard.

[Damaged Dolphin] built a weather alert readerboard using a Raspberry Pi and a 64×128 LED matrix. The Raspberry Pi runs Raspbian and uses a HAT from Adafruit, and once connected to the internet pulls down weather information for a specific area using custom python code. From there it can display any emergency weather alerts instantly on the readerboard screen including alerts for hurricanes. It does rely on data from the National Weather Service though, so if that is not available in your area some modifications will need to be made to the code.

While he notes that you probably shouldn’t rely on his non-professional python code exclusively when getting weather information, it would still be a good way of retrieving information about weather events without having to refresh a browser all the time. Once the storms have passed though, be sure you’re prepared for the days following.

Thanks to [b00tfa|l] for the tip!

source https://hackaday.com/2020/08/31/the-hurricanes-are-coming/

An Analog IC Design Book Draft

[Jean-Francois Debroux] spent 35 years designing analog ASICs. He’s started a book and while it isn’t finished — indeed he says it may never be — the 180 pages he posted on LinkedIn are a pretty good read.

The 46 sections are well organized, although some are placeholders. There are sections on design flow and the technical aspects of design. Examples range from a square root circuit to a sigma-delta modulator, although some of them are not complete yet. There are also sections on math, physics, common electronics, materials, and tools.

The text is decidedly practical. For example, there’s a succinct summary of what a MOSFET channel width and length do to parameters such as capacitance, noise, and saturated resistance.

If you prefer a PDF copy, here’s a tip. When viewing the document, click on the full-screen button. Then at the top, you’ll see a download button. The link there looks as though it isn’t a static link, so you’ll need to visit the post yourself to do the download.

It is a lot of work to put a book together and even though this isn’t complete, it is a great start and already useful. If you want some more book recommendations, check out ours. We never fail to recommend The Art of Electronics, too.

source https://hackaday.com/2020/08/31/an-analog-ic-design-book-draft/

A 3D Printed Paint Mixer

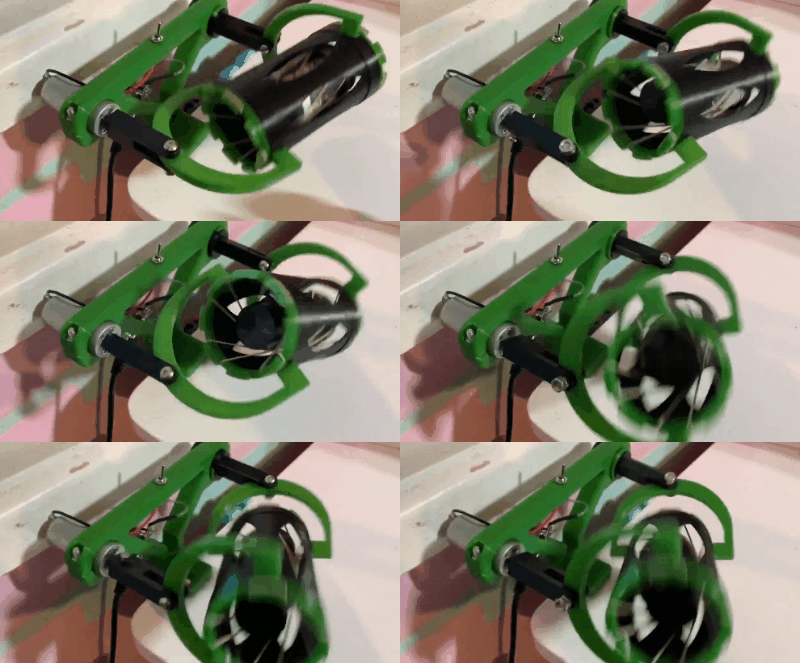
To get the perfect mix for your paint, you need a good shake that is as random as possible. [Mark Rhodes] wanted to automate the process of mixing paint, so he built a 3D printed shaker to thoroughly shake small paint bottles. Using only a single motor, it shakes the bottle along three axes of rotation and one axis of translation.

A cylindrical container is attached to a U-shaped bracket on each end, which in turn is attached to a rotating shaft. Only one of these shafts are powered, the other is effectively an idler. When turned on, it rotates the cylinder partially around the pitch and yaw axis, 360 degrees around the roll axis, and reciprocates it back and forth. The design appears to be based on an industrial mixer known as a “Turbula“. Another interesting feature is how it holds the paint bottle in the cylinder. Several bands are stretched along the inside of the cylinder, and by rotating one of the rings at the end, it creates an hourglass-shaped web that can tightly hold the paint bottle.

The mechanism is mounted on a 3d printed frame that can be quickly clamped to a table. The Twitter post embedded below is a preview for a video [Mark] is working for his Youtube channel, along with which he will also release the 3D files.

Mixing machines come in all shapes and sizes, and we’ve seen a number of 3D printed versions, including a static mixer and a magnetic stirrer.

source https://hackaday.com/2020/08/31/a-3d-printed-paint-mixer/

How to sell your car on Junk Mail

Are you wondering how to sell your car online? There’s a quick and easy option. Place a FREE ad on Junk Mail and connect with potential car buyers across South Africa. Follow the steps below to list your car on Junk Mail.

Here’s how to sell your car on Junk
Mail:

Time needed: 5 minutes.

  1. Complete the ‘Advertiser Details’ section

    a) Enter your email address. If the email field is already filled in, it’s because the browser you’re using remembers you.

    b) Enter your WhatsApp contact number. The green checkbox is automatically ticked to enable WhatsApp on your advert, but if you don’t want WhatsApp enabled, you can untick this box. Please enter the WhatsApp number without spaces in between.

    c) If you have an additional number you would like to add (that is not your WhatsApp number), please click on ‘Add Contact Number’ and fill in your name and contact number. Please enter the contact number without spaces in between.

    If you are advertising as a business, please click on ‘Add Contact Number’ and tick the box for ‘Business Owners’ in the grey block. Enter Advertiser Details | Junk Mail Ad Placement

  2. Select a category and subcategory

    a) Select ‘Vehicles’ under ‘Choose a Category’.

    b) After clicking on ‘Vehicles’, it will give you a list of options to choose from below your selection. You can then select ‘Cars’. Select the vehicles category on Junk Mail

  3. Fill in the vehicle’s details

    After you’ve selected the subcategory, you’ll need to provide the details of the vehicle that you’re selling.

    a) Select the make of your vehicle, e.g. BMW.

    b) Select the model of your vehicle, e.g. 3 Series

    c) Select the model variant, e.g. 335i Convertible

    d) Select the colour of the vehicle, e.g. Black

    e) Type the mileage in km. Please enter the numbers without spaces in between.
    Mileage is the number of kilometres your car has travelled. You can find the mileage on your car’s dashboard. Your car will either have a mechanical odometer, a digital odometer or it will display your mileage on the dashboard behind the steering in newer vehicles. An odometer can usually be found above, below or next to the km/h counter.

    f) Type in the year model for your vehicle. Please note that this is the year the vehicle was manufactured and not the year you purchased the vehicle.

    g) Select your ad type/intention. You can choose from for sale, for rent, on auction, wanted, contact me, and to swop.

    h) Select the condition of your vehicle. You can choose from used, new or demo.

    i) Add in a description of the vehicle. You’ll need to write at least one sentence.
    A description of the vehicle is extremely important. The more information you can provide about the vehicle’s condition and features, the better since it helps people find it. You can mention things like upgraded mags, leather or material upholstery, service and accident history, engine performance, safety features, modifications made and more. You should also explain why you’re selling the car. It’s important to be honest and transparent and mention as much information as possible about the vehicle.

    j) Add the region where you’re selling the vehicle. You can select your province, city and suburb. Fill in the vehicle's details on ad placement | Junk Mail

  4. Upload photos of the vehicle you’re selling

    Complete your ad by adding images of your vehicle. Select the “Choose photos to upload” button or drag and drop the images into the box.

    a) The minimum image resolution accepted is 300 x 200 pixels.

    b) You can add up to 20 images on your advert.

    c) Use high-quality photos that are taken with good, natural lighting.

    d) Make sure the buyer can see the vehicle from all angles, interior and exterior. Also, take a photo of the dashboard in order for the buyer to see the mileage on the vehicle. Add photos to your car advert on Junk Mail

  5. Submit your advert

    Click the big green button at the bottom of your form and submit your advert.

    If you’ve clicked ‘Preview’, you’ll see that at the top of the preview page you can choose to edit or submit your advert. Submit your car advert on Junk Mail

Bonus Tips:

  • If you accidentally close the page or your browser without completing your ad, an email will be sent to you prompting you to complete your advert. It saves your progress as you fill in the form, so you can pick up where you’ve left off if something unexpected happens.
  • You can increase your chances of getting interaction with your advert by completing all the sections of the form. Incomplete adverts that don’t have images are less likely to attract the attention of potential buyers.
  • Check your spelling and grammar. Poorly written adverts are a deterrent to potential buyers.
  • If you’re selling more than one vehicle, create an advert for each one. It will help users find your advert when they search for it on the site or search engines.
  • Required fields will be marked with a red *. This means you cannot submit your advert without filling in these fields. If you try to submit your vehicle advert while one of those fields are incomplete, it will take you back to the first empty field and highlight that field in red.
Fill in all your details on the ad placement form | Junk Mail

Now that you know how to sell your car online, you can visit Junk Mail and place a FREE advert, quickly and easily.

Bright White Night Light Fights E-Waste

E-waste is a gigantic problem, and it can seem impossible as a lone individual to make any kind of dent in it. But [akshar1101] is trying to do their part by looking past the defective aspects of broken, discarded electronics to draw out the possibilities of what’s left.

This friendly night light is made from the PCBs of four broken Nokia 5110 LCD modules. The screens were all toast, but the nice white LEDs that used to light them from the sides work just fine. [akshar1101] cleverly tied all the LED and GND lines together with single right-angle header pins. To power the LEDs, they wired up a JST receptacle to one of the PCBs and connected a 3.7 V lithium battery pack that sits underneath. [akshar1101] diffused the piercing white lights into a soft glow with two pieces of acrylic.

We love to see electronic components get saved from landfills, especially when they can be turned into something useful and beautiful. Something about the traces on these boards makes them visually interesting to us — it’s that little hiccup that interrupts otherwise parallel lines.

If all of your 5110 LCDs are in working order, you could spice one of them up with an RGB backlight.

source https://hackaday.com/2020/08/31/bright-white-night-light-fights-e-waste/

100% Printed Flashlight: Conductive Filament and Melted-in Leads

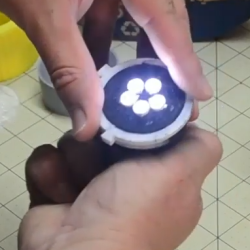
Conductive filament isn’t an ideal electrical conductor, but it’s a 3D-printable one and that’s what makes [Hercemer]’s 3D-printed flashlight using conductive filament work. Every part of the flashlight is printed except for the 9 volt battery and LEDs. Electrically speaking, the flashlight is a small number of LEDs connected in parallel to the terminals of the battery, and turning it on or off is done by twisting or loosening a cap to make or break the connection.

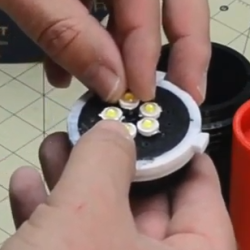
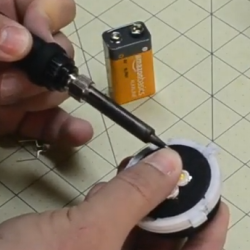
The main part of the build is a 3D-printed conductive cylinder surrounded by a printed conductive ring with an insulator between them. This disk- or pad-shaped assembly forms not only the electrical connection between the LEDs and battery terminals, but also physically holds the LEDs. To attach them, [Hercemer] simply melts them right in. He uses a soldering iron to heat up the leads, and presses them into the 3D-printed conductive block while hot. The 9 V battery’s terminals contact the bottom when the end cap is twisted, and when they touch the conductive assembly the flashlight turns on.


Anticipating everyone’s curiosity, [Hercemer] measured the resistance of his conductive block and measured roughly 350 ohms when printed at 90% infill; lower infills result in more resistance. You can see a video of the assembly and watch the flashlight in action in the video, embedded below.

Heat-setting of the LED leads is clever, and allows a variety of LEDs to be mounted as needed. It’s a lot like brass heat set inserts, which work well with 3D printed plastics and could themselves make a good electrical connection in a similar build.

source https://hackaday.com/2020/08/31/100-printed-flashlight-conductive-filament-and-melted-in-leads/

100% Printed Flashlight: Conductive Filament and Melted-in Leads

Conductive filament isn’t an ideal electrical conductor, but it’s a 3D-printable one and that’s what makes [Hercemer]’s 3D-printed flashlight using conductive filament work. Every part of the flashlight is printed except for the 9 volt battery and LEDs. Electrically speaking, the flashlight is a small number of LEDs connected in parallel to the terminals of the battery, and turning it on or off is done by twisting or loosening a cap to make or break the connection.

The main part of the build is a 3D-printed conductive cylinder surrounded by a printed conductive ring with an insulator between them. This disk- or pad-shaped assembly forms not only the electrical connection between the LEDs and battery terminals, but also physically holds the LEDs. To attach them, [Hercemer] simply melts them right in. He uses a soldering iron to heat up the leads, and presses them into the 3D-printed conductive block while hot. The 9 V battery’s terminals contact the bottom when the end cap is twisted, and when they touch the conductive assembly the flashlight turns on.


Anticipating everyone’s curiosity, [Hercemer] measured the resistance of his conductive block and measured roughly 350 ohms when printed at 90% infill; lower infills result in more resistance. You can see a video of the assembly and watch the flashlight in action in the video, embedded below.

Heat-setting of the LED leads is clever, and allows a variety of LEDs to be mounted as needed. It’s a lot like brass heat set inserts, which work well with 3D printed plastics and could themselves make a good electrical connection in a similar build.

source https://hackaday.com/2020/08/31/100-printed-flashlight-conductive-filament-and-melted-in-leads/

Grasp Kotlin’s Coroutines With This Short Tutorial

Kotlin is a relatively new programming language; a derivative of Java with lots of little handy functional bits such as coroutines. [Foalyy] is porting an app to Android and learning Kotlin at the same time, and after wrapping their mind around coroutines, has written up a concise five-part tutorial on them.

Coroutines in Kotlin are a way to simplify writing asynchronous code, which is code that doesn’t necessarily execute in the order it is written. Coroutines are like light-weight threads that can be launched and managed easily, making it simpler to bridge together blocking and non-blocking code. (However, coroutines are not threads. They are more akin to suspending functions that play very well together.)

[Foalyy] found that the official Kotlin documentation on coroutines went into great detail on how coroutines function, but wanted a more bottom-up approach to understanding how they work and can be used. Luckily for anyone who thinks the same way, [Foalyy] wrote it all up and begins with a great recap of important elements, but if you prefer you can jump straight to the examples.

Kotlin has been around for a while, and readers with sharp memories may recall it was featured in this excellent introduction to what neural networks are and how they work.

source https://hackaday.com/2020/08/31/grasp-kotlins-coroutines-with-this-short-tutorial/

Something To Look Forward To: MCH2021 Call For Participation

As we stare dejectedly at our screens and consider what might have been during the 2020 summer that didn’t quite happen, here’s a little something to look forward to in a future where the COVID-19 pandemic will with any luck be much less of a threat. We have have had precious little in the way of events in 2020, but the call for participation has been announced for one of the largest planned for 2021. MCH2021 will be big European summer camp of next year, and is scheduled for the 6th to the 10th of August at Scoutinglandgoed Zeewolde in the Netherlands province of Flevoland. It will be the latest in a long line of such events going back to 1989, and with such a track record we know it’s going to be a good one.

We know that among our community are many people who’ll be interested in going to MCH, and that each and every one of you will have some fascinating insights that others would love to hear about. The challenge of the MCH orga is to bestow upon you the courage to stand up in front of your peers and talk about it, and from our experience here at Hackaday we’d say that an event such as this one makes for a very good place to give speaking a try. As always they’re interested in all the cool stuff that comes from our diverse community, but to help you along they’ve suggested a theme. Recent events have it’s fair to say presented a challenge to the world, and in that light they state that “we are especially looking for content that is about our ability to recover from extreme events of whatever nature”. We look forward to seeing you there.

source https://hackaday.com/2020/08/30/something-to-look-forward-to-mch2021-call-for-participation/

Sudden Death Rainbow Sorting Game Reveals Your True Colors

When [marzsman]’s eight-year-old daughter thought up a game they could play together involving rainbows, he was all ears. She is a certified rainbow expert, after all. They had a few R&D sessions and came up with a rainbow sorting speed trial game that looks fun to play and fairly easy to build.

Press that blue button on the side, and the RGB LEDs along the top are put in randomized order. The object of this game is simple — just sort the rainbow before the other player by pressing each LED’s corresponding arcade button. Whoever sorts faster is rewarded with a rainbow animation behind their set of way-cool clear buttons.

Inside the laser-cut box is an Espruino, which is a handy little microcontroller that speaks JavaScript. All of the arcade buttons are wired up as a key matrix. The astute among you have noticed there is six of everything, and that’s because indigo light is too hard to distinguish from blue. Check out the intense gameplay after the break.

If [marzsman]’s daughter wants to learn computer science, rainbows are good for that, too.

source https://hackaday.com/2020/08/30/__trashed-38/

Hackaday Links: August 30, 2020

Tech history is rife with examples of bizarre product demos, but we’ve got to think that Elon Musk’s Neuralink demo this week will have to rank up there with the weirdest of them. Elon’s job here was to sell the proposition that having a quarter-sized plug removed from your skull by a surgical robot and having it plunge 1,024 tiny wires into your gray matter will be totally normal and something that all the cool kids will be doing someday. We watched the 14-minute supercut of the demo, which went on for considerably longer than that due to the realities of pig wrangling, and we remain unsold on the technology. Elon selling it as “a Fitbit in your skull, with tiny wires” probably didn’t help, nor did the somewhat terrifying appearance of the surgical robot needed to do the job. On the other hand, Gertrude the Bionic Pig seemed none the worse for her implant, which was reportedly wired to her snout and sending data wirelessly. The demonstration of reading joint positions directly from the brain was honestly pretty neat. If you want to dive deeper into Neuralink, check out Maya’s great article that separates fact from science fiction.

Jerry Carr, NASA astronaut and commander of the third and final crewed Skylab mission, passed away this week at the age of 88. Carr’s Skylab 4 mission was record-breaking in 1974, with the three astronauts living and working in the orbiting workshop for 84 days. The mission contributed a vast amount of information on space medicine and the human factors of long-duration spaceflight. Carr retired from NASA in 1977 and had a long career as an engineer and entrepreneur. It’s sad to lose yet another of the dwindling number of heroes remaining from NASA’s manned-flight heyday.

Speaking of spaceflight, the closest most of us DIYers can get to space is likely courtesy of a helium-filled balloon. If you’ve ever considered sending something — or someone — aloft, you’ll find this helium balloon calculator an invaluable tool. Just plug in the weight of your payload, select from a few common balloon sizes, and the calculator will tell you how many you need and how much gas it will take to fill them. It’s got a second section that tells you how many more balloons it’ll take to get to a certain altitude, should merely getting off the ground not be enough for you.

If 2020 has proven anything, it’s that time is, at best, a negotiable concept. Improbably, September is only a day away, after an August that somehow took forever to go by in the blink of an eye. With that in mind,  October is OSHWA’s Open Hardware Month, with this year’s theme being “Label and Certify”. We’re a little bit in love with the Open Hardware Facts generator, which takes your open-source hardware, software, and documentation license and generates a USDA “Nutrition Facts”-style label for your product. They’ve also added tools to make it easier to get OSHWA certification for your project.

And finally, what would it be like to pilot a giant exoskeleton? Like, a 9,000 pound (4,100 kg), quadrupedal all-terrain beast of a mech? Turns out you can (theoretically) find out for yourself courtesy of Furrion Exo-Bionics and their monster mech, dubbed Prosthesis. The machine has been in development for a long time, with the vision of turning mech racing into the next big thing in sports entertainment. Their Alpha Mech Pilot Training Program will allow mere mortals to learn how to pilot Prosthesis at the company’s proving ground in British Columbia. Details are sparse, so caveat emptor, but it sure looks like fun.

source https://hackaday.com/2020/08/30/hackaday-links-august-30-2020/

Solar Satellite Glows at Night

They say that imitation is the sincerest form of flattery. If we were going to imitate one of master circuit sculptor Mohite Bhoite’s creations, we’d probably pick the little blinky solar satellite as a jumping off point just like [richardsappia] did. It’s cute, it’s functional, and it involves solar power and supercapacitors. What more could you want?

SATtiny is a pummer, which is BEAM robotics speak for a bot that soaks up the sun all day and blinks (or ‘pumms’, we suppose) for as long as it can throughout the night on the juice it collected. This one uses four mini solar panels to charge up a 4 F supercapacitor.

At the controls is an ATtiny25V, which checks every eight seconds to see if the supercapacitor is charging or not as long as there is enough light. Once night has fallen, the two red LEDs will pumm like a pair of chums until the power runs out. Check out the brief demo after the break.

Would you rather have something more nightstand-friendly? Here’s a mini night light sculpture with a friendly glow. If you haven’t started your entry into our Circuit Sculpture Challenge, there’s still plenty of time — the contest runs until November 10th.

source https://hackaday.com/2020/08/30/solar-satellite-glows-at-night/

A PIN Pad Blasting UV Sanitizer

Retailers have instituted enhanced cleaning procedures in response to the COVID-19 pandemic, with an aim to keep frequently touched surfaces as clean as possible. Certainly one of the most commonly handled objects in the entire store is the payment terminal by the register, and the PIN pad specifically. Which is why [Josh Starnes] is working on a UV sterilizer that mounts onto a standard credit card terminal.

It’s a simple enough idea, but as is often the case, figuring out how to properly execute it is where things get tricky. [Josh] has already moved through several design iterations for his 3D printed enclosure in an attempt to make something that’s unobtrusive enough to be practical. The goal is to make something that the user won’t mistake for some kind of skimming device, which can certainly be tricky.

The skeptics in the audience will be happy to hear that [Josh] isn’t bothering with an LED UV source, either. We’ve all seen the pitfalls of trying to sanitize using UV LEDs, so this design goes old school with a small 12 volt UV bulb. That does mean it will need a dedicated power source however, which it seems like he’ll be addressing in the next phase of the project.


source https://hackaday.com/2020/08/30/a-pin-pad-blasting-uv-sanitizer/

OCR Reads Old Newspapers So We Don’t Have To

Plenty of people don’t bother to read the current newspaper, let alone editions that were published over 100 years ago. But there’s a wealth of important historical information buried in these dusty old publications, assuming you can find a way to reliably digitize and index it all. You might think the solution is as simple as running images of the paper through optical character recognition (OCR) software, but as [John Scancella] explains, the problem is a bit more complicated than that.

Stretching the text vertically highlights the columns.

Ultimately, the issue largely comes down to formatting. The OCR software reasonably assumes all the text is in orderly horizontal lines, because in the vast majority of cases, it would be. That’s how you’re reading these words now. But as anyone who’s seen an old time newspaper knows, that’s not how things were necessarily written back then. Pages consisted of multiple narrow columns of stories separated by vertical lines; if the OCR tries to read the page from left to right, the resulting text is a mishmash of several unrelated topics.

The answer is to break all those articles into their own images, but doing that manually at any sort of scale simply isn’t an option. So [John] has been working on a system that uses OpenCV to identify the columns of text and isolate them. He details the multi-step process down in his write-up, and even provides the Python code should you want to give it a spin. But the short version is that the image is converted to grayscale and the OpenCV dilate function is used to stretch the text in the Y dimension. This produces big blobs of white that can easily be picked out with findContours() and snipped into individual images.

It’s not a perfect solution, and there are still a few pitfalls. For one, the name of the paper needs to be removed from the front page before the stretching operation happens. But it’s clearly a step in the right direction, and the results certainly look very promising. Anything that makes OCR more accurate or easier to implement is a win in our book, so we’re excited to see where [John] takes this concept.

source https://hackaday.com/2020/08/30/ocr-reads-old-newspapers-so-we-dont-have-to/

OCR Reads Old Newspapers So We Don’t Have To

Plenty of people don’t bother to read the current newspaper, let alone editions that were published over 100 years ago. But there’s a wealth of important historical information buried in these dusty old publications, assuming you can find a way to reliably digitize and index it all. You might think the solution is as simple as running images of the paper through optical character recognition (OCR) software, but as [John Scancella] explains, the problem is a bit more complicated than that.

Stretching the text vertically highlights the columns.

Ultimately, the issue largely comes down to formatting. The OCR software reasonably assumes all the text is in orderly horizontal lines, because in the vast majority of cases, it would be. That’s how you’re reading these words now. But as anyone who’s seen an old time newspaper knows, that’s not how things were necessarily written back then. Pages consisted of multiple narrow columns of stories separated by vertical lines; if the OCR tries to read the page from left to right, the resulting text is a mishmash of several unrelated topics.

The answer is to break all those articles into their own images, but doing that manually at any sort of scale simply isn’t an option. So [John] has been working on a system that uses OpenCV to identify the columns of text and isolate them. He details the multi-step process down in his write-up, and even provides the Python code should you want to give it a spin. But the short version is that the image is converted to grayscale and the OpenCV dilate function is used to stretch the text in the Y dimension. This produces big blobs of white that can easily be picked out with findContours() and snipped into individual images.

It’s not a perfect solution, and there are still a few pitfalls. For one, the name of the paper needs to be removed from the front page before the stretching operation happens. But it’s clearly a step in the right direction, and the results certainly look very promising. Anything that makes OCR more accurate or easier to implement is a win in our book, so we’re excited to see where [John] takes this concept.

source https://hackaday.com/2020/08/30/ocr-reads-old-newspapers-so-we-dont-have-to/

OCR Reads Old Newspapers So We Don’t Have To

Plenty of people don’t bother to read the current newspaper, let alone editions that were published over 100 years ago. But there’s a wealth of important historical information buried in these dusty old publications, assuming you can find a way to reliably digitize and index it all. You might think the solution is as simple as running images of the paper through optical character recognition (OCR) software, but as [John Scancella] explains, the problem is a bit more complicated than that.

Stretching the text vertically highlights the columns.

Ultimately, the issue largely comes down to formatting. The OCR software reasonably assumes all the text is in orderly horizontal lines, because in the vast majority of cases, it would be. That’s how you’re reading these words now. But as anyone who’s seen an old time newspaper knows, that’s not how things were necessarily written back then. Pages consisted of multiple narrow columns of stories separated by vertical lines; if the OCR tries to read the page from left to right, the resulting text is a mishmash of several unrelated topics.

The answer is to break all those articles into their own images, but doing that manually at any sort of scale simply isn’t an option. So [John] has been working on a system that uses OpenCV to identify the columns of text and isolate them. He details the multi-step process down in his write-up, and even provides the Python code should you want to give it a spin. But the short version is that the image is converted to grayscale and the OpenCV dilate function is used to stretch the text in the Y dimension. This produces big blobs of white that can easily be picked out with findContours() and snipped into individual images.

It’s not a perfect solution, and there are still a few pitfalls. For one, the name of the paper needs to be removed from the front page before the stretching operation happens. But it’s clearly a step in the right direction, and the results certainly look very promising. Anything that makes OCR more accurate or easier to implement is a win in our book, so we’re excited to see where [John] takes this concept.

source https://hackaday.com/2020/08/30/ocr-reads-old-newspapers-so-we-dont-have-to/