Giant Blacksmith Vise From Start To Finish

In any proper workshop you want to be able to securely hold a workpiece, whether it’s a tiny PCB or a heavy piece of forged steel. [Jason Marburger] from Fireball Tool needed a really large heavy-duty vise, so he built himself a massive 1490 lbs / 676 kg floor-standing blacksmith vise from scratch.

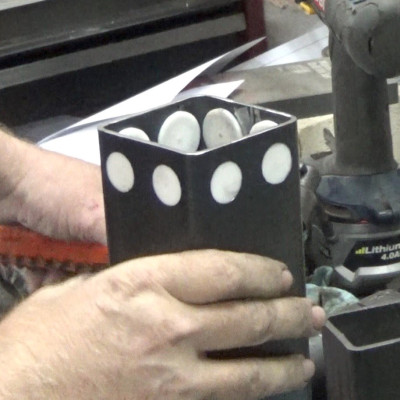
Blacksmith vises are designed to take a lot of heavy abuse, such as holding heavy pieces of steel that are being hammered. [Jason]’s vise stands about 3 feet tall, and the main frame components were cut from 1 5/8 inch (41.3 mm) steel with a water jet cutter. The jaws are operated with a large hand wheel connected to a lead screw. Bearings on the lead screw allow the hand wheel to be spun like a flywheel, allowing it to be quickly opened and closed. The weight of the moving jaw keeps the lead screw under tension, eliminating any backlash. This allows for really fine control over the holding force, which [Jason] demonstrates by carefully clamping a tiny screw. With the hand wheel alone the vise can exert 12880 lb / 5800 kg, but a hydraulic lift was also added, boosting the force to 30000 lbs. The deep throat allows a large object to be clamped, and the jaws can also be offset to clamp something to the side of the vise.

The vise was beautifully finished with powder coating and pin striping, which will no doubt wear over time if it’s properly used, but the vise itself should last a few lifetimes. While this isn’t something you can really build in a home workshop, it is always inspiring to see what is possible with a bit more tools, knowledge and skill. The build is documented in a 4 part series (link in first paragraph), but we’ve added a short highlights reel below for your view pleasure.

[Jason] really knows his way around a piece of steel, and we’ve previously covered his techniques for cleaning up the inside to square tubing to make telescoping tubes. Another interesting recent vise build was [Alexandre Chappel]’s wide bench vise that used 3D printed gears to drive two lead screws simultaneously.

source https://hackaday.com/2020/11/05/giant-blacksmith-vise-from-start-to-finish/

A Featherweight Direct Drive Extruder in a Class of Its Own

Even a decade later, homebrew 3D printing still doesn’t stop when it comes to mechanical improvements. These last few months have been especially kind to lightweight direct-drive extruders, and [lorinczroby’s] Orbiter Extruder might just set a paradigm for a new kind of direct drive extruder that’s especially lightweight.

Weighing in at a mere 140 grams, this setup features a 7.5:1 gear reduction that’s capable of pushing filament at speeds up to 200 mm/sec. What’s more, the gear reduction style and Nema 14 motor end up giving it an overall package size that’s smaller than any Nema 17 based extruder. And the resulting prints on the project’s Thingiverse page are clean enough to speak for themselves. Finally, the project is released as open source under a Creative Commons Non-Commercial Share-Alike license for all that (license-respecting!) mischief you’d like to add to it.

This little extruder has only been around since March, but it seems to be getting a good amount of love from a few 3D printer communities. The Voron community has recently reimagined it as the Galileo. Meanwhile, folks with E3D Toolchangers have been also experimenting with an independent Orbiter-based tool head. And the Annex-Engineering crew has just finished a few new extruder designs like the Sherpa and Sherpa-Mini, successors to the Ascender, all of which derive from a Nema 14 motor like the one in the Orbiter. Admittedly, with some similarity between the Annex and Orbiter designs, it’s hard to say who inspired who. Nevertheless, the result may be that we’re getting an early peek into what modern extruders are starting to shape into: smaller steppers and more compact gear reduction for an overall lighter package.

Possibly just as interesting as the design itself is [lorinczroby’s] means of sharing it. The license terms are such you can faithfully replicate the design for yourself, provided that you don’t profit off of it, as well as remix it, provided that you share your remix with the same license. But [lorinczroby] also negotiated an agreement with the AliExpress vendor Blurolls Store where Blurolls sells manufactured versions of the design with some proceeds going back to [lorinczroby].

This is a clever way of sharing a nifty piece of open source hardware. With this sharing model, users don’t need to fuss with fabricating mechanically complex parts themselves; they can just buy them. And buying them acts as a tip to the designer for their hard design work. On top of that, the design is still open, subject to remixing as long as remixers respect the license terms. In a world where mechanical designers in industry might worry about having their IP cloned, this sharing model is a nice alternative way for others to both consume and build off of the original designer’s work while sending a tip back their way.


source https://hackaday.com/2020/11/05/a-featherweight-direct-drive-extruder-in-a-class-of-its-own/

Quadcopter with Tensegrity Shell Takes A Beating And Gets Back Up

Many of us have become familiar with the distinctive sound of multirotor toys, a sound frequently punctuated by sharp sounds of crashes. We’d then have to pick it up and repair any damage before flying fun can resume. This is fine for a toy, but autonomous fliers will need to shake it off and get back to work without human intervention. [Zha et al.] of UC Berkeley’s HiPeRLab have invented a resilient design to do so.

We’ve seen increased durability from flexible frames, but that left the propellers largely exposed. Protective bumpers and cages are not new, either, but this icosahedron (twenty sided) tensegrity structure is far more durable than the norm. Tests verified it can survive impact with a concrete wall at speed of 6.5 meters per second. Tensegrity is a lot of fun to play with, letting us build intuition-defying structures and here tensegrity elements dissipate impact energy, preventing damage to fragile components like propellers and electronics.

But surviving an impact and falling to the ground in one piece is not enough. For independent operation, it needs to be able to get itself back in the air. Fortunately the brains of this quadcopter has been taught the geometry of an icosahedron. Starting from the face it landed on, it can autonomously devise a plan to flip itself upright by applying bursts of power to select propeller motors. Rotating itself face by face, working its way to an upright orientation for takeoff, at which point it is back in business.

We have a long way to go before autonomous drone robots can operate safely and reliably. Right now the easy answer is to fly slowly, but that also drastically cuts into efficiency and effectiveness. Having flying robots that are resilient against flying mistakes at speed, and can also recover from those mistakes, will be very useful in exploration of aerial autonomy.

[IROS 2020 Presentation video (duration 14:16) requires free registration, available until at least Nov. 25th 2020.]

source https://hackaday.com/2020/11/05/quadcopter-with-tensegrity-shell-takes-a-beating-and-gets-back-up/

Rebuilding a Hero (the Robot, not the Sandwich)

When [Scott Baker] found a Heathkit Hero Junior on eBay, he grabbed it. He had one as a kid, but it was long sold. The robot arrived with no electronics, so the first order of business is to give it some new modern brains including an ATMega328 and a Raspberry Pi. You can see the start of the project in the video below.

So far, you can see a nice teardown of the chassis and what’s left of the little robot’s drive system. This wasn’t the big Hero-1 that you probably remember, but it was still a pretty solid platform, especially for the time it was on the market.

[Scott] took over the project from the eBay seller. The original plan included some 3D printed parts to mount a web camera and some other sensors. If you’ve ever wanted to see someone characterize an unfamiliar stepper motor, this is your chance.

We don’t know what happened to the original electronics, but we do know that the original Hero Jr. had a 6808 CPU with a whopping 2 K of RAM and 32 K of ROM. You could upgrade to 24 K of RAM. The original also had an SC-01 speech synthesizer, along with sensors for light and sound. There was also a sonar sensor and two 6 V rechargeable batteries. For the advanced user, you could connect a serial port and use the BASIC cartridge.

By the end of the video, [Scott] could drive the thing around using a joystick. We are sure there’s more to come. Meanwhile, if you want to see the different models Heathkit made over eight years, check out the Old Robots Site. According to them, Heath sold 4,000 of these little monsters along with some 17,000 of the bigger siblings.

We’ve seen Hero upgrades before, of course. Heathkit is back, sort of, although we don’t think we’ll see the likes of the Hero family of robots again anytime soon.

source https://hackaday.com/2020/11/05/rebuilding-a-hero-the-robot-not-the-sandwich/

DualShock Flight Simulator Yoke

Aircraft control interfaces can be divided into stick or yoke, with the stick being more popular for flight simulators. [Akaki Kuumeri] has been designing some ingenious 3D printed adaptors for game console controllers, and his latest build is a yoke adaptor for the PlayStation DualShock Controller.

Like his previous joystick/throttle combination, this yoke makes use of a series of ball and socket links to convert the yoke’s push/pull and rotation motion into the appropriate inputs on the controller’s thumbs sticks. All the components are 3D printed except for rubber bands to provide spring tension. On the sliding contact surfaces between the different components, [Akaki] specifically designed the parts to slide along the grain (layer lines) to allow for smooth motion without resorting to bearings.

If you want an absolute minimalist yoke, tape some potentiometers to a desk drawer. Or you can go to the other end of the scale and build a complete cockpit. With the arrival of Microsoft Flight Simulator 2020, we’ll be seeing a lot of controller builds.

source https://hackaday.com/2020/11/04/dualshock-flight-simulator-yoke/

Building Walks with Robot Legs

The Shanghai Evolution Shift company has just pulled off one of the most impressive robotic projects we’ve ever seen – making a building walk using 198 robotic legs. We’ve all seen structural relocation documentaries where large buildings are moved to new locations. This involves jacking up the building and installing a supporting platform on wheels, then carefully towing the building to its new site.

But the T shape of the five story, 7600 ton Lagena elementary school was problematic, and the route to the new site involved taking a curved path and rotating the building. This ruled out the more traditional methods of relocation. Robot legs came to the rescue. It took 18 days for the building to walk 62 meters and rotate 21 degrees to its new home. This project is part of a trend to preserve historic architecture rather than bulldoze everything to make space for modern buildings.

After watching the video below, we think you’ll agree that this is a unique application of robotics and an amazing engineering feat. Disclaimer – don’t try this at home. Thanks to [Chuckz] for sending us this tip.


Also, you can see a time-lapse video of the move.

source https://hackaday.com/2020/11/04/building-walks-with-robot-legs/

3D Printed Workshop Lamp Uses A Few Neat Tricks

As far as light fittings go, store bought is fine, but it’s hard to beat something you’ve built yourself from the ground up. [Heliox] demonstrates this well, with a 3D-printed workshop lamp that looks the business and is functional, too.

The lamp has plenty of neat design touches that speak to [Heliox]’s experience in the 3D printed arts. The articulating arms are modular, and feature integrated cable guides. The lamp base features nuts inserted mid-print for easy assembly, and the swivel is actually a two-piece mechanism printed as a single assembly. The table clamp uses a large screw, and the benefit of 3D printing means its easy to customise to suit any individual table. Using black and orange filaments gives the lamp a proper industrial look, and the bright LED strips are perfect for illuminating a bench for fine detailed work.

It’s a great addition to [Heliox]’s workspace, and the tall articulated design means it can cast light without getting in the way of what you’re doing. We’ve featured her work before, too – like this glorious infinity cube. Video after the break.

source https://hackaday.com/2020/11/04/3d-printed-workshop-lamp-uses-a-few-neat-tricks/

Minimalist Low Power Supercapacitor Sensor Node

One of the biggest challenges for wireless sensor networks is that of power. Solar panels usually produce less power than you hoped, especially small ones, and designing super low power circuits is tricky. [Strange.rand] has dropped into the low-power rabbit hole, and is designing a low-cost wireless sensor node that runs on solar power and a supercapacitor.

The main components of the sensor node is an ATMega 328P microcontroller running at 4Mhz, RFM69 radio transceiver, I2C temperature/humidity sensor, 1F supercapacitor, and a small solar panel. The radio, MCU, and sensor all run on 1.5-3.6V, but the supercap and solar panel combination can go up to 5.5V. To regulate the power to lower voltage components a low-drop voltage regulator might seem like the simplest solution, but [strange.rand] found that the 3.3V regulator was consuming an additional 20uA or more when the voltage dropped below 3.3V. Instead, he opted to eliminate the LDO, and limit the charging voltage of the capacitor to 3.6V with a comparator-based overvoltage protection circuit. Using this configuration, the circuit was able to run for 42 hours on a single charge, transmitting data once per minute while above 2.7V, and once every three minutes below that.

Another challenge was undervoltage protection. [strange.rand] discovered that the ATmega consumes an undocumented 3-5 mA when it goes into brown-out below 1.8V. The small solar panel only produces 1 mA, so the MCU would prevent the supercapacitor from charging again. He solved this with another comparator circuit to cut power to the other components.

We see challenges like these a lot with environmental sensors and weather stations with smaller solar panels. For communication, low power consumption of a sub-Ghz radio is probably your best bet, but if you want to use WiFi, you can get the power usage down with a few tricks.

source https://hackaday.com/2020/11/04/minimalist-low-power-supercapacitor-sensor-node/

Quick and Simple Milliohmmeter

User [mircemk] presents his “MiliOhm Meter” project which you can build with an Arduino, a handful of common parts from your lab, and a cigar box.  It doesn’t get much simpler than this, folks.  While this is something you won’t be getting calibrated with NIST traceability, it looks like a fun and quick project that’s more than suited for hobbyist measurements.  It’s not only easy to build, the Arduino sketch is less than thirty lines of code.  This is a great learning project, plus you get something useful for your lab when its finished.

We like the creative use of colored tape instead of paint on the project’s box.  If this style suits you, [mircemk] has published several other similar lab instrument projects on his Hackaday.io page, including a frequency meter, an audio spectrum analyzer, and an auto-ranging capacitance meter to name a few.  You might recognize him from some other projects we’ve featured, such as the crazy kinematic arms that set a clock’s hands every minute.


source https://hackaday.com/2020/11/04/quick-and-simple-milliohmmeter/

DIY Heavy Duty Linear Slides

The rise of cost-effective CNC platforms like 3D printers, routers, and laser cutters has gone hand in hand with the availability of affordable and accurate linear rails and extrusions. However, they quickly become expensive when you need something for heavy loads. [Andy Pugh] found himself in need of a large linear slide, so he resorted to making his own with steel square tubing and a bit of PTFE (Teflon).

The PTFE slider/spacers

[Andy] needed a compact motorcycle lift for his small workshop, so he designed one with a single vertical tube that mounts on his floor. The moving part of the lift is a slightly larger tube, onto which the motorcycle mounts. To allow the outer part to slide easily [Andy] machined a set of 16 PTFE spacers to fit between the surfaces of the tubes. The spacers have a small shoulder that lets them mount securely in the outer tube without pushing out. After a bit of fine-tuning with a file, it slides smoothly enough for [Andy]’s purposes. With a large lead screw mounted onto the lift, he can easily lift his 200 kg motorcycle with a cordless drill, without taking up all the floor space required by a traditional motorcycle lift.

Although the Teflon spacers will wear with regular use and, they are more than good enough for the occasional motorcycle service, and are also easy to replace. You may not want to use this on your next CNC machine build, but it is a handy blueprint to keep in your mental toolbox for certain use-cases. These spacers were machined on a lathe, but we found that very similar looking PTFE parts are sold as “wrist pin buttons” for the piston of old air cooled VW engines, and could be modified for the purpose.

For other lifting applications, check out this hydraulic workbench, and this forklift for moving stuff in your crawl space without crawling.

source https://hackaday.com/2020/11/04/diy-heavy-duty-linear-slides/

DIY Heavy Duty Linear Slides

The rise of cost-effective CNC platforms like 3D printers, routers, and laser cutters has gone hand in hand with the availability of affordable and accurate linear rails and extrusions. However, they quickly become expensive when you need something for heavy loads. [Andy Pugh] found himself in need of a large linear slide, so he resorted to making his own with steel square tubing and a bit of PTFE (Teflon).

The PTFE slider/spacers

[Andy] needed a compact motorcycle lift for his small workshop, so he designed one with a single vertical tube that mounts on his floor. The moving part of the lift is a slightly larger tube, onto which the motorcycle mounts. To allow the outer part to slide easily [Andy] machined a set of 16 PTFE spacers to fit between the surfaces of the tubes. The spacers have a small shoulder that lets them mount securely in the outer tube without pushing out. After a bit of fine-tuning with a file, it slides smoothly enough for [Andy]’s purposes. With a large lead screw mounted onto the lift, he can easily lift his 200 kg motorcycle with a cordless drill, without taking up all the floor space required by a traditional motorcycle lift.

Although the Teflon spacers will wear with regular use and, they are more than good enough for the occasional motorcycle service, and are also easy to replace. You may not want to use this on your next CNC machine build, but it is a handy blueprint to keep in your mental toolbox for certain use-cases. These spacers were machined on a lathe, but we found that very similar looking PTFE parts are sold as “wrist pin buttons” for the piston of old air cooled VW engines, and could be modified for the purpose.

For other lifting applications, check out this hydraulic workbench, and this forklift for moving stuff in your crawl space without crawling.

source https://hackaday.com/2020/11/04/diy-heavy-duty-linear-slides/

Scratch Built 3D Printer Goes Big

There was a time, not so very long ago, that buying a reliable 3D printer was a fairly expensive proposition. Many chose to build their own printer instead, and for a few years, we were flooded with very impressive custom designs. But as you might expect, with the prices on decent 3D printers now having hit rock bottom, the custom builds have largely dried up.

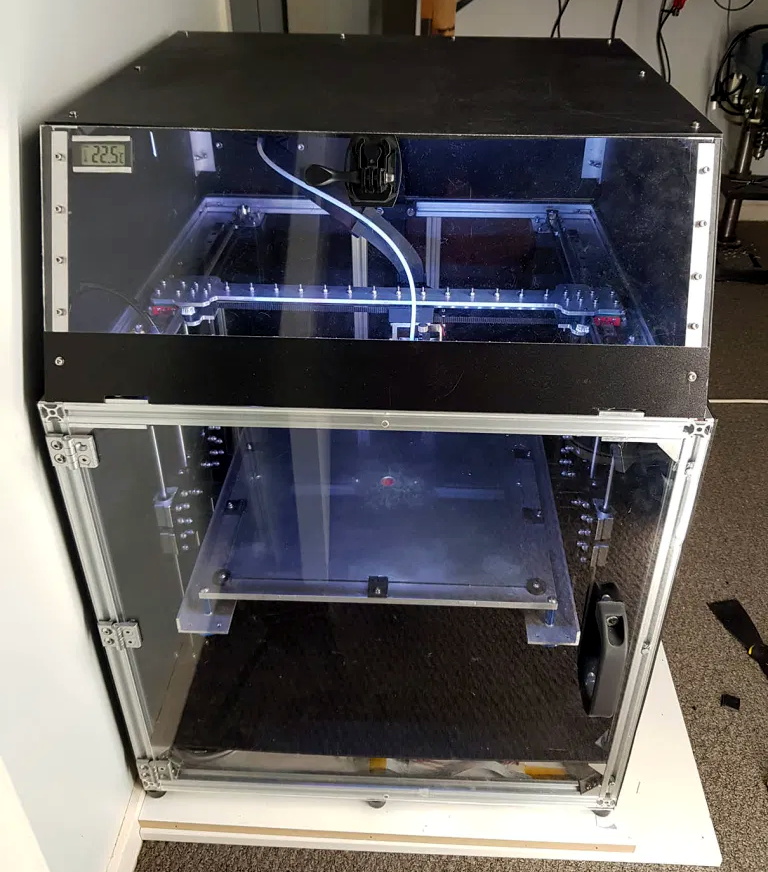
Arguably, the only reason you’d build rather than buy in 2020 is if you want something very specific. Which is precisely how [Joshendy] ended up building the Big F… Printer or BFP. No doubt the F stands for Fun, or Friendly. Either way, it’s certainly something special. With a 300 mm³ build volume and heavy-duty Z axis, this fully enclosed CoreXY machine is ready to handle whatever he throws at it.

It did take [Joshendy] a few attempts to get everything the way he wanted though. In fact, the prototype for the machine wasn’t even CoreXY, it started as an H-Bot. In his write-up he goes over the elements of the BFP did that didn’t quite live up to his expectations, and what he replaced them with. So when wobbly leadscrews and a knock-off V6 hotend both left something to be desired, they ended up getting replaced with ball screws and an authentic E3D Hemera, respectively.

To control this monster, [Joshendy] is using OctoPrint on a Raspberry Pi and a BigTreeTech SKR Pro running Klipper. OctoPrint gives him the ability to control and monitor the printer remotely, complete with a camera mounted inside the enclosure to keep an eye on things, while the Klipper firmware on the SKR board pushes all the computationally expensive aspects of 3D printing onto the vastly more powerful ARM chip in the Pi. The end result is faster and more accurate control of the steppers through the TMC2130 drivers than would be possible otherwise.

If you don’t mind tinkering, a cheap entry-level desktop 3D printer is good enough for most of hackers and makers. If you need something more capable or more reliable, there’s always higher-end options from the likes of Prusa and Ultimaker. Very few people need to build something as serious as the BFP, but when the do, we’re glad they send them our way.

source https://hackaday.com/2020/11/04/scratch-built-3d-printer-goes-big/

“Brain in a Vat” 6502

The 6502 was a revolutionary processor for its time. Offered at a small fraction of the cost of other processors available when it was released, it became adopted in such iconic computers at the Atari 2600, the Apple II, the NES, and the Commodore 64. For that reason it’s still extremely popular among retrocomputing enthusiasts who will often go to great lengths to restore these computers or build them from scratch. [jamesbowman] had an idea to build a 6502-based computer with the processor only, leaving the rest of the computer up to an FPGA.

He describes the system as a “brain in a vat” since a real 6502 is used as the “brain” and all other functions are passed off to the FPGA. In his build he uses an FPGA board with built-in graphics abilities, but the truly interesting part of this build is how the FPGA handles memory. If a particular value is placed on the data bus of the 6502, it loops forever through the entire memory and executes all of the instructions it finds. This saved a lot of time getting this system up and running, and he is able to demonstrate it by showing a waveform on the video output of the device.

Of course you can take an FPGA and emulate an entire computer based on a 6502, but using the actual silicon in a build like this really ensures that the user can learn and understand the hardware involved without some of the other tedium of doing things such as converting old video signals to HDMI for example. It’s a great take on retrocomputing that we expect to see more of in the future.

source https://hackaday.com/2020/11/03/brain-in-a-vat-6502/

Make Some Noise or Simulate It, at Least

Noise is a fact of life, especially in electronic circuits. But on our paper schematics and just as often our simulations, there is no noise. If you are blinking an LED on a breadboard, you probably don’t care. But if you are working on something meatier, handling electrical noise gracefully is important and simulation can help you. [Ignacio de Mendizábal] has a great piece on simulating EMC filters using LTSpice that can get you started.

There are many ways of classifying noise and [Ignacio] starts with common-mode versus differential noise, where common-mode is noise with current flowing in the same direction without regard to the circuit’s normal operation, and differential noise having currents that flow in the opposite direction of normal current flow.

The post shows how to model both types of noise and also covers how to model real-world circuit elements that will more accurately capture the behavior of a real filter. Armed with a good model of noise and some Bode plots, your filter design work will be much easier and robust.

EMC, or electromagnetic compatibility, is crucial for commercial devices. Testing is expensive, so the more you can work out in a simulation, the better. If you need a kick start on using LTSpice, we got you.

source https://hackaday.com/2020/11/03/make-some-noise-or-simulate-it-at-least/

E-Paper Weather Display is a Great Base to Build From

As e-paper modules have become more affordable, we’ve started to see them pop up more and more in hacker projects. It used to be that you had to force a second-hand Kindle to do your bidding, but now you can buy just the screen itself complete with a header to plug right into your Raspberry Pi. It will still cost you as much as a used Kindle…but at least it comes with some documentation and there are Python libraries to talk to it.

But where to start? If you need some inspiration, and perhaps a little source code, this very slick weather display put together by [James Howard] is a great as baseline. Not that it really needs any additional refinement, as we think it already looks gorgeous. But rather than starting from scratch for your own project, it would be much easier to graft some additional functionality onto his code.

A lot of that has to do with how concise and well commented his code is. We’ve seen enough of these projects to know the kind of spaghetti that’s often running on the backend, but there’s none of that here. [James] assembles the display using the powerful Pillow graphics library, which lets you draw primitives and drop in text and icons with just a couple lines of code.

Once all the data is plugged in, the entire screen is saved as an image file which is then opened up on the e-paper display. Even if you aren’t a Python expert, you should be able to understand what’s happening and how to bend it to your will.

We’ve always had high hopes for electronic paper, and it seems the technology might finally be hitting critical mass. While it’s still a bit expensive, we’ve started seeing it pop up in unexpected places to great effect. Hopefully projects like this one will inspire others to take the B&W plunge.

source https://hackaday.com/2020/11/03/e-paper-weather-display-is-a-great-base-to-build-from/

E-Paper Weather Display is a Great Base to Build From

As e-paper modules have become more affordable, we’ve started to see them pop up more and more in hacker projects. It used to be that you had to force a second-hand Kindle to do your bidding, but now you can buy just the screen itself complete with a header to plug right into your Raspberry Pi. It will still cost you as much as a used Kindle…but at least it comes with some documentation and there are Python libraries to talk to it.

But where to start? If you need some inspiration, and perhaps a little source code, this very slick weather display put together by [James Howard] is a great as baseline. Not that it really needs any additional refinement, as we think it already looks gorgeous. But rather than starting from scratch for your own project, it would be much easier to graft some additional functionality onto his code.

A lot of that has to do with how concise and well commented his code is. We’ve seen enough of these projects to know the kind of spaghetti that’s often running on the backend, but there’s none of that here. [James] assembles the display using the powerful Pillow graphics library, which lets you draw primitives and drop in text and icons with just a couple lines of code.

Once all the data is plugged in, the entire screen is saved as an image file which is then opened up on the e-paper display. Even if you aren’t a Python expert, you should be able to understand what’s happening and how to bend it to your will.

We’ve always had high hopes for electronic paper, and it seems the technology might finally be hitting critical mass. While it’s still a bit expensive, we’ve started seeing it pop up in unexpected places to great effect. Hopefully projects like this one will inspire others to take the B&W plunge.

source https://hackaday.com/2020/11/03/e-paper-weather-display-is-a-great-base-to-build-from/

E-Paper Weather Display is a Great Base to Build From

As e-paper modules have become more affordable, we’ve started to see them pop up more and more in hacker projects. It used to be that you had to force a second-hand Kindle to do your bidding, but now you can buy just the screen itself complete with a header to plug right into your Raspberry Pi. It will still cost you as much as a used Kindle…but at least it comes with some documentation and there are Python libraries to talk to it.

But where to start? If you need some inspiration, and perhaps a little source code, this very slick weather display put together by [James Howard] is a great as baseline. Not that it really needs any additional refinement, as we think it already looks gorgeous. But rather than starting from scratch for your own project, it would be much easier to graft some additional functionality onto his code.

A lot of that has to do with how concise and well commented his code is. We’ve seen enough of these projects to know the kind of spaghetti that’s often running on the backend, but there’s none of that here. [James] assembles the display using the powerful Pillow graphics library, which lets you draw primitives and drop in text and icons with just a couple lines of code.

Once all the data is plugged in, the entire screen is saved as an image file which is then opened up on the e-paper display. Even if you aren’t a Python expert, you should be able to understand what’s happening and how to bend it to your will.

We’ve always had high hopes for electronic paper, and it seems the technology might finally be hitting critical mass. While it’s still a bit expensive, we’ve started seeing it pop up in unexpected places to great effect. Hopefully projects like this one will inspire others to take the B&W plunge.

source https://hackaday.com/2020/11/03/e-paper-weather-display-is-a-great-base-to-build-from/

Computer Vision Maps Christmas Lights

There’s a small but dedicated group of folks out there who spend all year planning their Christmas decorations. These aren’t simple lawn ornaments or displays, either, but have evolved into complex lightning performances that require quite a bit of computer control. For some things, hooking up a relay to a microcontroller can get the job done, but [Andy] has turned to computer vision to solve some of the more time-consuming aspects of these displays.

Specifically, [Andy] has a long string of programmable RGB LED lights to wrap around a Christmas tree, but didn’t want to spend time manually mapping out each light’s location. So he used OpenCV to register the locations of the LEDs from three different camera angles, and then used a Python script to calculate their position in the 3D space. This means that he will easily be able to take the LEDs down at the end of the holidays and string them back up next year without having to do the tedious manual mapping ever again.

While [Andy] notes that he may have spent more time writing the software to map out the LEDs than manually doing it himself, but year-after-year it may save him a lot of time and effort, not to mention the benefits of a challenge like writing this software in the first place. If you want to get started on your own display this year, all you really need is some lights and a MIDI controller.

source https://hackaday.com/2020/11/03/computer-vision-maps-christmas-lights/

Useless Box with Attitude Isn’t Entirely Useless

What is it about useless machines that makes them so attractive to build? After all, they’re meant to be low-key enraging. At this point, the name of the game is more about giving that faceless enemy inside the machine a personality more than anything else. How about making it more of a bully with laughter and teasing? That’s the idea behind [alexpikkert]’s useless machine with attitude — every time you flip a switch, the creature of uselessness inside gets a little more annoyed.

In this case the creature is Arduino-based and features two sound boards that hold the giggles and other sounds. There are three servos total: one for each of the two switch-flipping fingers, and a third that flaps the box lid at you. This build is wide open, and [alexpikkert] even explains how to repurpose a key holder box for the enclosure. Check out the demo after the break.

We love a good useless machine around here, especially when they take a new tack. This one looks like any other useless machine, but what’s happening inside may surprise you.

source https://hackaday.com/2020/11/03/useless-box-with-attitude-isnt-entirely-useless/

Dumping A N64 Development Cartridge Safely

Retro gaming enthusiasts have always had great interest in rarities outside the usual commercial titles. Whether they be early betas, review copies, or even near-complete versions of games that never made it to release, these finds can be inordinately valuable. [Modern Vintage Gamer] recently came across a pre-release version of Turok 3 for the Nintendo 64, and set about dumping and preserving the find. (Video, embedded below.)

With one-off cartridges like these, it’s important to take the utmost care in order to preserve the data onboard. Simply slapping it into a regular console might boot up the game, but carries with it a non-zero chance of damaging the cart. Instead, the first step taken was to dump the cart for archival purposes. When working with a prototype cart, commodity dumpers like the Retrode aren’t sufficient to do the job. [Modern Vintage Gamer] notes that a Doctor V64 or Gameshark with a parallel port could work, but elects to use a more modern solution in the form of the Ultrasave and 64drive.

With the cartridge backed up and duplicated onto the 64drive, the code can be run on a real console without risk of damage to the original. At first glance, the game appears similar to the final retail version. Analysis of the dump using a file comparison tool suggests that the only differences between the “80% Complete” ROM and the retail edition are headers, leading [Modern Vintage Gamer] to surmise that the game may have been rushed to release.

While in this case the dump didn’t net an amazing rare version of a retro game, [Modern Vintage Gamer] does a great job of explaining the how and why of the process of preserving a vintage cartridge. We look forward to the next rare drop that shakes up the retro world; we’ve seen efforts on Capcom arcade boards net great results. Video after the break.

source https://hackaday.com/2020/11/02/dumping-a-n64-development-cartridge-safely/

TTL Simulator in JavaScript

How do you celebrate your YouTube channel passing the 7400 subscriber mark? If you are [Low Level JavaScript], the answer is obvious: You create a 7400 TTL logic simulator in JavaScript. The gate simulations progress from simple gates up to flipflops and registers. You could probably build a 7400-based computer virtually with this code.

In addition to just being fun and interesting, there were a lot of links of interest in the video (see below) and its comments. For one, someone watching the channel took the code and made a Verilog-like IDE that is impressive.

Granted, you could just go to EDAPlayground, write some Verilog, and simulate it using normal tools. Somehow, though, that doesn’t seem as much fun as virtually connecting 7400 chips together. Don’t ask us why.

There’s also a link to an impressive open source web-based logic simulator. You can grab the code for it on GitHub if you wanted to make modifications or just look at how it works.

The video mentions that [Ben Eater’s] breadboard computer was inspiring for this project and we’d love to see someone do a simulation for the browser using this kind of technology. If you want to see an even more primitive computer simulated in your browser, try GENIAC.

source https://hackaday.com/2020/11/02/ttl-simulator-in-javascript/

Building A Top-Notch Electret Microphone

Electret microphones are capable of high-quality output, and are prized for their smooth frequency response. However, unlike other types, they can’t simply be plugged directly into a mixing desk. Instead, they require special high-impedence circuitry to extract the audio signal for recording. [DJJules] is a big fan of these microphones, and decided to build a high-quality, easy to use circuit that he has shared with the community. 

The goal of the project was to create a circuit to match the TSB2555B electret capsule that could be used with phantom power, and that could be built with easily obtainable parts. [DJJules] had used FETs in the past, but grew tired of routinely having to hunt for obsolete parts. Instead, this design relies on a dual OPA1642 op-amp, with its low quiescent current meaning it’s perfect for running off phantom power. This means the microphone needs no batteries, and using a dual op-amp enables the circuit to properly drive a balanced audio connection.

The circuit is designed to fit inside a common BM700 or BM800 microphone body, and the PCB can be ordered from PCBWay for those interested in building their own. There’s also a saddle on Shapeways that’s designed to neatly mount the electret capsule within the housing.

The final results are impressive, and this project would make a great entry into the DIY microphone space for anyone eager to start building their own gear. Of course, there are simpler builds if you’re looking for an easier way to get started. Video after the break.

source https://hackaday.com/2020/11/02/building-a-top-notch-electret-microphone/

Peter Sripol’s DIY Electric Ultralight MK4

Peter Sripol really likes building gravity defying death traps. He recently flew the fourth ultralight, which he designed and built himself. For a taste of what’s going on here, the wings have aluminum tube spars and are made of hot-wire-cut styrofoam sections.

To keep the plane simple, he got rid of ailerons entirely. For roll stabilization he angled up the wings noticeably, adding dihedral. This gives the aircraft passive stability, because as it rolls to a side, the upper wing’s lift decreases and the lower wing’s lift increases, forcing the plane to correct itself. Interestingly he kept the rudder controls on pedals instead of moving it to the stick, so the stick only controls the elevator.

It is powered by a single large brushless electric motor borrowed from the OpenPPG project. On the first test he used a two-bladed propeller, with a small pitch angle which required full throttle to keep flying. It can be compared to driving a car only in first gear. By moving to a three bladed propeller with a higher pitch angle, and increasing the length of the wings for more lift, [Peter] was able to cruise comfortably at about 30 MPH or 48 km/h.

Although this aircraft definitely performed better than [Peter]’s previous ultralight builds, piloting something like this isn’t for the faint of heart. Although he does extensive weight-loading and thrust testing before taking to the air, adding tail weight to piloted aircraft by simply taping a water bottle to the tail just felt wrong. But we aren’t aviation experts, so we won’t pass final judgement.

source https://hackaday.com/2020/11/02/peter-sripols-diy-electric-ultralight-mk4/

International Champ of Champions Race @ Mahem Raceway

On 5 October 2019, Mahem Raceway hosted the exhilarating 50-year racing legends race and now they’re doing it again, but this time, with a little bit of a twist… On 25 January, they will celebrate 20 years of international racing in South Africa and for the very first time in Oval history, they will have a 50-lap final with a compulsory pitstop! Legendary racers from South Africa, Holland, United Kingdom, and Germany will be battling it out to see who will be the King of the Ring! This is a race day you don’t want to miss!

Info about the day:

When:

Where:

Time:


Price:

25 January 2020

Mahem Raceway (View Map)

Gates open at 10:00
Racing starts at 14:00

R100 per adult
R50 per child (7 – 12 years) – Free for kids under 7 years
R50 for secure parking

Supporting Classes:

  • Ninja Midgets
  • Junior
    Stockrods
  • 1660
    Modifieds
  • Ladies Cup
  • Open Class

Some of the Racers:

  • Dave Leech
  • Deane Wood
  • Boxer Jack
  • Joe Reynolds
  • Frank Nohring
  • Gerton Boes
  • James Morris
  • Chantelle
    Lewis
  • Marnus du
    Plessis
  • Donovan
    Vorster
  • Johan Vorster
  • Tony
    Loosemore
  • Jason
    Loosemore
  • Jaco van der
    Merwe
  • Frans Joubert
  • Jacobus Maree
  • Ruan Maree
  • Neville
    Loosemore
  • Kosie Weyers
  • Tokkos
    Joubert
  • Gavin Botha
  • Andrew Botha
  • Freek
    Buitendag
  • Lee
    Kingsnorth
  • Liam Lake
  • Jordon
    Cumming
  • PJ Collins

Official Sponsor of the International Champ of Champions Race:

MIT-MAK Motors | Official Sponsor of the International Champ of Champions Race | Junk Mail
MIT-MAK MOTORS

Need Dyno tuning or racing fuel? Visit Triple A Service Station in Gezina, Pretoria or contact Andre Maree for more information.

OpenOffice or LibreOffice? A Star is Torn

When it comes to open source office suites, most people choose OpenOffice or LibreOffice, and they both look suspiciously similar. That isn’t surprising since they both started with exactly the same code base. However, the LibreOffice team recently penned an open letter to the Apache project — the current keepers of OpenOffice — asking them to redirect new users to the LibreOffice project. Their logic is that OpenOffice has huge name recognition, but hasn’t had a new major release in several years. LibreOffice, on the other hand, is a very active project. We could argue that case either way, but we won’t. But it did get us thinking about how things got here.

It all started when German Marco Börries wrote StarWriter in 1985 for the Zilog Z80. By 1986, he created a company, Star Division, porting the word processor to platforms like CP/M and MSDOS. Eventually, the company added other office suite programs and with support for DOS, OS/2, and Windows, the suite became known as StarOffice.

The program was far less expensive than most competitors, costing about $70, yet in 1999 that price point prompted Sun Microsystems to buy StarOffice. We don’t mean they bought a copy or a license, they bought the entire thing for just under $74 million. The story was that it was still cheaper than buying a license for each Sun employee, particularly since most had both a Windows machine and a Unix machine which still required some capability.

Sun in Charge

Sun provided StarOffice 5.2 in 2000 as a free download for personal use, which gave the software a lot of attention. It eventually released much of the code under an open source license producing OpenOffice. Sun contributed to the project and would periodically snapshot the code to market future versions of StarOffice.

This was the state of affairs for a while. StarOffice 6.0 corresponded to OpenOffice 1.0. In 2003, release 1.1 turned into StarOffice 7. A couple of years later, StarOffice 8/OpenOffice 2.0 appeared and by 2008, we had StarOffice 9 with OpenOffice 3.0 just before Oracle entered the picture.

Then Came Oracle

In 2010, Oracle bought Sun. All of it. They didn’t seem to have much of a plan for some of the things they bought and StarOffice was one of them. They renamed the program Oracle Open Office. They also did strange things with licensing. For example, StarOffice 9 was no longer free for educational customers, but they could use StarOffice 8 or, of course, just stick with OpenOffice and forego support.

In 2011, Oracle decided to kill the commercial offering, leaving OpenOffice, the official community-based keeper for the StarOffice flame. They gave responsibility over to the Apache Software Foundation.

Apparently, though, StarOffice 5.1 will still run on Windows 10 as [RickMakes] demonstrates in the following video:

Open Source and the Rise of LibreOffice

Of course, once the code went open source around 2000, people were free to create derivative projects and they did. While there have been several notable forks including NeoOffice and Go-oo, only LibreOffice has really been robust, even though NeoOffice and the original OpenOffice are still active. However, NeoOffice only targets the Mac. The timeline is a bit of a head scratcher but Wikipedia has this great graphic that lays it out:

When Oracle came on the scene, most of the OpenOffice developers formed LibreOffice. LibreOffice has been under very active development since then, and most Linux distributions now use it as their default office suite. According to the LibreOffice letter, they’ve had 15,000 code commits in 2019 compared to 595 in OpenOffice over the same period. They have had 13 major releases, while OpenOffice hasn’t had a major release in six years.

License Peculiarity

We aren’t open source lawyers — or any kind of lawyers, for that matter — but one of the problems stems from how the two projects have their licenses. OpenOffice uses the Apache License, whereas LibreOffice uses a dual LGPLv3/Mozilla Public license.

For some legal reasons, then, anything OpenOffice does can be incorporated into LibreOffice, the terms of the license permit that. But if LibreOffice adds something, take font embedding, for example, OpenOffice can’t legally incorporate that code. If you want the details, you can read this contemporary post from the Free Software Foundation. This is further complicated by issues with IBM providing some code from Lotus Symphony that may not have been properly placed into the open source domain.

Back to the Letter

That was a journey, but what about that open letter LibreOffice sent to the Apache project earlier this month? We could argue on either side of the letter. On the one hand, part of living in the open source world is understanding that other people can and will develop parallel projects. However, we can understand the frustration that some people go to OpenOffice and think there’s nothing new there. Of course, there are other open source suites, too, but given the two projects’ sibling status, we can see their point. But users might be just as happy going to Calligra (used to be KOffice) or OnlyOffice, both of which are open source, too.

What do you think? Should OpenOffice throw in the towel? Commence commenting.

source https://hackaday.com/2020/11/02/openoffice-or-libreoffice-a-star-is-torn/