While there are loads of impressive and complex projects here on Hackaday, sometimes it’s the simple ones that really speak to us. In this case we were presented with [Isabell Park]’s easy-to-follow instructable on how to build an anti-procrastination device.
On the hardware side there are no surprises, it consists of a PIR sensor connected to a NodeMCU microcontroller. It checks for a signal from the sensor, and if it’s triggered, it sends a command through the Adafruit IO libraries to IFTTT. On its own it could make for a decent movement alarm, but the part that makes the project interesting is how it’s applied to become a device to help with procrastination instead.
First, you put your phone in a jar along with the electronics and close it. Then, with everything configured, the circuit is powered on and stays vigilant for any movement inside the jar. Should you try to take your phone out of it for a quick social media break (which, if you’re like us, can turn into a few hours), IFTTT will be alerted and run through whatever script you have in place. In [Isabell]’s case, she suggests sending an SMS to a trusted contact to keep you in check.
[Teaching Tech] has been interested in adding a tool changer to his 3D printer. E3D offers a system that allows you to switch print heads or even change out a hot end for a laser or a (probably) light-duty CNC head. The price of the entire device, though, is about $2,500, which put him off. But now he’s excited about a product from PrinterMods called XChange. This is a kit that will allow rapid tool changes on many existing printers and costs quite a bit less. Preorder on KickStarter is about $150, but that probably won’t be the final price.
Not all printers are compatible. It appears the unit attaches to printers that have linear rails and there is an adapter for printers that have V rollers in extrusions. Supposedly, there is an adapter in the works for printers that use rods and bearings.
It looks like the installation wouldn’t be very difficult and once you have the main part attached, the tools attach to a plate that simply snaps in and out. There is a sturdy mechanical attachment and also an electrical attachment.
This can cause the head position to change which could affect your print area, your center position, and generally require changes in your production G code or maybe your firmware. Still, you probably expect anything like this to require a little fiddling to get working. Apparently, there will be some prebuilt firmware for popular machines available by the time the units actually ship.
Switching hot ends is certainly attractive. But the real value, it seems, would be adding other things. Lasers and pen plotters seem to be a good idea. We aren’t sure a common printer is stiff enough to do anything serious with mechanical CNC, though. The video also mentions the possibility of having a pick and place system in the future.
This seems like a good idea and we’ve seen quick-change carriage designs for some time. The real issue is if the system requires recalibration on each tool change each time. If so, the value of any system like this is limited. We also wondered if there shouldn’t be an option of a serial EEPROM on the tool plates so the firmware could interrogate the tool head for its identity and even store configuration data on the plate itself. Maybe that’ll be version two. Our own [Joshua Vasquez] released his toolchanging platform, Jubilee, late last year that’s worth checking out, too.
The holiday season is here, and along with it comes Christmas music. Love them or hate them, Yuletide tunes are a simple fact of life each December. This year, [Derek Anderson] put a modern spin on a few classic melodies and listened to them via his set of self-playing chimes.
Inspired by [Derek]’s childhood Ye Merry Minstrel Caroling Christmas Bells (video), these chimes really bring the old-school Christmas decoration into the 21st century. Each chime is struck by a dedicated electromagnetically-actuated mallet, which is in turn controlled by an ESP32 running MicroPython.
Winding the electromagnets
The chimes play MIDI files, so you could, of course, play music unrelated to Christmas if you wanted to. And they even feature an OLED screen that displays what song is being played. For added flair, the entire thing is beautifully framed in black walnut, not to mention the custom-wound solenoids.
This project incorporated mechanical and electrical design, woodworking, 3D printing, programming, and song arrangement. It’s a wonder that [Derek] was able to create the entire product in the 40-80 hour time frame he estimated. (Though it looks like he had a bit of help.)
We always love to see projects like this, ones in which several disciplines get rolled together to create a beautiful finished piece.
Humanity is another step closer to a fantasy-accurate lightsaber thanks to Hackaday alumnus [James Hobson] at Hacksmith. Their proto-saber cuts through (cosplay) stormtrooper armor, (foam) walls, and a (legit!) 1/4″ (6.35mm) steel plate. For so many reasons, we want to focus on the blade and handle. (Video, embedded below.)
The blade is a plasma stream designed for glassworking and burns a propane/oxygen mix with almost no residue, but the “blade” stays in a tight cylinder shape. With a custom PCB hosting a mixing controller, the blade extends and retracts like in the movies. The handle is not a technical marvel; it is an artistic wonder and if you want to see some machining eye-candy, check out the first video after the break. The second video demonstrates just how much damage you can do with a 4000° Fahrenheit tube of portable plasma.
You won’t be dueling anyone just yet, since there is no magnetic field shaping the blade like the ones [Lucas] envisioned. Unfortunately, you can’t block anything more substantial than a balloon sword since solid material will pass right through it, but it will suffer a mighty burn in the process. Lightsabers are a fantasy weapon, but the collective passion of nerds have made it as real as ever, and the Guinness folks give credibility to this build.
Holograms are tricky to describe because science-fiction gives the name to any three-dimensional image. The science-fact versions are not as flashy, but they are still darn cool. Legitimate holograms are images stored on a photographic medium, and they retain a picture of the subject from certain angles. In other words, when [Justin Atkin] makes a hologram of a model building, (video, embedded below) you can see the east side of the belfry, but when you reorient, you see the west side, or the roof if you point down. Holography is different from stereoscopy, which shows you a 3D image using two cameras. With a stereoscopic image, you cannot tilt it and see a new part of the subject, so there is a niche for each method.
There are a couple of different methods for making a hologram at home. First, you probably want a DIY hologram kit since it will come with the exposure plate and a known-good light source. Far be it for us to tell you you can’t buy plates and a laser pointer to take the path less traveled. Next, you need something that will not move, so we’re afraid you cannot immortalize your rambunctious kitty. The last necessity is a stable platform since you will perform a long-exposure shot, and even breathing on the setup can ruin the image. Different colors come from the coherent light source, so getting the “Rainbow Holograms” advertised in the video is a matter of mixing lights. Since you can buy red, green, and blue laser pointers for a pittance, you can do color remixes to your content.
Another type of hologram appears on things like trading cards as those wildly off-color (chromatic, not distasteful) images of super-heroes or abstract shapes. They’re a different variety, which can be printed en-masse, unlike the one-off [Justin] shows us how to make.
If you’re yearning for volumetric displays, we are happy to point you to this beauty capable of showing a jaw-dropping 3D model or this full-color blocky duck.
It might be fair to suspect that most people who are considered digital natives have very little to no clue about what is actually going on inside their smartphones, tablets, and computers. To be fair, it is not easy to understand how modern CPUs work but this was different at the beginning of the 80s when personal computers just started to become popular. People who grew up back then might have a much better understanding of computer basics thanks to computer education systems. The Busch 2090 Microtronic Computer System released in 1981 in Germany was one of these devices teaching people the basics of programming and machine language. It was also [Michael Wessel]’s first computer and even though he is still in proud possession of the original he just recently recreated it using an Arduino.
The original Microtronic was sold under the catchy slogan “Hobby of the future which has already begun!” Of course, the specs of the 4-bit, 500 kHz TMS 1600 inside the Microtronic seem laughable compared to modern microcontrollers, but it did run a virtual environment that taught more than the native assembly. He points out though that the instruction manual was exceptionally well written and is still highly effective in teaching students the basics of computer programming.
Already, a couple of years back he wrote an Arduino-based Microtronic emulator. In his new project, he got around to extending the functionality and creating a custom PCB for the device. The whole thing is based on ATMega 2560 Pro Mini including an SD card module for file storage, an LCD display, and a whole bunch of pushbuttons. He also added an RTC module and a speaker to recreate some of the original functions like programming a digital clock or composing melodies. The device can also serve as an emulator of the cassette interface of the original Microtronic that allowed to save programs with a whopping data rate of 14 baud.
He has certainly done a great job of preserving this beautiful piece of retro-tech for the future. Instead of an Arduino, retro computers can also be emulated on an FPGA or just take the original hardware and extend it with a Raspberry Pi.
Australia has always had a reputation for astronomy. It is a great site low in the Southern hemisphere and there are lots of sparsely inhabited areas free from light and radio interference. Some of the first video from the Apollo 11 landing, for example, came in from “the dish” — a very large radio telescope down under. Australian hobbyists have formed a group, SpaceAusScope, where teams across Australia are building radio telescopes with the plan — which has been delayed by the pandemic — of collecting data and providing it for public analysis.
A secondary goal of the group is to provide better documentation for amateur radio telescope builders. So even if you don’t live in Australia, you might want to check out their website. It looks as thoughthe documentation will arrive in the future, but there is a very informative blog post from one team member about the helical antenna design most of the teams are using to eavesdrop on the hydrogen line.
[Geoff] had access to high dollar simulation tools and some test equipment, so he managed to build an antenna that has good performance and is easier to build than some other common antenna types. Receiving gear that would have been astronomically priced — no pun intended — a few years ago is now commonplace. If you ever thought about building a radio telescope, this might be the time to do it.
Because of the availability of software-defined radios, we’ve seen quite a few radio telescopes lately. Some are reusing old TV dishes. Others use Wi-Fi gear.
[Keenan Rebera] recently found himself with an old racing clock (a chronoix cc3000) left behind by a roommate. How the roommate obtained such a clock seems murky at best, but undeterred [Keenan] set to work bringing the clock to life with Bluetooth functionality. The mechanical nature of the digits provided a satisfying auditory click, making it a good candidate for some upgrading. The new brain transplant is the venerable ESP32 with an RTC for good measure. He created a custom PCB with QWIC connectors to daisy chain together the driver boards together. Each PCB has four TBD62083 for driving the digits, two MCP expanders to increase the address space. This allows the ESP32 to address all the various segments over I2C. By soldering different pads together, he can change the address of each MCP, giving a maximum of 16 digits (9 possible MCP’s each driving 2 digits).
A handsomely designed app accompanies the clock, making updating the RTC and setting the timezone a breeze. Currently, it is displaying a count down to the time when 2020 is officially over. While 2020 will certainly go down in the books as a tumultuous year, it was a great year for DIY clocks at Hackaday. Just in the past few weeks, we’ve seen big LED workshop clocks, esoteric domino clocks, and beautiful clocks that double as works of art. Come 2021, we’re quite confident that [Keenan] will still have a gorgeous clock on his wall ticking and clicking away.
We seem to want our PCB design software to do everything these days, and it almost delivers. You can not only lay it all out, check electrical and design rules, and even spit out a bill of materials, but many PCB tools produce 3D models that are good enough to check parts clearance or are useful in designing enclosures. But when it comes to producing photorealistic output, whether for advertising or just for eye-candy, you might want to turn to 3D design tools.
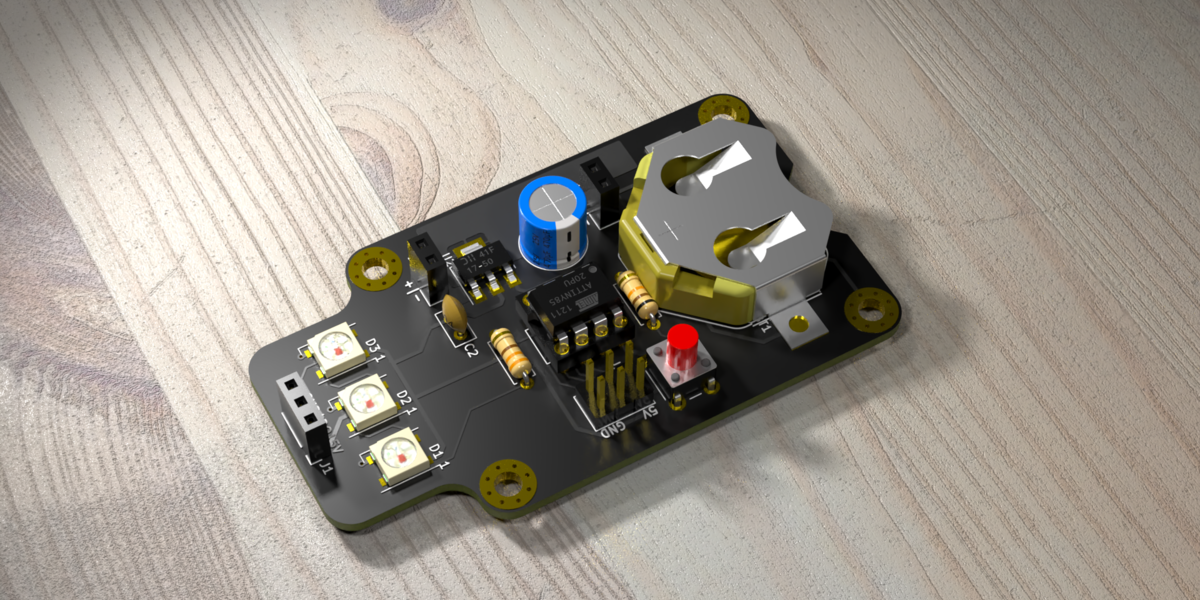
In this workshop, Anool Mahidharia takes the output of KiCad’s VRML export, gets it rendering in Blender, and then starts tweaking the result until you’re almost not sure if it’s the real thing or a 3D model. He starts off with a board in KiCad, included in the project’s GitHub repo, and you can follow along through the basic import, or go all the way to copying the graphics off the top of an ATtiny85 and making sure that the insides of the through-plated holes match the tops.
If you don’t know Blender, maybe you don’t know how comprehensive a 3D modelling and animation tool it is. And with the incredible power comes a notoriously steep learning curve up a high mountain. Anool doesn’t even try to turn you into a Blender expert, but focuses on the tweaks and tricks that you’ll need to make good looking PCB renders. You’ll find general purpose Blender tutorials everywhere on the net, but if you want something PCB-specific, you’ve come to the right place.
The National Institute Of Standards and Technology was founded on March 3, 1901 as the National Bureau of Standards, taking on its current moniker in 1988. The organisation is charged by the government with ensuring the uniformity of weights and measures across the United States, and generally helping out industry, academia and other users wherever some kind of overarching standard is required.
One of the primary jobs of NIST is the production and sale of Standard Reference Materials, or SRMs. These cover a huge variety of applications, from steel samples to concrete and geological materials like clay. However, there are also edible SRMS, too. Yes, you can purchase yourself a jar of NIST Standard Peanut Butter, though you might find the price uncompetitive with the varieties at your local supermarket. Let’s dive into why these “standard” foods exist, and see what’s available from the shelves of our favourite national standards institute.
A selection of various NIST Standard Reference Materials from the Food and Beverage category.
It’s fun to think about a government organisation creating a “standard” peanut butter to rule them all, one neither better nor worse than one could expect a peanut butter to be. However, these standards are not intended to be a guide on how manufacturers should craft their foods. Instead, the materials are intended for use as calibration standards.
Manufacturers need to verify the nutritional content of their foods, and also need to verify that they’re safe and free of dangerous contaminants. This requires the use of a variety of complex tests. In order to verify that the results of these tests are valid, it’s necessary to have a known standard material on hand to check with. For example, if you run a test on NIST’s standard apple juice, and your measured levels for arsenic match the documented values, you can be relatively certain that when you measure your own company’s product, the numbers you get are valid.
Some of the standards are more familiar than others. Baby Food Composite is fairly straightforward; Typical Diet is a material with broader testing applications.
While the NIST standards could technically be considered edible, they’re not intended to be ingested, and prices are orders of magnitude higher than what you’d pay at your local store. A 3-pack of standard peanut butter will set you back $881 before shipping, while five bars of baking chocolate will cost you the same. Suffice to say, NIST aren’t known for handing out holiday promo codes, either. If we had to cater a picnic with nothing but SRMs, we’d lean on the milk & egg powders along with flour samples to bake a nice standard loaf of bread, topped with either oyster tissue (a steal at $672 for 25 grams), bovine liver, or perhaps the slurried spinach for those wanting a vegetarian option.
Overall, these reference materials serve an important role in ensuring the quality of the foods and beverages we consume every day. Combined with the formal, bleak aesthetic of their label designs, they also make an excellent gag prop for your refrigerator, albeit at great cost. NIST’s work makes life easier for manufacturers, and helps produce better products for consumers. Thus, the enigmatic Standard Reference Materials play an highly important role in the food and beverage industry.
One of Hyundai’s recent concept cars was an electric vehicle named “45” in honor of its inspiration, another concept car from 45 years ago. When footage of a child-sized “Mini 45” surfaced, it was easy to conclude the car was a motorized toy for children. But Jalopnik got more information from Hyundai about this project, where we learned that was not nearly the whole picture.
The video (embedded below) explained this little vehicle is a concept car in its own right, and most of the video is a scripted performance illustrating their concept: using technology to help calm young patients in a hospital, reducing their anxiety as they faced treatment procedures. Mini 45 packs a lot more equipment than the toy cars available at our local store. The little driver’s heartbeat and breathing rate are monitored, and a camera analyzes facial expressions to gauge emotional stress. The onboard computer has an animated avatar who will try to connect with the patient, armed with tools like colorful animations, happy music, candy scent dispenser, and a bubble-blowing machine.
After watching the video masterfully edited to tug at our heartstrings (go blow your nose if you need to) we have many questions. If this was just Hyundai we would have dismissed it as a puff piece and moved on. But a children’s hospital in Barcelona was named as participant in this research project, lending some credibility to the claims. However, it’s not clear how many features shown were actually functional during hospital trial. For example, the UI on the adult-held tablet looks suspiciously like glitzy Hollywood fantasy UI instead of a real tablet app. The video ended with a few clips from the hospital trial, and children’s faces ranged from ecstatic to indifference. Not a surprise since different kids have different personalities.
While some were obviously thrilled to ride in an electric chariot of the future, others might have been better comforted by a trusted adult human instead of a robot. What was the metric for measuring success rate of calming young patients? Has the trial proved this to be a cost-effective solution to a problem that actually exists, or is this the result of a bunch of automotive engineers doing what they do best (build cars) to solve a non-existing problem?
Unsurprisingly, answers to such questions are not found in this Hyundai public relations exercise. But even in the absence of rigorous documentation, this project prompts us to ask if we want robots to monitor our body this closely. Is it a good idea to have computers know our moods? Do we want them to manipulate our emotions? As technology becomes ever more pervasive in our lives, these are not merely academic questions. Hyundai’s Mini 45 might be a cute little thing, but its ambitions raise questions that give us pause.
CLOSED 24/12 – 03/01THANK YOU! It’s been a massive pleasure tattooing all of you. There would be no TRADE MARK without your continuous support. We hope you have a great & safe festive season. See all of you in 2021
This year has been the year of home video conferencing. If you are really on the ball, you’ve managed to put some kind of green screen up so you can hide your mess and look as though you are in your posh upper east side office space. However, most of the consumer video conferencing now has some way to try to guess what your background is and replace it even without a green screen. The results, though, often leave something to be desired. A recent University of Washington paper outlines a new background matting procedure using machine learning and, as you can see in the video below, the results are quite good. There’s code on GitHub and even a Linux-based WebCam filter.
The algorithm does require a shot of the background without you in it, which we imagine needs to be relatively static. From watching the video, it appears the acid test for this kind of software is spiky hair. There are several comparisons of definitely not bald people flipping their hair around using this method and other background replacers such as the one in Zoom.
The quality of the results depends somewhat on how many pixels the filter can work with, so 4K video seemed to do better than lower resolutions. Even then, it isn’t perfect, but it does seem like it did a better job than some of the existing tools. If you try it yourself, we did read that you want to avoid blocking bright light, especially during background capture, and try to keep lighting constant. For prolonged use, it may be helpful to re-take the background image as light conditions drift.
As you might expect, you are going to need a big video card to do this in real-time. This is especially true since the algorithm seems to work better with 4K input. However, if you are doing video production in post, you can probably trade hardware for time.
We’ve seen a similar effort with DeepBackSub. Once you have this working, you can build a mirror to improve your video conference eye contact.
Astronomy fans were recently treated to the Great Conjunction, where Jupiter and Saturn appear close together from the perspective of our planet Earth. Astronomy has given us this and many other magnificent sights, but we can get other senses involved. Science News tells of explorations into adapting our sense of hearing into tools of astronomical data analysis.
Data visualization has long been a part of astronomy, but they’re not restricted to charts and graphs that require a trained background to interpret. Every “image” generated using data from radio telescopes (like the recently-lost Arecibo facility) are a visualization of data from outside the visible spectrum. Visualizations also include crowd pleasing false-color images such as The Pillars of Creationpublished by NASA where interstellar emissions captured by science instruments are remapped to colors in the visible spectrum. The results are equal parts art and science, and can be appreciated from either perspective.
Data sonification is a whole other toolset with different strengths. Our visual system evolved ability to pick out edges and patterns in spatial plots, which we exploit for data visualization. In contrast our aural system evolved ability to process data in the frequency domain, and the challenge is to figure out how to use those abilities to gain scientifically relevant data insight. For now this field of work is more art than science, but it does open another venue for the visually impaired. Some of whom are already active contributors in astronomy and interested in applying their well-developed sense of hearing to their work.
Of course there’s no reason this has to be restricted to astronomy. A few months ago we covered a project for sonification of DNA data. It doesn’t take much to get started, as shown in this student sonification project. We certainly have no shortage of projects that make interesting sounds on this site, perhaps one of them will be the key.
[Wesley Kagan] is building a Corvette with a V12 engine swap. Much of the driveline will be entirely replaced, which means the components to drive the mechanical speedometer and tachometer will no longer be present in the final car. Instead, [Wesley] came up with his own electronic gauge conversion to do the job.
It’s a build that respects the original aesthetic of the car, reusing the original gauges but driving them differently. In place of the original mechanical drives from the transmission and distributor respectively, the speedometer and tach instead get servos installed in the back with a 3D printed gear train. The odometer gets its own continuous rotation servo, too. An Arduino Nano is used to drive the servos, using data from a GPS module and the car’s ignition system.
[Will Cogley]’s mechanized gauntlet concept sure has a hypnotizing look to it, and it uses only a single motor. Underneath the scales is a rod with several cams, each of which moves a lever up and down in a rippling wave as it rotates. Add a painted scale to each, and the result is mesmerizing. This is only a proof of concept prototype, and [Will] learned quite a few lessons when making it, but the end result is a real winner of a visual effect.
The gauntlet uses one motor, 3D printed hardware, and a mechanical linkage between the wrist and the rest of the forearm. Each of the scales is magnetically attached to the lever underneath, which provides some forgiveness for when one inevitably bumps into something. You can see the gauntlet without the scales in the video, embedded below the break, which should make clear how the prototype works.
The scales were created with the help of a Mayku desktop vacuum former by making lightweight copies of 3D printed scales. Interestingly, 3D printing each scale with full supports made for a useful mold; there was no need to remove supports from underneath the prints, because they are actually a benefit to the vacuum forming process. When vacuum forming, the presence of overhangs can lead to plastic wrapped around the master, trapping it, but the presence of the supports helps prevent this. 3D prints don’t hold up very well to the heat involved in vacuum forming, but they do well enough for a short run like this. Watch it in action and listen to [Will] explain the design in the video, embedded below.
There’s no question that being able to see who’s at your front door from your computer or mobile device is convenient, which is why the market is currently flooded with video doorbells. Unfortunately, it’s not always clear who else has access to the images these devices capture. Organizations such as the Electronic Frontier Foundation have argued that by installing one of these Internet-connected cameras on their front door, consumers are unwittingly contributing to a mass surveillance system that could easily be turned against them.
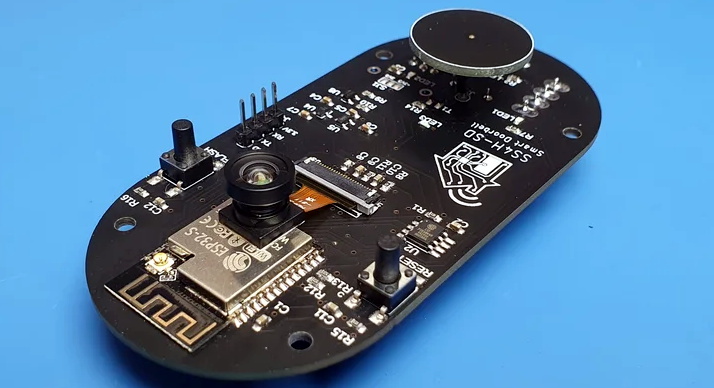
Luckily, there’s a solution. As [Sebastian] shows in his latest project, you can build your own video doorbell that replicates the features of the commercial offerings while ensuring you’re the only one who has access to the data by leveraging open source, community developed projects such as ESPHome and Home Assistant. At the same time, modern manufacturing techniques like desktop 3D printing and low-cost PCB fabrication mean your DIY doorbell doesn’t have to look like you made it yourself.
The project starts with a custom PCB that combines the ESP32, a camera module, a capacitive touch sensor, a relay to optionally trigger an electronic door lock, and a DC-DC converter that will let you power the device from a wide range of input voltages. The board even has a spot where you can solder on an additional 8 MB of external PSRAM for the ESP32, which will enable the chip to capture higher resolution video.
The electronics are housed in a minimalistic 3D printed enclosure that would fit right in alongside similar gadgets from the likes of Ring and Arlo; especially if you have access to a CNC and can cut the front panel out of acrylic. The lighted touch sensor looks phenomenal, and really gives the device a professional feel. That said, it doesn’t look like the case would last very long if exposed to harsh weather and there are some obvious physical security issues with this approach. But to be fair, we’ve seen the same problem with commercial hardware.
Naturally with a project like this, the hardware is only half of the story. It takes a considerable amount of software poking and prodding to get things like mobile device notifications working, and as a special added annoyance, the process is different depending on which MegaCorp produced the OS your gadget is running. [Sebastian] has documented the bulk of the process in the video after the break, but the finer points will likely need some adjustment depending on how you want to set things up.
[Mark]’s initial attempts relied on Python and the RPI.GPIO library. Unfortunately, the overheads introduced made decoding SENT traffic impossible. Undeterred, [Mark] pressed on, leveraging the pigpio library and its callback function which allowed sampling at up to one microsecond. This was fast enough to read the messages from a LX3302A inductive position sensor that uses the protocol.
It’s a project that could prove useful for those trying to work with certain sensors who want to avoid adding complexity to a Raspberry Pi project. Files are available on Github for the curious. We’ve seen other direct sensor builds with the Pi, before too – like this power monitoring system. Video after the break.
Long before the current smartwatch craze, Texas Instruments released the eZ430-Chronos. Even by 2010s standards, it was pretty clunky. Its simple LCD display and handful of buttons also limited what kind of “smart” tasks it could realistically perform. But it did have one thing going for it: it’s SDK allowed users to create a custom firmware tailored to their exact specifications.
It’s been nearly a decade since we’ve seen anyone dust off the eZ430-Chronos, but that didn’t stop [ogdento] from turning one into a custom alert device for a sick family member. A simple two-button procedure on the watch will fire off emails and text messages to a pre-defined list of contacts, all without involving a third party or have to pay for a service contract. Perhaps most importantly, the relatively energy efficient eZ430 doesn’t need to be recharged weekly or even daily as would be the case for a modern smartwatch.
To make the device as simple as possible, [ogdento] went through the source code for the stock firmware and commented out every function beyond the ability to show the time. With the watch’s menu stripped down to the minimum, a new alert function was introduced that can send out a message using the device’s 915 MHz CC1101 radio.
Messages and recipients can easily be modified.
The display even shows “HELP” next to the appropriate button so there’s no confusion. A second button press is required to send the alert, and there’s even a provision for canceling it should the button be pressed accidentally.
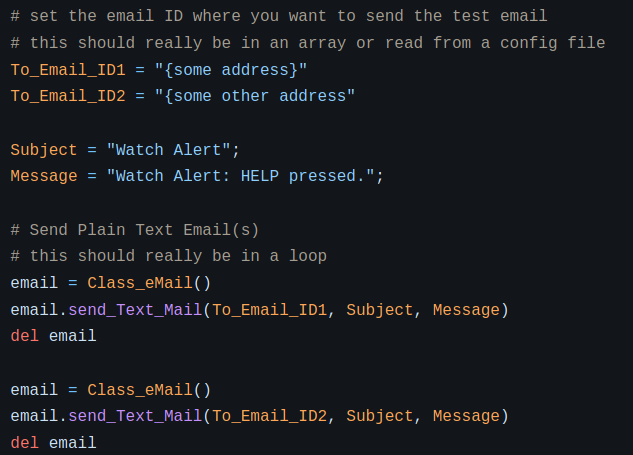
On the receiving side, [ogdento] is using a Raspberry Pi with its own CC1101 radio plugged into the USB port. When the Python scripts running on the Pi picks up the transmission coming from the eZ430 it starts working through a list of recipients to send messages to. A quick look at the source code shows it would be easy to provide your own contact list should you want to put together your own version of this system.
Here’s a simple tip from [Andy], whose Raspberry Pi projects often travel with him outside the workshop: he suggests adding a small HDMI-to-USB video capture device to one’s Raspberry Pi utility belt. As long as there is a computer around, it provides a simple and configuration-free way to view a Raspberry Pi’s display that doesn’t involve the local network, nor does it require carrying around a spare HDMI display and power supply.
Raspberry Pi’s display, viewed on a Mac as if it were a USB webcam. No configuration required.
The usual way to see a Pi’s screen is to either plug in an HDMI display or to connect remotely, but [Andy] found that he didn’t always have details about the network where he was working (assuming a network was even available) and configuring the Pi with a location’s network details was a hassle in any case. Carrying around an HMDI display and power supply was also something he felt he could do without. Throwing a small HDMI-to-USB adapter into his toolkit, on the other hand, has paid off for him big time.
The way it works is simple: the device turns an HDMI video source into something that acts just like a USB webcam’s video stream, which is trivial to view on just about any desktop or laptop. As long as [Andy] has access to some kind of computer, he can be viewing the Pi’s display in no time.
Many of his projects (like this automated cloud camera timelapse) use the Pi camera modules, so a quick way to see the screen is useful to check focus, preview video, and so on. Doing it this way hit a real sweet spot for him. We can’t help but think that one of these little boards could be a tempting thing to embed into a custom cyberdeck build.
You have great dreams and
hopes for your children. Dreams of a quality education, a safe home, and a
family of their own. What would happen to those dreams if anything ever
happened to you? How would your family survive the loss of your income?
We all know how important it is to have Life Insurance but with our packed schedules and busy to-do lists, it’s hard to make the time to get to it. From the time you open your eyes in the morning, the tasks begin. Making lunch, dropping off the kids at school, rushing to meetings, grocery shopping, cooking, cleaning, and through it all, remembering to eat on time and take deep breaths are part of our everyday lives.
1Life understands this and has
worked hard to find a solution to help you get a Life Insurance quote on the
go. A solution that’s available 24/7, accessible via your mobile phone, and
simple to use. Well, we’ve found it!
We’d like to introduce you to the 1Life Insurance Assistant. Chat to our Assistant anytime on your phone or desktop and get an obligation-free quote in less than two minutes. By answering a few quick and simple questions, you can get the quote you’ve been meaning to get for months. Our Assistant is also able to provide you with more product information to help you make an informed decision.
With the 1Life Insurance Assistant, there are no more excuses. Get a quote while waiting in line for your morning coffee, while you wait for the presentation to be set up in your meeting, or during the half-time of your child’s soccer game. Get covered the easy way for more peace of mind for you and your family.
Here’s a simple tip from [Andy], whose Raspberry Pi projects often travel with him outside the workshop: he suggests adding a small HDMI-to-USB video capture device to one’s Raspberry Pi utility belt. As long as there is a computer around, it provides a simple and configuration-free way to view a Raspberry Pi’s display that doesn’t involve the local network, nor does it require carrying around a spare HDMI display and power supply.
Raspberry Pi’s display, viewed on a Mac as if it were a USB webcam. No configuration required.
The usual way to see a Pi’s screen is to either plug in an HDMI display or to connect remotely, but [Andy] found that he didn’t always have details about the network where he was working (assuming a network was even available) and configuring the Pi with a location’s network details was a hassle in any case. Carrying around an HMDI display and power supply was also something he felt he could do without. Throwing a small HDMI-to-USB adapter into his toolkit, on the other hand, has paid off for him big time.
The way it works is simple: the device turns an HDMI video source into something that acts just like a USB webcam’s video stream, which is trivial to view on just about any desktop or laptop. As long as [Andy] has access to some kind of computer, he can be viewing the Pi’s display in no time.
Many of his projects (like this automated cloud camera timelapse) use the Pi camera modules, so a quick way to see the screen is useful to check focus, preview video, and so on. Doing it this way hit a real sweet spot for him. We can’t help but think that one of these little boards could be a tempting thing to embed into a custom cyberdeck build.
It is a common problem these days. You have a piece of code in C or C++. Maybe it is older code. Or maybe you prefer prototyping your ideas using C. But, inevitably, someone now wants your code to run in a Web browser. The options for making this happen have expanded quite a bit lately and one possibility is Cheerp, an open-source compiler that handles up to C++ 17 and can output to WebAssembly, JavaScript, or asm.js.
The compiler is free to use for GPLv2 projects. If you aren’t open yourself, it looks like you have to cut a deal to use Cheerp with its maker, Learning Technologies.
Traditionally, you’d use Emscripten to do something like this. According to the project’s site, Cheep generates faster and smaller WebAssembly than Emscripten and has several advantages if you compile to JavaScript. For example, they claim to have better dynamic memory handling, more efficient access to the DOM, and better JavaScript interoperability.
The Hello World example is, understandably, a little underwhelming, but does show some special features that allow direct access to the browser. They do point out that you can ignore that and use things like printf or cout if you aren’t worried about performance. A better place to start if you want to do anything serious is the pong game example.
If you haven’t been keeping up with WebAssembly, we can get you started. If you don’t think any of this would have application in an embedded system, we’ll refer you to Olaf.
The spark plug was a key invention in the history of the internal combustion engine, allowing combustion to be easily controlled and engines to rev faster than messy earlier designs. Mid-century cars tended to rely on points ignition with a distributor and coil, however more modern designs place a coil on top of each individual spark plug. [Roger Moore] decided to build a similar setup for a small model engine on his workbench.
The rig is built with an Arduino, a flyback transformer, a smattering of MOSFETs and passives, an IGBT and a capacitor. The Arduino outputs PWM through a MOSFET which is stepped up through the transformer, and then charges the capacitor. The capacitor is then discharged into a coil mounted on top of the sparkplug of the single-cylinder engine, which fires the spark. The timing of the spark is determined by a Hall effect sensor reading a magnet placed on the flywheel.
Later development aims to shrink the system further to fit on a V10 design [Roger] is planning to make. It’s been done on a small scale before, and we’d love to see another tiny engine with way too many cylinders. Video after the break.