SpaceX Sending Tom Cruise to the Space Station in 2021

Several months after NASA Administrator Jim Bridenstine confirmed the project was in the works, sources are now reporting that Tom Cruise and director Doug Liman will officially be making the trip to the International Space Station in October of 2021 to film scenes for an as of yet untitled movie. Cruise and Liman previously worked together on the science fiction spectacle Edge of Tomorrow in 2014, which may give us a hint at what the duo are planning for their trip to the final frontier.

Industry insiders claim that the two film makers and potentially a female co-star will fly aboard a SpaceX Crew Dragon capsule under the command of Michael López-Alegría, a veteran astronaut who currently holds the American record for number and duration of extra-vehicular activities (EVAs). The mission is being organized by Axiom Space, which previously announced they would perform a series of privately funded flights to the ISS as a precursor to constructing their own commercial expansion to the orbiting laboratory.

Mars One living units under regolith
This never happened.

Of course, with more than a year before liftoff, anything could happen. SpaceX has been linked, officially or otherwise, to several private trips to space that literally and figuratively never got off the ground.

Mars-One was touting concept art that showed a fleet of modified SpaceX Dragons on the Red Planet as far back as 2012, and Elon Musk himself once announced that the Falcon Heavy would send private passengers on a trip around the Moon by the end of 2018. But to date, a pair of NASA astronauts have been the only humans to actually fly on SpaceX hardware.

Undoubtedly, some will see this flight of fancy as a waste of valuable resources. After all, there’s no shortage of scientists and researchers who would be more deserving of trip to a space than Jerry Maguire. But according to Bridenstine, the hope is that a big budget Hollywood film featuring scenes shot on the ISS could do for NASA what Top Gun once did for the Navy:

There was a day when I was in elementary school and I saw Top Gun. From that day, I knew I was going to be a Navy pilot. If we can get Tom Cruise to inspire an elementary kid to join the Navy and be a pilot, why can’t we get Tom Cruise to inspire the next Elon Musk? That’s what we need.

While we might not all agree on who the next generation of engineers should look to for inspiration, the impact that Top Gun had on Navy recruitment in the 80s and 90s is well established. If sending Tom Cruise to space for a few weeks might help inspire more kids to look into a STEM education, it’s probably worth a shot. Though it seems like Tom Hanks and his fellow Apollo 13 crew mates did a respectable enough job celebrating the incredible engineering behind NASA’s greatest triumph without actually going into orbit themselves.

source https://hackaday.com/2020/09/22/spacex-sending-tom-cruise-to-the-space-station-in-2021/

Second-Hand Television SHINEs, Takes Down Entire Village’s Internet

We occasionally get stories on the tips line that just make us want to know more. This is especially true with tech stories covered by the mass media, which usually leave out the juicy tidbits that would just clutter up the story for the majority of non-technical readers. That leaves us to dig a little deeper for the satisfying details.

The latest one of these gems to hit the tips line is the tale of a regular broadband outage in a Welsh village. As in, really regular — at 7:00 AM every day, the internet customers of Aberhosan suffered a loss of their internet service. Customers of Openreach, the connectivity arm of the British telco BT, complained about the interruptions as customers do, and technicians responded to investigate the issue. Nobody was able to find the root cause, and despite replacing nearly all the cables in the system, the daily outages persisted for 18 months.

In the end, Openreach brought in a crack team from their Chief Engineer’s office to investigate. Working against COVID-19 restrictions, the team set up a spectrum analyzer in the early morning hours, to capture any evidence of whatever was causing the problem. At the appointed hour they saw a smear of radio frequency interference appear, a high-intensity pulse of noise at just the right frequency to interfere with the village’s asymmetric digital subscriber line (ADSL) broadband service.

A little sleuthing led to the home of a villager and a second-hand TV, which was switched on every day at 7:00 AM. The TV was found to be emitting a strong RF impulse when it was powered up, strong enough to knock out the ADSL service to the entire village. Openreach categorized this as SHINE, or single high-level impulse noise. We’d never heard of this, but apparently it’s common enough that BT warns customers about it and provides helpful instructions for locating sources with an AM radio.

We’ll say one thing for the good people of Aberhosan: they must be patient in the extreme to put up with daily internet outages for 18 months. And it’s funny how there was no apparent notice paid by the offending television’s owner that his or her steady habit caused the outage. Perhaps they don’t have a broadband connection, and so wouldn’t have noticed the borking.

In any case, the owner was reportedly “mortified” by the news and hasn’t turned the TV on since learning of the issue. This generally seems to be the reaction when someone gets caught inadvertently messing up the spectrum — remember the Great Ohio Key Fob Mystery?

Thanks to [Kieran Donnelly] for spotting this for us.

source https://hackaday.com/2020/09/22/second-hand-television-shines-takes-down-entire-villages-internet/

Linkage Inferring Software Handwaves Away the Hard Stuff

Jokes aside, manually designing linkages that move along specific paths is no easy task. Whether we’re doodling paper sketches or constraining lines in a CAD program, we still need to do the work of actually “imagining” the linkage design. If only there were some sort of tool that would do all that hard imagining work for us! Thankfully, we’re in luck! That’s exactly what researchers [Gen Nishida], [Adrien Bousseau2], and [Daniel G. Aliaga1] at Purdue have done. They’ve designed a software tool that lets us position important bodies in space in particular “key” frames, and then the software simply fills in the linkage for you!

To start the design process, the user inputs a few candidate locations that their solid bodies need to reach in the final linkage path.  From here, these locations get fed to a particle filter. This particle filter seeds thousands of semi-random linkage configurations at small timesteps, selects some of the best-matching ones that most closely approximate the required body locations, removes the lesser-scoring results, re-creates a new set of possible joint configurations based on the best matching ones, and repeats until the tool converges on a linkage that respects our input key frames.

Like a brute force search, this solution takes lots and lots of samples to find a solution, but unlike a brute force search, trials iteratively improve, enabling the software to converge closer and closer to a final solution. Under the hood, the software needs to actually simulate these candidate linkage in order to grade them. It’s in this step that the team wrote in additional checks to remove impossible linkages like self-intersecting joints from this linkage “gene pool” before reseeding them. The result is a tool that does all that trial-and-error scratchwork for you–no brain cycles. For more details, have a peek at their (open access!) paper.

Design software that augments our mechanical design capabilities is a rare gem on these pages, and this one is no exception. If your curious to play with other useful linkages simulating tools, have a go at Linkage Designer. And if you’re in the mood for other tools that fill in the blanks, check out this machine learning algorithm that literally fills in footage between frames in a video feed.

source https://hackaday.com/2020/09/22/linkage-inferring-software-handwaves-away-the-hard-stuff/

A Monotrack Bike With Only Basic Tools And Parts

Tracked vehicles are cool, but can be quite complicated to build. [XenonJohn] wanted to skip the complexity, so he created Vector, an electric tracked motorcycle using only basic parts and tools. No machine tools required.

If it looks familiar, it’s because it was inspired by [Make It Extreme]’s monotrack motorcycle that we covered last year. [XenonJohn] liked the concept, but wanted one that was simpler to build. That meant ditching the custom machined parts like the wheels and the suspension system. These were replaced with three go cart wheels and axles mounted in pillow blocks, on a simple welded frame. An e-bike battery powers a 500 W golf cart motor that drives the rear wheel. Like [Make It Extreme]’s version, the track is an SUV tire with the sidewall cut off. [XenonJohn] used tin snips to do this, but from personal experience we would recommend a utility knife. This track design will have a tendency to collect debris inside it, so cutting some hole in the tread could help. As with most single wheeled/tracked vehicles, you really don’t want to try and stop quickly.

It looks like this bike works fine in straight lines, but there is room for improvement with the steering. [XenonJohn] has some ideas to do this, which we hope to see some time in the future. Let us know in the comments how you would make it turn better.

[XenonJohn] really like vehicles that can make you face plant. He built quite a few self-balancing motorcycles, one of which was supposedly designed with first responders in mind. It honestly seems more likely to create an emergency than respond to one.

source https://hackaday.com/2020/09/22/a-monotrack-bike-with-only-basic-tools-and-parts/

Autonomous Rover Navigates The House With LIDAR

For those wishing to explore robot autonomy, there’s no better way then to learn by doing. [Greg] was in that camp, and decided to build an autonomous rover to roam his house, and learned plenty along the way.

[Greg]’s aims with the project were to build a robot that was capable of navigating his home without external assistance. To do the job, a Raspberry Pi 3 was put in charge, and kitted out with a LIDAR for mapping. Pololu Roboclaw motor controllers are then used to allow the Raspberry Pi to drive the robot’s individual wheel motors, giving the four-wheeled bot skid steering capability.

[Greg] goes into immense detail on the project’s writeup, exploring the code and concepts behind its autonomous abilities. Creating a robot that can navigate using LIDAR is no easy task, but [Greg] does a great job of explaining how it all works, and why.

It’s not the first autonomous rover we’ve seen here, and we’re sure it won’t be the last. If you’ve got your own build coming together in the lab, be sure to let us know. Video after the break.

source https://hackaday.com/2020/09/22/autonomous-rover-navigates-the-house-with-lidar/

Adding MIDI to a Mini Synth is Easy As Pi

There are a handful of relatively dirt cheap synths out there like the KORG Monotron, but many of them use ribbon controllers that aren’t very precise.  Ribbon controllers basically slide pots that you operate with your finger or a stylus.  They’re painted to look like piano keys in order to show you approximately where the notes are supposed to be. The Stylophone is another extremely affordable synth that does even less as a synthesizer and uses this type of input. It’s a fun input if you don’t mind imprecision, but can be annoying otherwise.

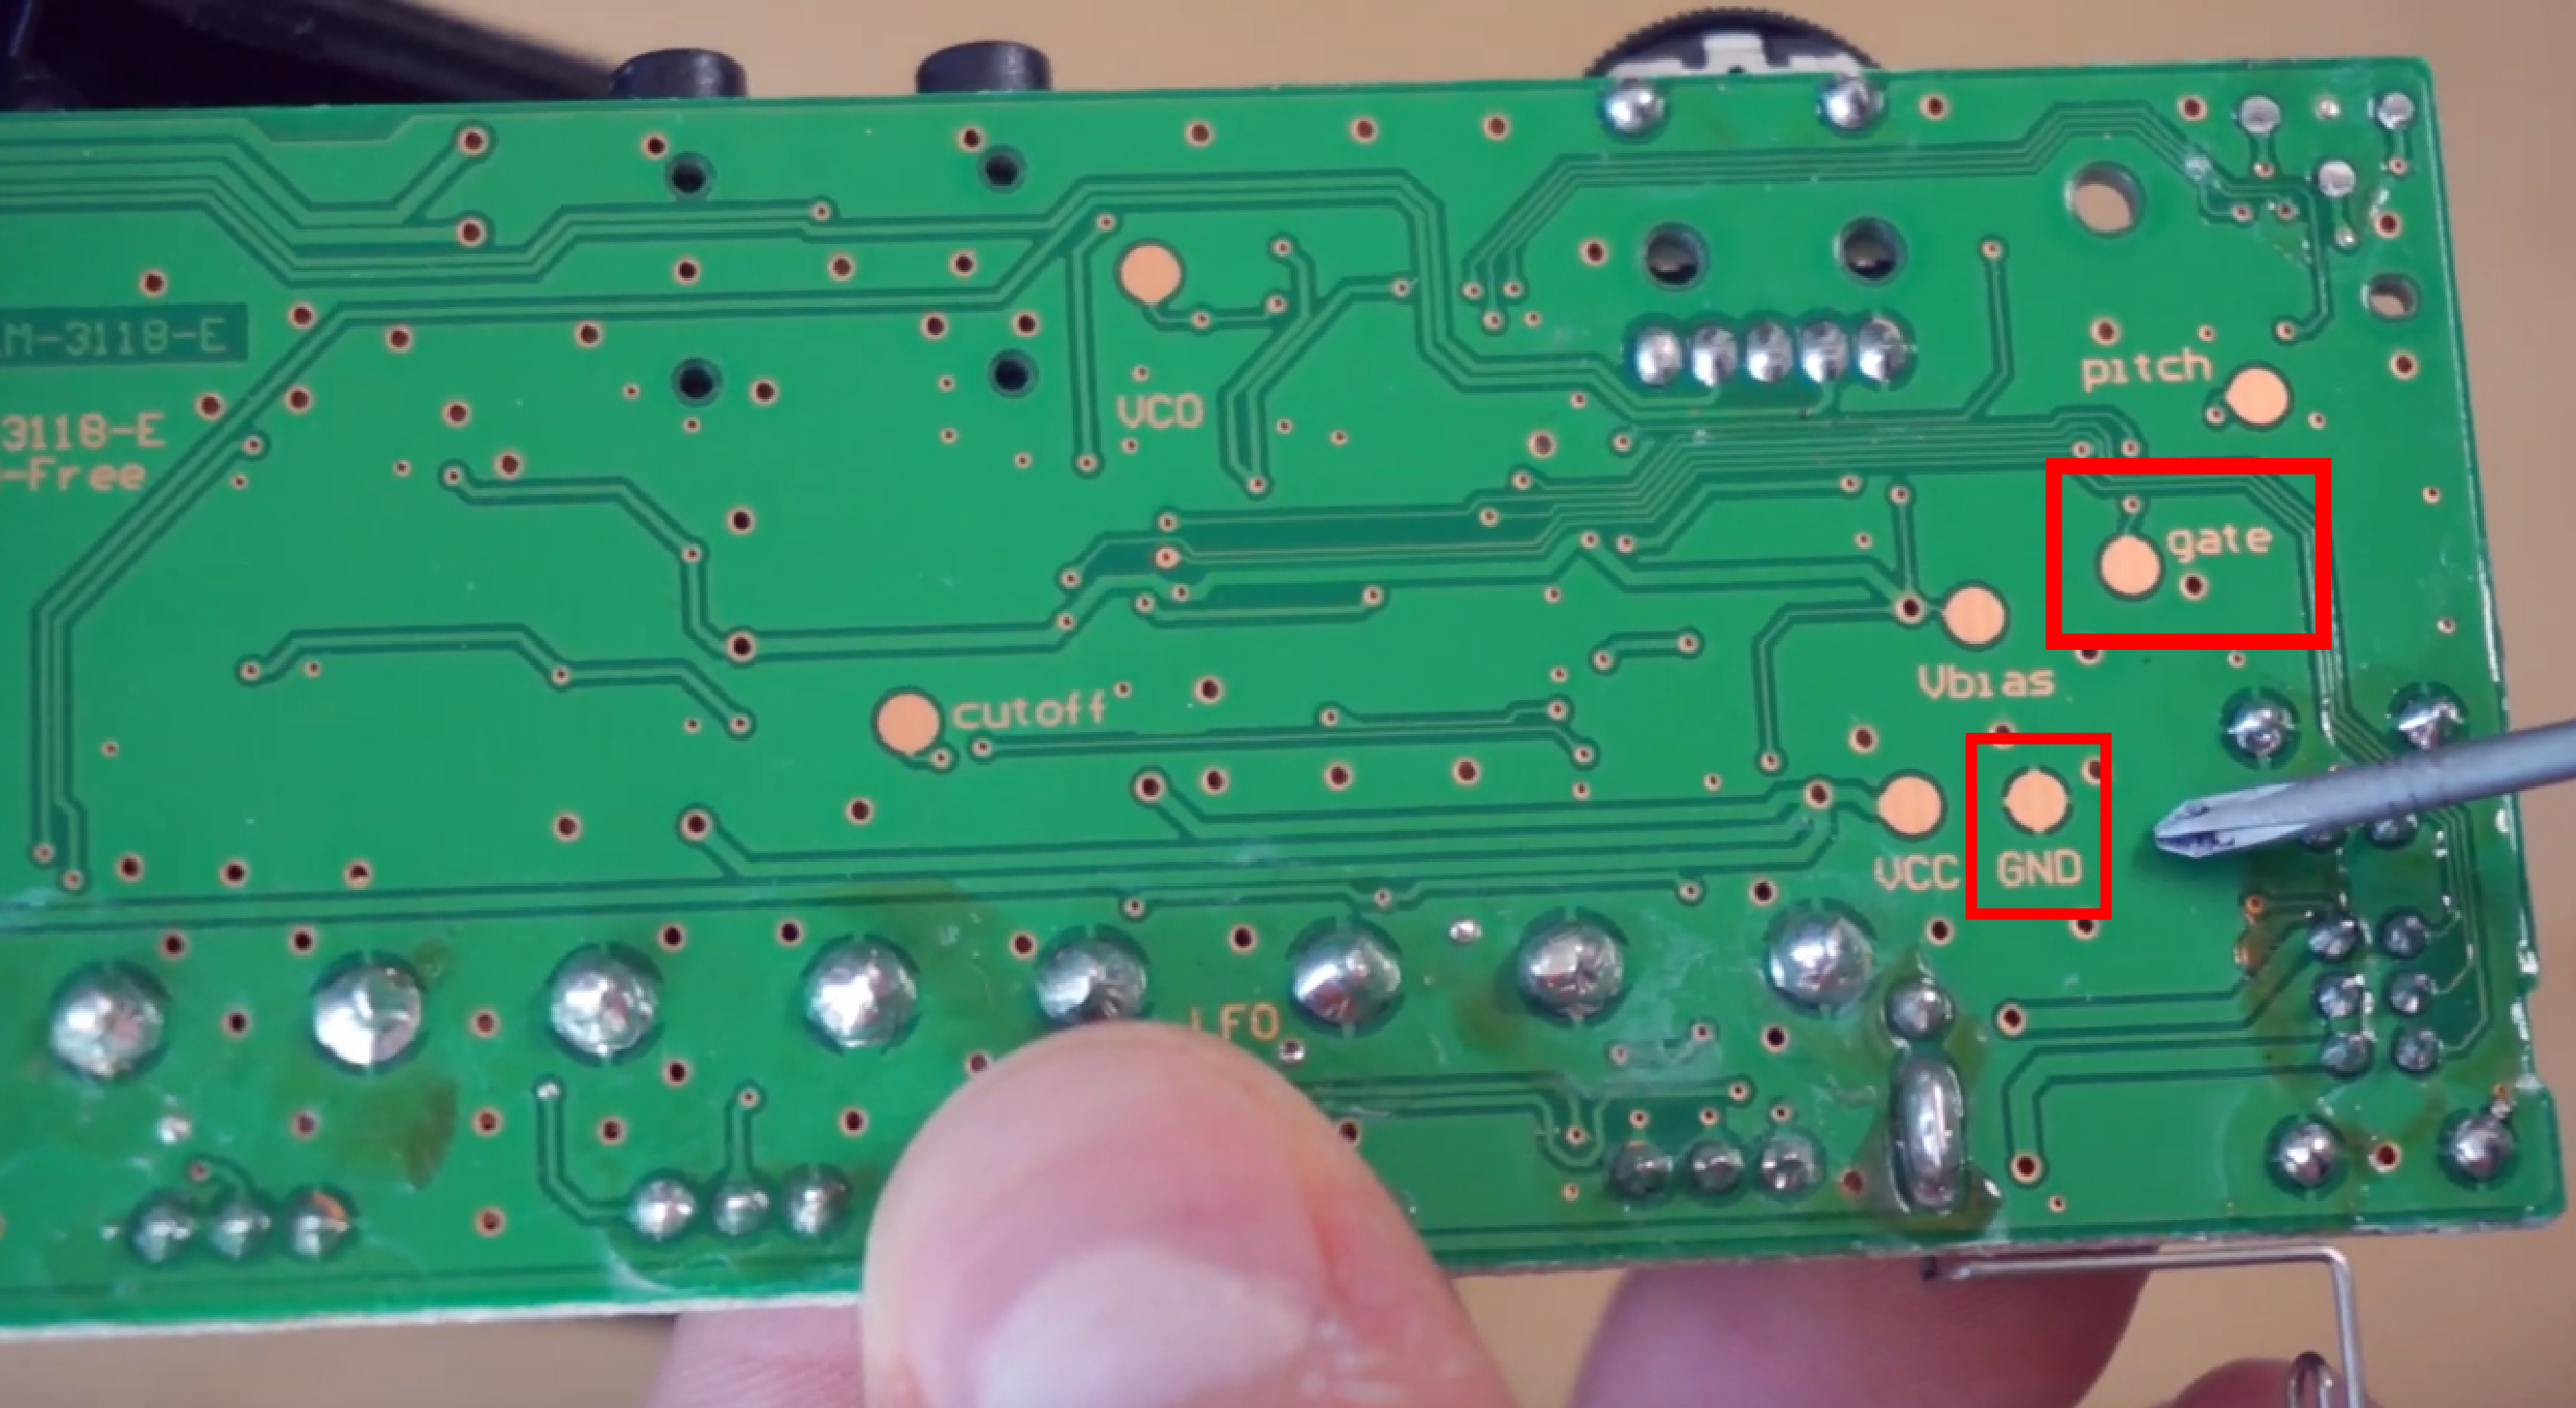
[schollz] isn’t satisfied to synth this way, so they added MIDI input to their KORG Monotron using a Raspberry Pi and a DAC. Fortunately, the Monotron is quite the hackable little synth, with nice, big, labelled pads on the PCB.

All it really took was a couple of solder joints in the right places, plus a clever Python script. The script listens for MIDI input from a keyboard, and then controls an MCP4725 DAC, which sends voltages to the Monotron. [schollz] wrote a tuning function that computes the FFT of the MIDI tones to find the fundamental frequencies of each to send along to the Monotron. Check it out after the break.

If liquid control is what you’re after but all you have is a keyboard, try making your own ribbon controller.

Via adafruit

source https://hackaday.com/2020/09/21/adding-midi-to-a-mini-synth-is-easy-as-pi/

Adding MIDI to a Mini Synth is Easy As Pi

There are a handful of relatively dirt cheap synths out there like the KORG Monotron, but many of them use ribbon controllers that aren’t very precise.  Ribbon controllers basically slide pots that you operate with your finger or a stylus.  They’re painted to look like piano keys in order to show you approximately where the notes are supposed to be. The Stylophone is another extremely affordable synth that does even less as a synthesizer and uses this type of input. It’s a fun input if you don’t mind imprecision, but can be annoying otherwise.

[schollz] isn’t satisfied to synth this way, so they added MIDI input to their KORG Monotron using a Raspberry Pi and a DAC. Fortunately, the Monotron is quite the hackable little synth, with nice, big, labelled pads on the PCB.

All it really took was a couple of solder joints in the right places, plus a clever Python script. The script listens for MIDI input from a keyboard, and then controls an MCP4725 DAC, which sends voltages to the Monotron. [schollz] wrote a tuning function that computes the FFT of the MIDI tones to find the fundamental frequencies of each to send along to the Monotron. Check it out after the break.

If liquid control is what you’re after but all you have is a keyboard, try making your own ribbon controller.

Via adafruit

source https://hackaday.com/2020/09/21/adding-midi-to-a-mini-synth-is-easy-as-pi/

Adding MIDI to a Mini Synth is Easy As Pi

There are a handful of relatively dirt cheap synths out there like the KORG Monotron, but many of them use ribbon controllers that aren’t very precise.  Ribbon controllers basically slide pots that you operate with your finger or a stylus.  They’re painted to look like piano keys in order to show you approximately where the notes are supposed to be. The Stylophone is another extremely affordable synth that does even less as a synthesizer and uses this type of input. It’s a fun input if you don’t mind imprecision, but can be annoying otherwise.

[schollz] isn’t satisfied to synth this way, so they added MIDI input to their KORG Monotron using a Raspberry Pi and a DAC. Fortunately, the Monotron is quite the hackable little synth, with nice, big, labelled pads on the PCB.

All it really took was a couple of solder joints in the right places, plus a clever Python script. The script listens for MIDI input from a keyboard, and then controls an MCP4725 DAC, which sends voltages to the Monotron. [schollz] wrote a tuning function that computes the FFT of the MIDI tones to find the fundamental frequencies of each to send along to the Monotron. Check it out after the break.

If liquid control is what you’re after but all you have is a keyboard, try making your own ribbon controller.

Via adafruit

source https://hackaday.com/2020/09/21/adding-midi-to-a-mini-synth-is-easy-as-pi/

A Motorcycle Dashboard Straight from the ECU

Classic motorcycles are the wild west of information displays. Often lacking even basic instrumentation such as a fuel gauge and sometimes even a speedometer, motorcycles have come a long way in instrument cluster design from even 20 years ago. There’s still some room for improvement, though, and luckily a lot of modern bikes have an ECU module that can be tapped into for some extra information as [mickwheelz] illustrates with his auxiliary motorcycle dashboard.

This display is built for a modern Honda enduro, and is based upon an ESP32 module. The ESP32 is tied directly into the ECU via a diagnostic socket, unlike other similar builds that interface with a CAN bus specifically. It can monitor all of the bike’s activity including engine temperature, throttle position, intake air temperature, and whether or not the bike is in neutral. [mickwheelz] also added an external GPS sensor so the new display can also show him GPS speed and location information within the same unit.

[mickwheelz] credits a few others for making headway into the Honda ECU. [Gonzo] created a similar build using a Raspberry Pi and more rudimentary screen but was instrumental in gathering the information for this build. If you’re looking for a display of any kind for your antique motorcycle which is lacking an ECU, though, we would suggest a speedometer made with nixie tubes.

source https://hackaday.com/2020/09/21/a-motorcycle-dashboard-straight-from-the-ecu/

Building a Cell Testing Station For 18650s

The 18650 is perhaps the world’s favorite lithium battery, even if electric car manufacturers are beginning to move towards larger cells such as the 21700. Used heavily in laptops and flashlights, it packs a useful amount of energy into a compact, easy to use package. There’s a small industry that has developed around harvesting these cells from old equipment and repurposing them, and [MakerMan] wanted to a piece of the action. Thus, he created a cell testing station to help in the effort.

Make no mistake, this is not a grandiose smart cell tester with 40 slots that logs every last iota of data into a cloud spreadsheet for further analysis. Nope, this is good old fashioned batch processing. [MakerMan] designed a single PCB that replicates the same cell testing circuit four times. Since PCB houses generally have a minimum order quantity of ten units, [MakerMan] ended up with forty individual cell testers on ten PCBs. Once populated, the boards were installed on a wooden frame with an ATX power supply which supplies the juice to run the system.

Overall, it’s a quick, cheap way for capacity testing cells en masse that should serve [MakerMan] well. We look forward to seeing where these cells end up. We’ve seen his work before, too – with a self-built laser engraver a particular highlight. Video after the break.

source https://hackaday.com/2020/09/21/building-a-cell-testing-station-for-18650s/

Circuit Board Origami Puts You Face-to-Face with Low-Poly Electronics

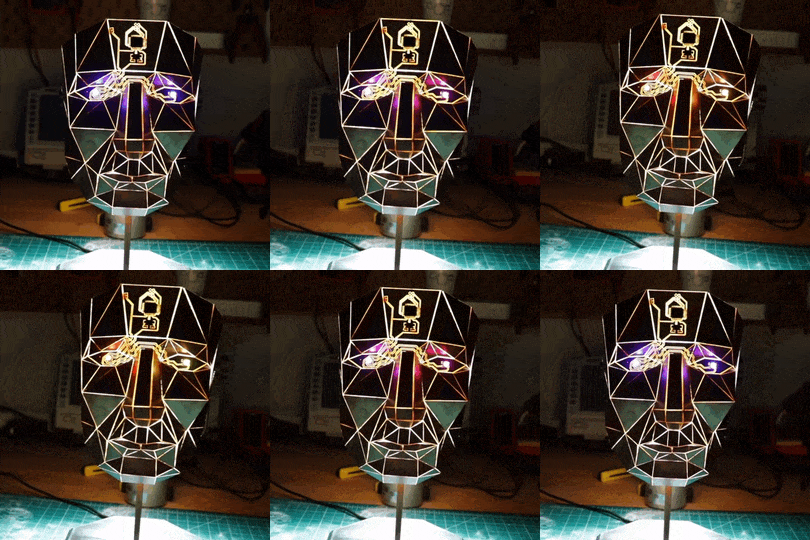
Paper craft has been around almost as long as paper itself. It’s fun to mimic paper craft and origami with low-poly 3D prints, and [Stephen Hawes] wondered whether it could be done with copper-clad PCBs. Two years after the question arose, we have the answer in the form of a fantastical mask with light-up eyes. Check it out in the video below.

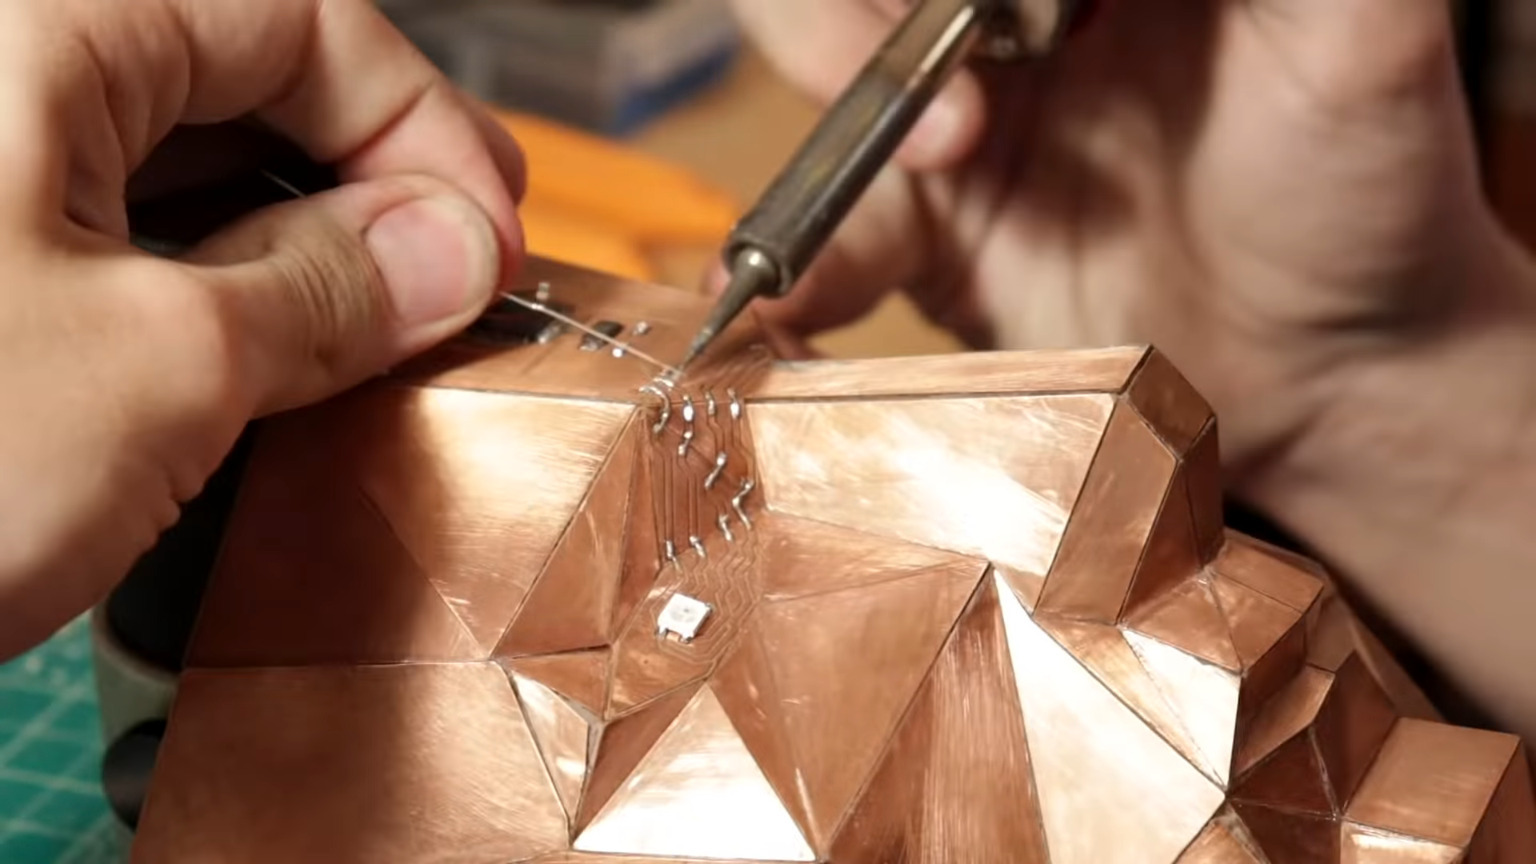
[Stephen] started with a model from the papercraft program Pepakura Designer, then milled out dozens of boards. Only a few of them support circuitry, but it was still quite the time-consuming process. The ATMega32u4 on the forehead along with the fold-traversing circuitry serve to light up the WS2812B eyes. Power runs up the copper tube, which doubles as a handy mounting rod to connect to the 3D-printed base.

To be fair, eighteen months out of the two years this project took was spent hand-sanding a chamfer on every edge of every panel so that they could be glued together. Soldering the edges together didn’t work as well as you might think, so [Stephen] used Superglue mixed with baking soda to give it body and make it dry faster. The result is a low-poly human face of shiny copper with TQFP-44 chip package a the all-seeing eye in the middle of its forehead like something from Tron come to life.

Just a reminder — we have a circuit sculpture contest running now until Tuesday, November 10, 2020 at 12:00 pm PST. We’d love to see what you can do, whether it’s in brass rod, copper clad, or a combination of the two. Take a look at the submissions we’ve received so far, and then show us what you’ve got.

Thanks to [Sophi] and [BaldPower] for the tip!

source https://hackaday.com/2020/09/21/circuit-board-origami-puts-you-face-to-face-with-low-poly-electronics/

Circuit Board Origami Puts You Face-to-Face with Low-Poly Electronics

Paper craft has been around almost as long as paper itself. It’s fun to mimic paper craft and origami with low-poly 3D prints, and [Stephen Hawes] wondered whether it could be done with copper-clad PCBs. Two years after the question arose, we have the answer in the form of a fantastical mask with light-up eyes. Check it out in the video below.

[Stephen] started with a model from the papercraft program Pepakura Designer, then milled out dozens of boards. Only a few of them support circuitry, but it was still quite the time-consuming process. The ATMega32u4 on the forehead along with the fold-traversing circuitry serve to light up the WS2812B eyes. Power runs up the copper tube, which doubles as a handy mounting rod to connect to the 3D-printed base.

To be fair, eighteen months out of the two years this project took was spent hand-sanding a chamfer on every edge of every panel so that they could be glued together. Soldering the edges together didn’t work as well as you might think, so [Stephen] used Superglue mixed with baking soda to give it body and make it dry faster. The result is a low-poly human face of shiny copper with TQFP-44 chip package a the all-seeing eye in the middle of its forehead like something from Tron come to life.

Just a reminder — we have a circuit sculpture contest running now until Tuesday, November 10, 2020 at 12:00 pm PST. We’d love to see what you can do, whether it’s in brass rod, copper clad, or a combination of the two. Take a look at the submissions we’ve received so far, and then show us what you’ve got.

Thanks to [Sophi] and [BaldPower] for the tip!

source https://hackaday.com/2020/09/21/circuit-board-origami-puts-you-face-to-face-with-low-poly-electronics/

Circuit Board Origami Puts You Face-to-Face with Low-Poly Electronics

Paper craft has been around almost as long as paper itself. It’s fun to mimic paper craft and origami with low-poly 3D prints, and [Stephen Hawes] wondered whether it could be done with copper-clad PCBs. Two years after the question arose, we have the answer in the form of a fantastical mask with light-up eyes. Check it out in the video below.

[Stephen] started with a model from the papercraft program Pepakura Designer, then milled out dozens of boards. Only a few of them support circuitry, but it was still quite the time-consuming process. The ATMega32u4 on the forehead along with the fold-traversing circuitry serve to light up the WS2812B eyes. Power runs up the copper tube, which doubles as a handy mounting rod to connect to the 3D-printed base.

To be fair, eighteen months out of the two years this project took was spent hand-sanding a chamfer on every edge of every panel so that they could be glued together. Soldering the edges together didn’t work as well as you might think, so [Stephen] used Superglue mixed with baking soda to give it body and make it dry faster. The result is a low-poly human face of shiny copper with TQFP-44 chip package a the all-seeing eye in the middle of its forehead like something from Tron come to life.

Just a reminder — we have a circuit sculpture contest running now until Tuesday, November 10, 2020 at 12:00 pm PST. We’d love to see what you can do, whether it’s in brass rod, copper clad, or a combination of the two. Take a look at the submissions we’ve received so far, and then show us what you’ve got.

Thanks to [Sophi] and [BaldPower] for the tip!

source https://hackaday.com/2020/09/21/circuit-board-origami-puts-you-face-to-face-with-low-poly-electronics/

Join the smart speaker revolution

Accessible, versatile, and stylish, a smart speaker makes a great addition to your home. Even if you’re not tech-savvy, they’re simple enough to operate. Use your smart home assistant to play songs, control household technology, and set reminders.

Upgrading to a new smart speaker? Need to sell your old one? Place a FREE advert on Junk Mail and sell your items quickly and easily.

Join the smart speaker revolution | Junk Mail
Photo Source – www.unsplash.com

What are smart speakers?

A smart speaker is a wireless
speaker that can be operated using voice commands and includes a virtual
assistant feature. There are also types of speakers that can be used as a smart
device, which provides you with a Wi-Fi and Bluetooth connection. These devices
can function to control other technology in your home. Some models also have a smart
display that features a touchscreen.

Benefits of using a smart speaker

  • Play your favourite songs

Get
access to millions of songs through streaming services and dance along to all
your favourite tunes.

  • Fill your house with music

With
multiple speakers, it’s easy to play the same music in different rooms of your
home. If you’re using one internet network and user account, it’s effortless to
play the same song without connecting the speakers by cables. However, you can
also play a different song on each speaker to cater to the varied music
preferences in your family.

  • Find new songs

Hear
a new song that you enjoy? It’s easy to find out everything you want to know
about the music you’re listening to. All you need to do is ask the smart speaker for more
information using a voice command.

  • Set reminders

Use
your smart speaker
to remind you of meetings and appointments. Your device can prompt you to do a
task or make a phone call at a specific time. You can even use it as an oven
timer to assist you when you’re cooking. You can also wake up to a relaxing
song every morning by using your smart speaker as an alarm.

  • Keep yourself entertained

Music
isn’t the only source of entertainment that your smart speaker offers. Playing voice-enabled games
is a fun activity that can stop you from becoming bored while you’re doing
household tasks. With a broad selection of games available, there is something
to suit everyone’s preferences.

  • Unwind and relax

Use
your smart speaker
to help you relax after a hard day’s work. The smart home assistant feature can improve your
mediation skills and offer you useful breathing exercises. The device can also
be used to remind you to take a break to meditate or relax.

  • Get organised

Get
organised and save time with help from your smart home assistant. Keeping up with a busy
lifestyle can be tough, but it’s easier to manage all your responsibilities
with this device.

Some of the smart speakers available in South Africa

1. Google

  • Google Home Assistant Smart Speaker
Google Home Assistant Smart Speaker | Junk Mail
Photo Source – store.google.com

This
voice-activated speaker features Google Assistant. You can get the answers to
all your questions with help from your device. Get updates on the weather,
traffic, and sports effortlessly. With a simple voice command, you can listen
to a playlist of your choice. This smart speaker weighs 477g and features a 2-inch driver and dual
in passive radiator speaker. Connections include a DC power jack and micro-USB
port.

  • Google Home Max Smart Speaker
Google Home Max Smart Speaker | Junk Mail
Photo Source – store.google.com

Get
the best sound quality with this awesome smart speaker. This top of the range speaker
eliminates unwanted resonance and delivers deep and balanced bass. The
dimensions of this charcoal device are 31.24cm, 18.8cm, and 15.24cm
respectively. Highlights of this speaker include two 4.5-inch high-excursion
dual voice-coil woofers and far-field voice recognition mics.

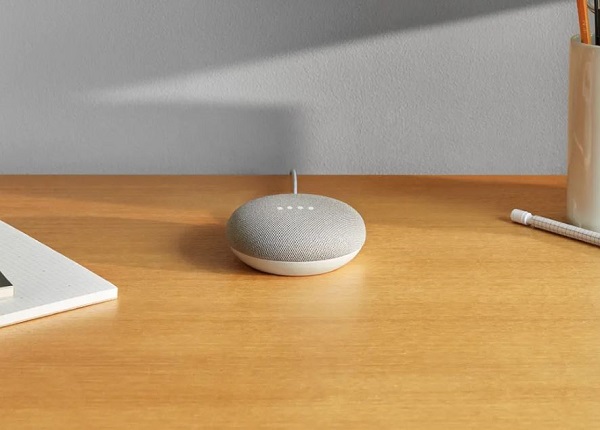
  • Google Home Mini Smart Speaker
Google Home Mini Smart Speaker | Junk Mail
Photo Source – store.google.com

Enjoy
your favourite entertainment and control your smart home technology with this
mini smart speaker.
The Google Assistant responds to voice commands so that you can find answers to
your questions effortlessly. Available in chalk, charcoal, and coral, this
device features Wi-Fi and Bluetooth support and has a diameter of 9.8cm and
height of 4.2cm.

2. Amazon

  • Amazon Echo 2nd Generation Smart Speaker
Amazon Echo 2nd Generation Smart Speaker | Junk Mail
Photo Source – amazon.com

Looking
for outstanding sound quality? The Echo offers you crisp vocals and dynamic
bass. Use Amazon Music to discover everything you want to know about your
favourite songs. Audiobooks are an excellent source of entertainment. The
dimensions of this heather grey device are 8.38cm, 8.38cm, and 23.62cm.

  • Amazon Echo Plus 2nd Generation Smart Speaker
Amazon Echo Plus 2nd Generation Smart Speaker | Junk Mail
Photo Source – amazon.com

Stylish
and innovative, the Echo Plus 2nd Generation makes an excellent
addition to your home. The LED ring is illuminated by a blue light when the
device is activated and when Alexa talks. The AUX port can be used to connect
the device to headphones or an additional speaker. This model weighs 780g and
features both Wi-Fi and Bluetooth connectivity.

  • Echo Show 2nd Generation Smart Display Speaker
Echo Show 2nd Generation Smart Display Speaker | Junk Mail
Photo Source – amazon.com

This smart speaker offers you
incredible sound and other impressive features. Its 10.1-inch screen and 5MP
camera set it apart from its competitors. It weighs 1 765g and features both Wi-Fi
and Bluetooth connectivity.

  • Amazon Echo Dot 3rd Generation Smart Speaker with Alexa
Amazon Echo Dot 3rd Generation Smart Speaker with Alexa | Junk Mail
Photo Source – amazon.com

With its upgraded speaker and refreshed design, the Echo Dot is a worthwhile investment. Use voice commands to access music, the news, and other useful information. Available in heather grey, charcoal, and sandstone, this device weighs 300g and its dimensions are 9.9cm, 9.9cm, and 4.3cm. It features both Wi-Fi and Bluetooth connectivity.

3. Apple

  • Apple Homepod Smart Speaker
Apple Homepod Smart Speaker | Junk Mail
Photo Source – apple.com

This
powerful smart speaker
offers you a smart home assistant to make managing the technology in your house
easier. It learns your music preferences so it can optimise your listening
experience. Available in black or white, it has a height of 17.27cm and width
of 14.22cm.

4. Sonos

  • Sonos One Smart Speaker
Sonos One Smart Speaker | Junk Mail
Photo Source – sonos.com

Control
your listening experience using your voice and connect wirelessly with
additional Sonos speakers to play the same music throughout your home.
Available in black or white, this device has a height of 16.15cm, width of 11.9cm,
and depth of 11.9cm. It features far-field voice recognition and the Amazon
Alexa voice assistant. The Sonos speaker has two Class-D digital amplifiers, a
mid-woofer, and a tweeter speaker.

  • Sonos Play 1 Smart Speaker
Sonos Play 1 Smart Speaker | Junk Mail
Photo Source – sonos.com

Enjoy
a rich sound quality with the Sonos Play 1. It features far-field voice
recognition and the Amazon Alexa voice assistant. This device is equipped with
two Class-D digital amplifiers as well as a mid-woofer and tweeter. Available
in black and white, it has a height of 16.15cm, width of 11.9cm, and depth of 11.9cm.

5. Bose

  • Bose Soundlink Micro Speaker
Bose Soundlink Micro Speaker | Junk Mail
Photo Source – bose.com

While this speaker is compact, it doesn’t compromise on power. With its waterproof design and silicone strap, it’s the perfect companion for your next adventure. This model has a height of 9.8cm, a width of 9.8cm, and depth of 3.47cm.


With so many benefits to owning a smart speaker, it’s easy to see why these devices are so popular. A smart home assistant adds convenience and fun to your daily routine. Find a smart speaker for sale on Junk Mail today.


Upcycled Dryer Motor Makes Budget Disk Sander

At the most basic level, most shop tools are just a motor with the right attachments. But the details are often far from simple. [DuctTapeMechanic] took a junker clothes dryer, yanked the electric motor from it, and converted it into a disk sander. The price was right at about $10. You can see it all after the break.

As you might imagine, having the motor is only half the battle. You also need a way to mount the thing securely and a way to affix the sanding disk. While this doesn’t pose the same challenges as, say, a drill press, it does take some thought. The motor in the donor dryer didn’t have threads on the shaft, so a bolt and some welding time took care of that. We suspect that’s tricky because you need the shaft and the bolt to be concentric and level.

Once you have a threaded shaft, the rest of the build is anti-climatic. A little carpentry and a little electrical. We would probably cover up the electrical connections a bit more. It seems like you’d want to know which way the motor spins so you could use a reverse thread, if necessary. From the video, we think the motor he has was spinning the right way, but we don’t know if that’s always true.

There’s something satisfying about building your own tools. If you work on smaller things, we’ve seen a miniature sander that might be handy to have around. If you want to go the other way, try finding an old floor polisher instead of a dryer.

source https://hackaday.com/2020/09/21/upcycled-dryer-motor-makes-budget-disk-sander/

Linux Fu: Simple SSH File Sharing

If you have more than one Linux computer, you probably use ssh all the time. It is a great tool, but I’ve always found one thing about it strange. Despite having file transfer capabilities in the form of scp and sftp, there is no way to move a file back or forth between the local and remote hosts without starting a new program on the local machine or logging in from the remote machine back to the local machine.

That last bit is a real problem since you often access a server from behind a firewall or a NAT router with an ephemeral IP address, so it can’t reconnect to you anyway. It would be nice to hit the escape character, select a local or remote file, and teleport it across the  interface, all from inside a single ssh session.

I didn’t quite get to that goal, but I did get pretty close. I’ll show you a script that can automatically mount a remote directory on the local machine. You’ll need sshfs on the local machine, but no changes on the remote machine where you may not be able to install software. With a little more work, and if your client has an ssh server running, you can mount a local directory on the remote machine, too. You won’t need to worry about your IP address or port blocking. If you can log into the remote machine, you are good.

Combined, this got me me very close to my goal. I can be working in a shell on either side and have access to read or write files on the other side. I just have to set it up carefully.

Wait… Is that Cheating?

You might say this is cheating because you are really using two ssh connections — one for the file system mount and another to log in. That’s true. However, if you have ssh set up properly, you’ll only authenticate once, and it won’t be as much overhead as two separate connections.

In addition, the script hides the details so from a user’s point of view, you connect (almost) the same as usual and it just works.

About SSHFS

The sshfs program is a user-space file system (FUSE), which means that it’s a user-space layer over the underlying file system. In this case, the underlying file system is an ssh server that can do sftp. This lets you access a file on the remote machine as if it were on the real filesystem on the local machine. If you haven’t used it, it works quite well.

If you have a login set up for a machine myserver, you simply run sshfs myserver:/home/admin ~/mounts/myserver from the local machine.

Now the /home/admin directory on the remote machine will appear at ~/mounts/myserver on the local machine.

There are some options you can use. For example, it is useful to allow the file system to reconnect a broken connection. Read the man page for more.

Because sshfs uses the remotely mounted version of the file, all changes made show up on the remote machine, but once you’ve shut sshfs down, you’ve got nothing on the local box. Let’s fix that.

Before The Script

Before I get into the script, there is a little setup on the client that you could customize if you like. I create a directory ~/remote and then create a subdirectory for each of my remote computers. For example ~/remote/fileserver and ~/remote/lab.

The script is called sshmount and it takes all the same arguments as ssh. To make life easier, you should have your details in the ~/.ssh/config file for the remote host so that you can use a simple name. For example, lab might be something like this:

Host lab
Hostname lab.wd5gnr-dyn.net
Port 444
User alw
ForwardX11 yes
ForwardX11Trusted yes
TCPKeepAlive yes
Compression yes
ControlMaster auto
ControlPath ~/.ssh/master-%r@%h:%p

Thiat isn’t strictly necessary, but then you get a nice ~/remote/lab directory and not ~/remote/alw@lab.wd5gnr-dyn.net:444 which is annoying to use. There’s nothing magic about any of these parameters but the ControlMaster and ControlPath do make multiple connections more economical which is important in this case.

You’ll also want to set up logging in automatically using a certificate if you haven’t already. We did a post on this for the Raspberry Pi, but it really applies to any ssh setup.

The Script

The script has a split personality. If you call it via a link to sshunmount it will unmount the directory associated with the named remote host. If you call it as anything else (usually sshmount), it will do three things:

  1. It checks for a directory under ~/remote that matches the remote host name (e.g., lab). If it fails to find it, it prints an error message and continues to execute ssh.
  2. If the directory exists, the script examines the list of mounted file systems to see if it is already mounted. If it is, the script just continues with ssh.
  3. If the directory is not mounted, the script calls sshfs and then proceeds with ssh.

You can find the script on GitHub, but here’s the gist of it (less some comments);


#!/bin/bash

if [ "$1" == "" ]
then
echo Usage: sshmount host [ssh_options] - Mount remote home folder on ~/remote/host and log in
echo or: sshunmount host - Remove mount from ~/remote/host
exit 1
fi

# if called as sshunmount...
if [ $(basename "$0") == sshunmount ]
then
echo Unmounting... 1>&2
fusermount -u "$HOME/remote/$1"
exit $?
fi

# normal call...
if [ -d "$HOME/remote/$1" ] # does directory exist?
then
if mount | grep "$HOME/remote/$1 " # already mounted?
then
echo Already mounted 1>&2
else
sshfs -o reconnect $1: $HOME/remote/$1 # mount
fi
else
echo No remote directory ~/remote/$1 exists 1>&2
fi
ssh $@ # do log in

This gives us half of what I wanted. My local machine has a direct mapping of the remote file system while I’m logged into the system. But getting the local directory mapped to the remote machine is a bit harder.

Reversing the Process

If you want to experiment with having a local directory mounted on the server, you can do that too if you have an ssh server running on the local machine. Of course, if your local machine is visible to the host and accessible, that’s trivial. Just run sshfs on the remote machine and mount a directory from the local machine. But in many cases, you won’t have an accessible route from the remote machine through whatever firewalls and routers you are behind, especially on something like a laptop that doesn’t stay in one place.

There is still an answer though. It requires two things. First, you need to add an extra argument when you call sshmount (you could edit the file if you wanted to always do this):


sshmount MyServer -R 5555:localhost:22

Then after you are on the host, run


sshfs -p 5555 localhost:/home/me ~/local

The -R option creates a socket on the remote machine at 5555 (which, obviously, needs to be otherwise unused) and maps it back to us on port 22. Assuming there is an ssh server on port 22, this will allow the server to log back into our local machine over the same connection. No need to know our IP address or have an open port.

The sshfs command, which you could put in your startup files, maps your local /home/me directory to the remote server’s ~/local directory. If you log in locally too, there are several SSH_ environment variables you could use to tell if you are starting up remotely, for example $SSH_CLIENT or $SSH_TTY.

Of course, you’ll need to change the hosts and directories and port numbers to suit your environment. But once set up, you can have folders on both machines visible to the other. No, I haven’t tried circularly mounting the same directories. That might create a black hole.

Be Careful Out There

You still should probably be careful going in both directions. Tools that scan the whole file system, for example, could easily get confused. I also wish I had a better answer to cleanly disconnect the server’s file share when you log out of the last session.

However, for now, the system works well and it is an easy way to share files from within an ssh session without much work. Another answer might be to just keep directories synchronized and use those directories for transfers. Want more stupid ssh tricks? We got ’em.

source https://hackaday.com/2020/09/21/linux-fu-simple-ssh-file-sharing/

Historical Satellite Tracker Saved From Scrap Heap

In a bit of rare Australian space news, the  Arnhemland Historical Society has managed to save one of the satellite trackers used during the 1960s and 1970s from the scrap heap. As the Space Race intensified during the 1950s and 1960s, every nation wanted a piece of this new technology. A number of European nations banded together in the form of ELDO, the European Launcher Development Organisation.

Australia was a partner in this program, with launches of the Europa-1 and Europa-2 rockets taking place from Woomera, South Australia. Initially the UK’s cancelled Blue Streak IRBM program provided the first stage for Europa-1, but this was later replaced with the French Diamant. France also provided the Coralie second stage in addition to the German-developed Astris third stage.

The satellite tracker being dismantled at the South Australian defence base before it was trucked north. (Photo: Arnhemland Historical Society)

The first launch of the Europa-1 took place in 1966, with the rocket performing well, but inaccurate readings from a radar station leading to the rocket to be wrongly instructed to self-destruct. Of nine launches, four were successful, with the satellite trackers at Arnhemland providing tracking support. Ultimately, the many technical setbacks led to the demise of ELDO, and it was merged by the 1970s into what is now the European Space Agency, with its main launch site in Kourou, French Guinana.

Despite the lack of success, these early days at Woomera were instrumental in getting Europe’s feet wet in the development of the Ariane rockets. Woomera’s rocketing days may also not be over yet, with NASA having announced  in 2019 plans to use Woomera for launches.

Maybe one day Arnhemland will have its own space port, with the old satellite track on display to remind of those early days.

[Top photo: The ELDO satellite trackers were state-of-the-art when they stood in Gove in the 1960s. (Supplied: Arnhemland Historical Society)]

(Thanks, David)

source https://hackaday.com/2020/09/21/historical-satellite-tracker-saved-from-scrap-heap/

Historical Satellite Tracker Saved From Scrap Heap

In a bit of rare Australian space news, the  Arnhemland Historical Society has managed to save one of the satellite trackers used during the 1960s and 1970s from the scrap heap. As the Space Race intensified during the 1950s and 1960s, every nation wanted a piece of this new technology. A number of European nations banded together in the form of ELDO, the European Launcher Development Organisation.

Australia was a partner in this program, with launches of the Europa-1 and Europa-2 rockets taking place from Woomera, South Australia. Initially the UK’s cancelled Blue Streak IRBM program provided the first stage for Europa-1, but this was later replaced with the French Diamant. France also provided the Coralie second stage in addition to the German-developed Astris third stage.

The satellite tracker being dismantled at the South Australian defence base before it was trucked north. (Photo: Arnhemland Historical Society)

The first launch of the Europa-1 took place in 1966, with the rocket performing well, but inaccurate readings from a radar station leading to the rocket to be wrongly instructed to self-destruct. Of nine launches, four were successful, with the satellite trackers at Arnhemland providing tracking support. Ultimately, the many technical setbacks led to the demise of ELDO, and it was merged by the 1970s into what is now the European Space Agency, with its main launch site in Kourou, French Guinana.

Despite the lack of success, these early days at Woomera were instrumental in getting Europe’s feet wet in the development of the Ariane rockets. Woomera’s rocketing days may also not be over yet, with NASA having announced  in 2019 plans to use Woomera for launches.

Maybe one day Arnhemland will have its own space port, with the old satellite track on display to remind of those early days.

[Top photo: The ELDO satellite trackers were state-of-the-art when they stood in Gove in the 1960s. (Supplied: Arnhemland Historical Society)]

(Thanks, David)

source https://hackaday.com/2020/09/21/historical-satellite-tracker-saved-from-scrap-heap/

Historical Satellite Tracker Saved From Scrap Heap

In a bit of rare Australian space news, the  Arnhemland Historical Society has managed to save one of the satellite trackers used during the 1960s and 1970s from the scrap heap. As the Space Race intensified during the 1950s and 1960s, every nation wanted a piece of this new technology. A number of European nations banded together in the form of ELDO, the European Launcher Development Organisation.

Australia was a partner in this program, with launches of the Europa-1 and Europa-2 rockets taking place from Woomera, South Australia. Initially the UK’s cancelled Blue Streak IRBM program provided the first stage for Europa-1, but this was later replaced with the French Diamant. France also provided the Coralie second stage in addition to the German-developed Astris third stage.

The satellite tracker being dismantled at the South Australian defence base before it was trucked north. (Photo: Arnhemland Historical Society)

The first launch of the Europa-1 took place in 1966, with the rocket performing well, but inaccurate readings from a radar station leading to the rocket to be wrongly instructed to self-destruct. Of nine launches, four were successful, with the satellite trackers at Arnhemland providing tracking support. Ultimately, the many technical setbacks led to the demise of ELDO, and it was merged by the 1970s into what is now the European Space Agency, with its main launch site in Kourou, French Guinana.

Despite the lack of success, these early days at Woomera were instrumental in getting Europe’s feet wet in the development of the Ariane rockets. Woomera’s rocketing days may also not be over yet, with NASA having announced  in 2019 plans to use Woomera for launches.

Maybe one day Arnhemland will have its own space port, with the old satellite track on display to remind of those early days.

[Top photo: The ELDO satellite trackers were state-of-the-art when they stood in Gove in the 1960s. (Supplied: Arnhemland Historical Society)]

(Thanks, David)

source https://hackaday.com/2020/09/21/historical-satellite-tracker-saved-from-scrap-heap/

What’s Inside An FPGA? Ken Shirriff Has (Again) The Answer

FPGAs are somewhat the IPv6 of integrated circuits — they’ve been around longer than you might think, they let you do awesome things that people are intrigued by initially, but they’ve never really broke out of their niches until rather recently. There’s still a bit of a myth and mystery surrounding them, and as with any technology that has grown vastly in complexity over the years, it’s sometimes best to go back to its very beginning in order to understand it. Well, who’d be better at taking an extra close look at a chip than [Ken Shirriff], so in his latest endeavor, he reverse engineered the very first FPGA known to the world: the Xilinx XC2064.

If you ever wished for a breadboard-friendly FPGA, the XC2064 can scratch that itch, although with its modest 64 configurable logic blocks, there isn’t all that much else it can do — certainly not compared to even the smallest and cheapest of its modern successors. And that’s the beauty of this chip as a reverse engineering target, there’s nothing else than the core essence of an FPGA. After introducing the general concepts of FPGAs, [Ken] (who isn’t known to be too shy to decap a chip in order to look inside) continued in known manner with die pictures in order to map the internal components’ schematics to the actual silicon and to make sense of it all. His ultimate goal: to fully understand and dissect the XC2064’s bitstream.

Of course, reverse engineering FPGA bitstreams isn’t new, and with little doubt, building a toolchain based on its results helped to put Lattice on the map in the maker community (which they didn’t seem to value at first, but still soon enough). We probably won’t see the same happening for Xilinx, but who knows what [Ken]’s up to next, and what others will make of this.

source https://hackaday.com/2020/09/21/whats-inside-an-fpga-ken-shirriff-has-again-the-answer/

Custom Strain Gauges Help Keep Paraglider Aloft

No matter what they’re flying, good pilots have a “feel” for their aircraft. They know instantly when something is wrong, whether by hearing a strange sound or a feeling a telltale vibration. Developing this sixth sense is sometimes critical to the goal of keeping the number of takeoff equal to the number of landings.

The same thing goes for non-traditional aircraft, like paragliders, where the penalty for failure is just as high. Staying out of trouble aloft is the idea behind this paraglider line tension monitor designed by pilot [Andre Bandarra]. Paragliders, along with their powered cousins paramotors, look somewhat like parachutes but are actually best described as an inflatable wing. The wing maintains its shape by being pressurized by air coming through openings in the leading edge. If the pilot doesn’t maintain the correct angle of attack, the wing can depressurize and collapse, with sometimes dire results.

Luckily, most pilots eventually develop a feel for collapse, sensed through changes in the tension of the lines connecting the wing to his or her harness. [Andre]’s “Tensy” — with the obligatory “McTenseface” surname — that’s featured in the video below uses an array of strain gauges to watch to the telltale release of tension in the lines for the leading edge of the wing, sounding an audible alarm. As a bonus, Tensy captures line tension data from across the wing, which can be used to monitor the performance of both the aircraft and the pilot.

There are a lot of great design elements here, but for our money, we found the lightweight homebrew strain gauges to be the real gem of this design. This isn’t the first time [Andre] has flown onto these pages, either — his giant RC paraglider was a big hit back in January.

Thanks to [mip] for the tip.

source https://hackaday.com/2020/09/20/custom-strain-gauges-help-keep-paraglider-aloft/

1/3 Scale Hybrid RC Car With A Scratch-Built 125cc V10 Engine

Scale model engines are fascinating pieces of engineering, and RC cars are always awesome to play with, no matter your age. [Keith57000] has gone over the top on both, creating a seriously impressive hybrid RC car built around a custom 125 cc V10 engine.

[Keith57000] started building the V10 engine back in 2013, after completing a 1/4 scale V8. The build is documented in a forum thread with lots of pictures of his beautiful craftsmanship. Most of the mechanical components were machined on a manual lathe and milling machine. No CNC, just lots of drawings and measurements, clever use of dividing heads, and careful dial reading. The engine also features electronic fuel injection with a MegaSquirt controller.

The rest of the car is just as impressive as the power plant. The chassis is bent tube, with machined brackets and carbon fiber suspension components. Two electric skateboard motors are added to give it a bit more power. The three speed gearbox is also custom, built with gears scavenged from a pit bike and angle grinder. It uses two small pneumatic pistons to do the shifting, with a clever servo mechanism that mechanically switches the solenoid valves. Check out all fourteen build videos on his channel for more details.

An amateur project of this complexity is never without speed bumps, which [Keith57000] details in the videos and build thread. It has taken seven years so far, but it is without a doubt the most impressive RC car we’ve seen. His skill with manual machine tools is something we rarely get to see in the age of CNC. We’re looking forward to the finished product, hopefully screaming around a track with a FPV cockpit.

source https://hackaday.com/2020/09/20/1-3-scale-hybrid-rc-car-with-a-scratch-built-125cc-v10-engine/

Hackaday Links: September 20, 2020

The announcement of Autodesk’s changes to the Fusion 360 personal use license terms this week caused quite a dustup. Our article on the announcement garnered a lot of discussion and not a few heated comments. At the end of the day, though, Autodesk is going to do what it’s going to do, and the Fusion 360 user community is just going to have to figure out how to deal with the changes. One person who decided to do something other than complain is Justin Nesselrotte, who came up with a quick and easy bulk export tool for Fusion 360. This gets to the heart of the issue since the removal of export to STEP, IGES, and SAT files is perhaps the most painful change for our community. Justin’s script automatically opens every design and exports it to the file type of your choice. Since the license changes go into effect on October 1, you’d better get cracking if you want to export your designs.

Over on Twitter, Hackaday superfriend Timon gives us a valuable lesson in “you get what you pay for.” He found that a bunch of his header pin jumper cables weren’t even remotely assembled properly. The conductors of the jumper wire were only loosely inserted into the terminal’s crimp, where apparently no crimping pressure had been applied. The wires were just rattling around inside the crimp, rather than making sold contact. We’ve covered the art and science of crimping before, and it’s pretty safe to say that these jumpers are garbage. So if you’re seeing weird results with a circuit, you might want to take a good, close look at your jumpers. And as always, caveat emptor.

The GNU Radio Conference wrapped up this week, in virtual format as so many other conferences have been this year, and it generated a load of interesting talks. They’ve got each day’s proceedings over on their YouTube channel, so the videos are pretty long; luckily, each day’s stream is indexed on the playbar, so along with the full schedule you can quickly find the talks you’re interested in. One that caught our eye was a talk on the Radio Resilience Competition, a hardware challenge where participants compete head-to-head using SDRs to get signals through in an adversarial environment. It sounds like a fascinating challenge for the RF inclined. More details about registering for the competition can be had on the Radio Resilience website.

You know those recipe sites that give you a few choices on what to make for dinner based on the ingredients you have on hand? We always thought that was a clever idea, and now something like it has come to our world. It’s called DIY Hub, and it aims to guide makers toward projects they can build based on the parts they have on hand. Users create projects on the site, either hosting the project directly on the site or providing a link to projects on another site. Either way, the project’s BOM is cataloged so that users can find something to build based on parts stored in their “Garage”. Granted, most of us suffer from the exact opposite problem of not knowing what to build next, but this could be an interesting tool for stimulating the creative process, especially for teachers and parents. It’s currently in beta, and we’d love to see a few Hackaday.io projects added to the site.

And finally, we got a tip to an oldie but a goodie: How to Build a Castle. No, we don’t expect to see a rash of 13th-century castle builds gracing our pages anytime soon — although we certainly wouldn’t be opposed to the idea. Rather, this is a little something for your binge-watching pleasure. The BBC series, which was actually called Secrets of the Castle, was a five-part 2014 offering that went into great detail on the construction of Guédelon Castle, an experimental archaeology project in France that seeks to build a castle using only the materials and methods available in the 1200s. The series is hosted by historian Ruth Goodman and archaeologists Peter Ginn and Tom Pinfold, and it’s great fun for anyone interested in history and technology.

source https://hackaday.com/2020/09/20/hackaday-links-september-20-2020/

ESP8266 Turned Secretive WiFi Probe Request Sniffer

When a Wi-Fi device is switched on, it starts spewing out probe requests to try and find a familiar access point. These probe requests contain the device’s MAC address and the SSID of the hotspot it’s looking for, which can potentially be used to identify a specific device and where it’s been. After experimenting with these probe requests, [Amine Mehdi Mansouri] has created OpenMAC, a tiny ESP8266 based sniffer that could be hidden anywhere.

The device consists of an ESP-07S module, a regulator circuit for getting power from a USB-C connector, and a button for power cycling. An external antenna is required for the module, which can be selected based on the size or gain requirements for a specific deployment. [Amine] tested the OpenMAC at a local library (with permission), in combination with a number of his own little Wi-Fi repeaters to expand the reach of the network. All the recorded MAC addresses were logged to a server, where the data can be used for traffic analysis in and around the library, or even for tracking and locating specific devices.

This is nothing new, and is relatively common technique used for gathering information in retail locations, and could be also be used for more nefarious purposes. Newer versions of iOS, Android, and Windows 10 feature MAC address randomization which can limit the ability to track devices in this manner, but it isn’t always activated.

We’ve seen a number of projects that exploit probe requests. FIND-LF can be used for locating devices in your home, and Linger fools probe requests sniffers by replaying previously recorded requests.

source https://hackaday.com/2020/09/20/esp8266-turned-secretive-wifi-probe-request-sniffer/

TI and Cadence Make PSpice Free

We like simulation software. Texas Instruments long offered TINA, but recently they’ve joined with Cadence to make OrCAD PSpice available for free with some restrictions. You’ve probably heard of PSpice — it’s widely used in academia and industry, but is usually quite costly. You can see a promotional overview video below.

The program requires registration and an approval step to get a license key. The downloaded program has TI models along with other standard models. There seem to be few limits as long as you stick to the supplied library. According to the datasheet, there are no size or simulation complexity limitations in that case. If you want to use other models, you can, but that’s where the limitations hit you:

There is no limitation of how many 3rd party models can be imported into the design. However, if 3rd party models are imported, a user will be able to plot a maximum of 3 signals at a time of their choice when any 3rd party model is imported from web.

We aren’t completely sure what “from web” means there, but presumably they just mean from other sources. In any event, you still get AC, DC, and transient analysis with plenty of options like worst-case timing analysis. Mixed signal designs are supported and there is a wealth of data plotting options, as you would expect.

This is a great opportunity to drive some serious software that is widely used in the industry. The only thing that bummed us out? It runs under Windows. We couldn’t get it to work under Wine, but a Windows 10 VM handled it fine, although we really hate running a VM if we don’t have to.

Still, the price is right and it is a great piece of software. We also liked the recent Micro-Cap 12 release, but we don’t expect any updates for that. Of course, LTSpice is quite capable, too.

source https://hackaday.com/2020/09/20/ti-and-cadence-make-pspice-free/